Week 7
electronic output devices
Assignment Prompt
-
Write a microcontroller program that integrates at least one input device and one output device, using an output device you haven't used before. Use an oscilloscope to discover the time domain at which your output device is operating. Is it on a fixed clock? What's its speed? Share images and describe your findings.
-
Prepare CAD files for CNC (next class). Consider either 2D DXF files for routing sheet material (like plywood or OSB), or 3D STL files to mill out a (2.5D) shape. We will also cover molding & casting, so you may want to consider milling a mold.
Process
-
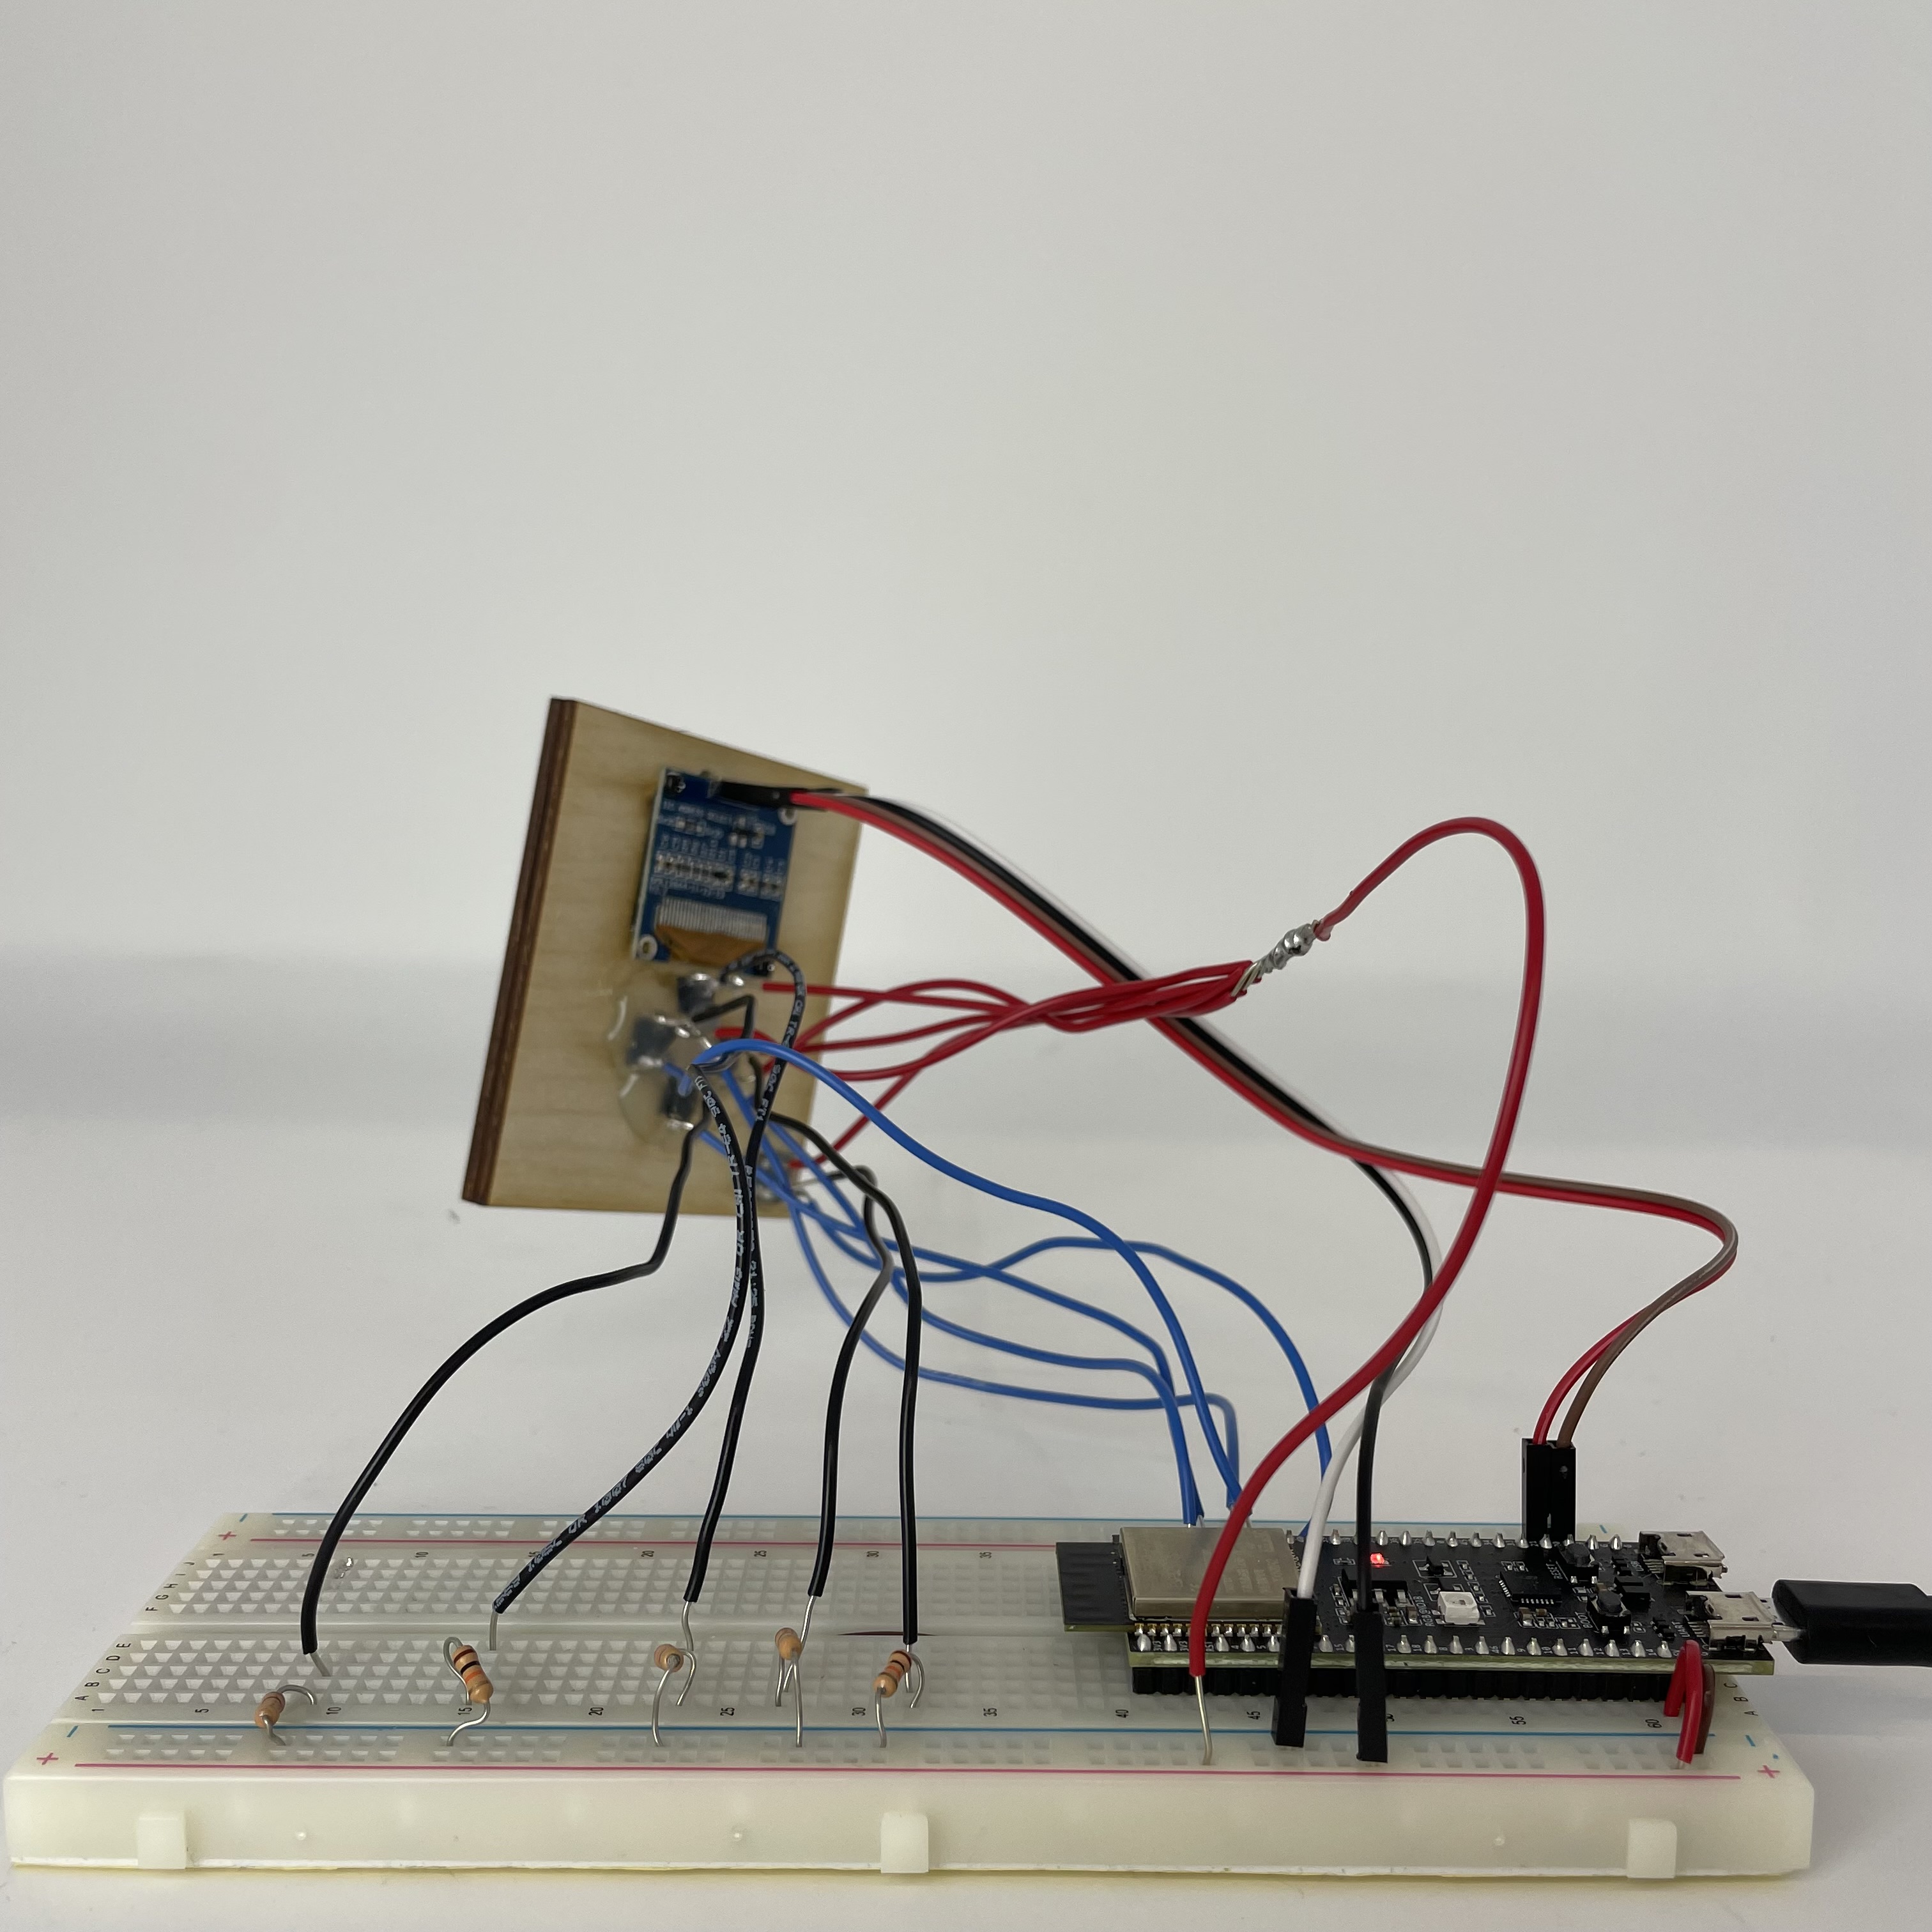
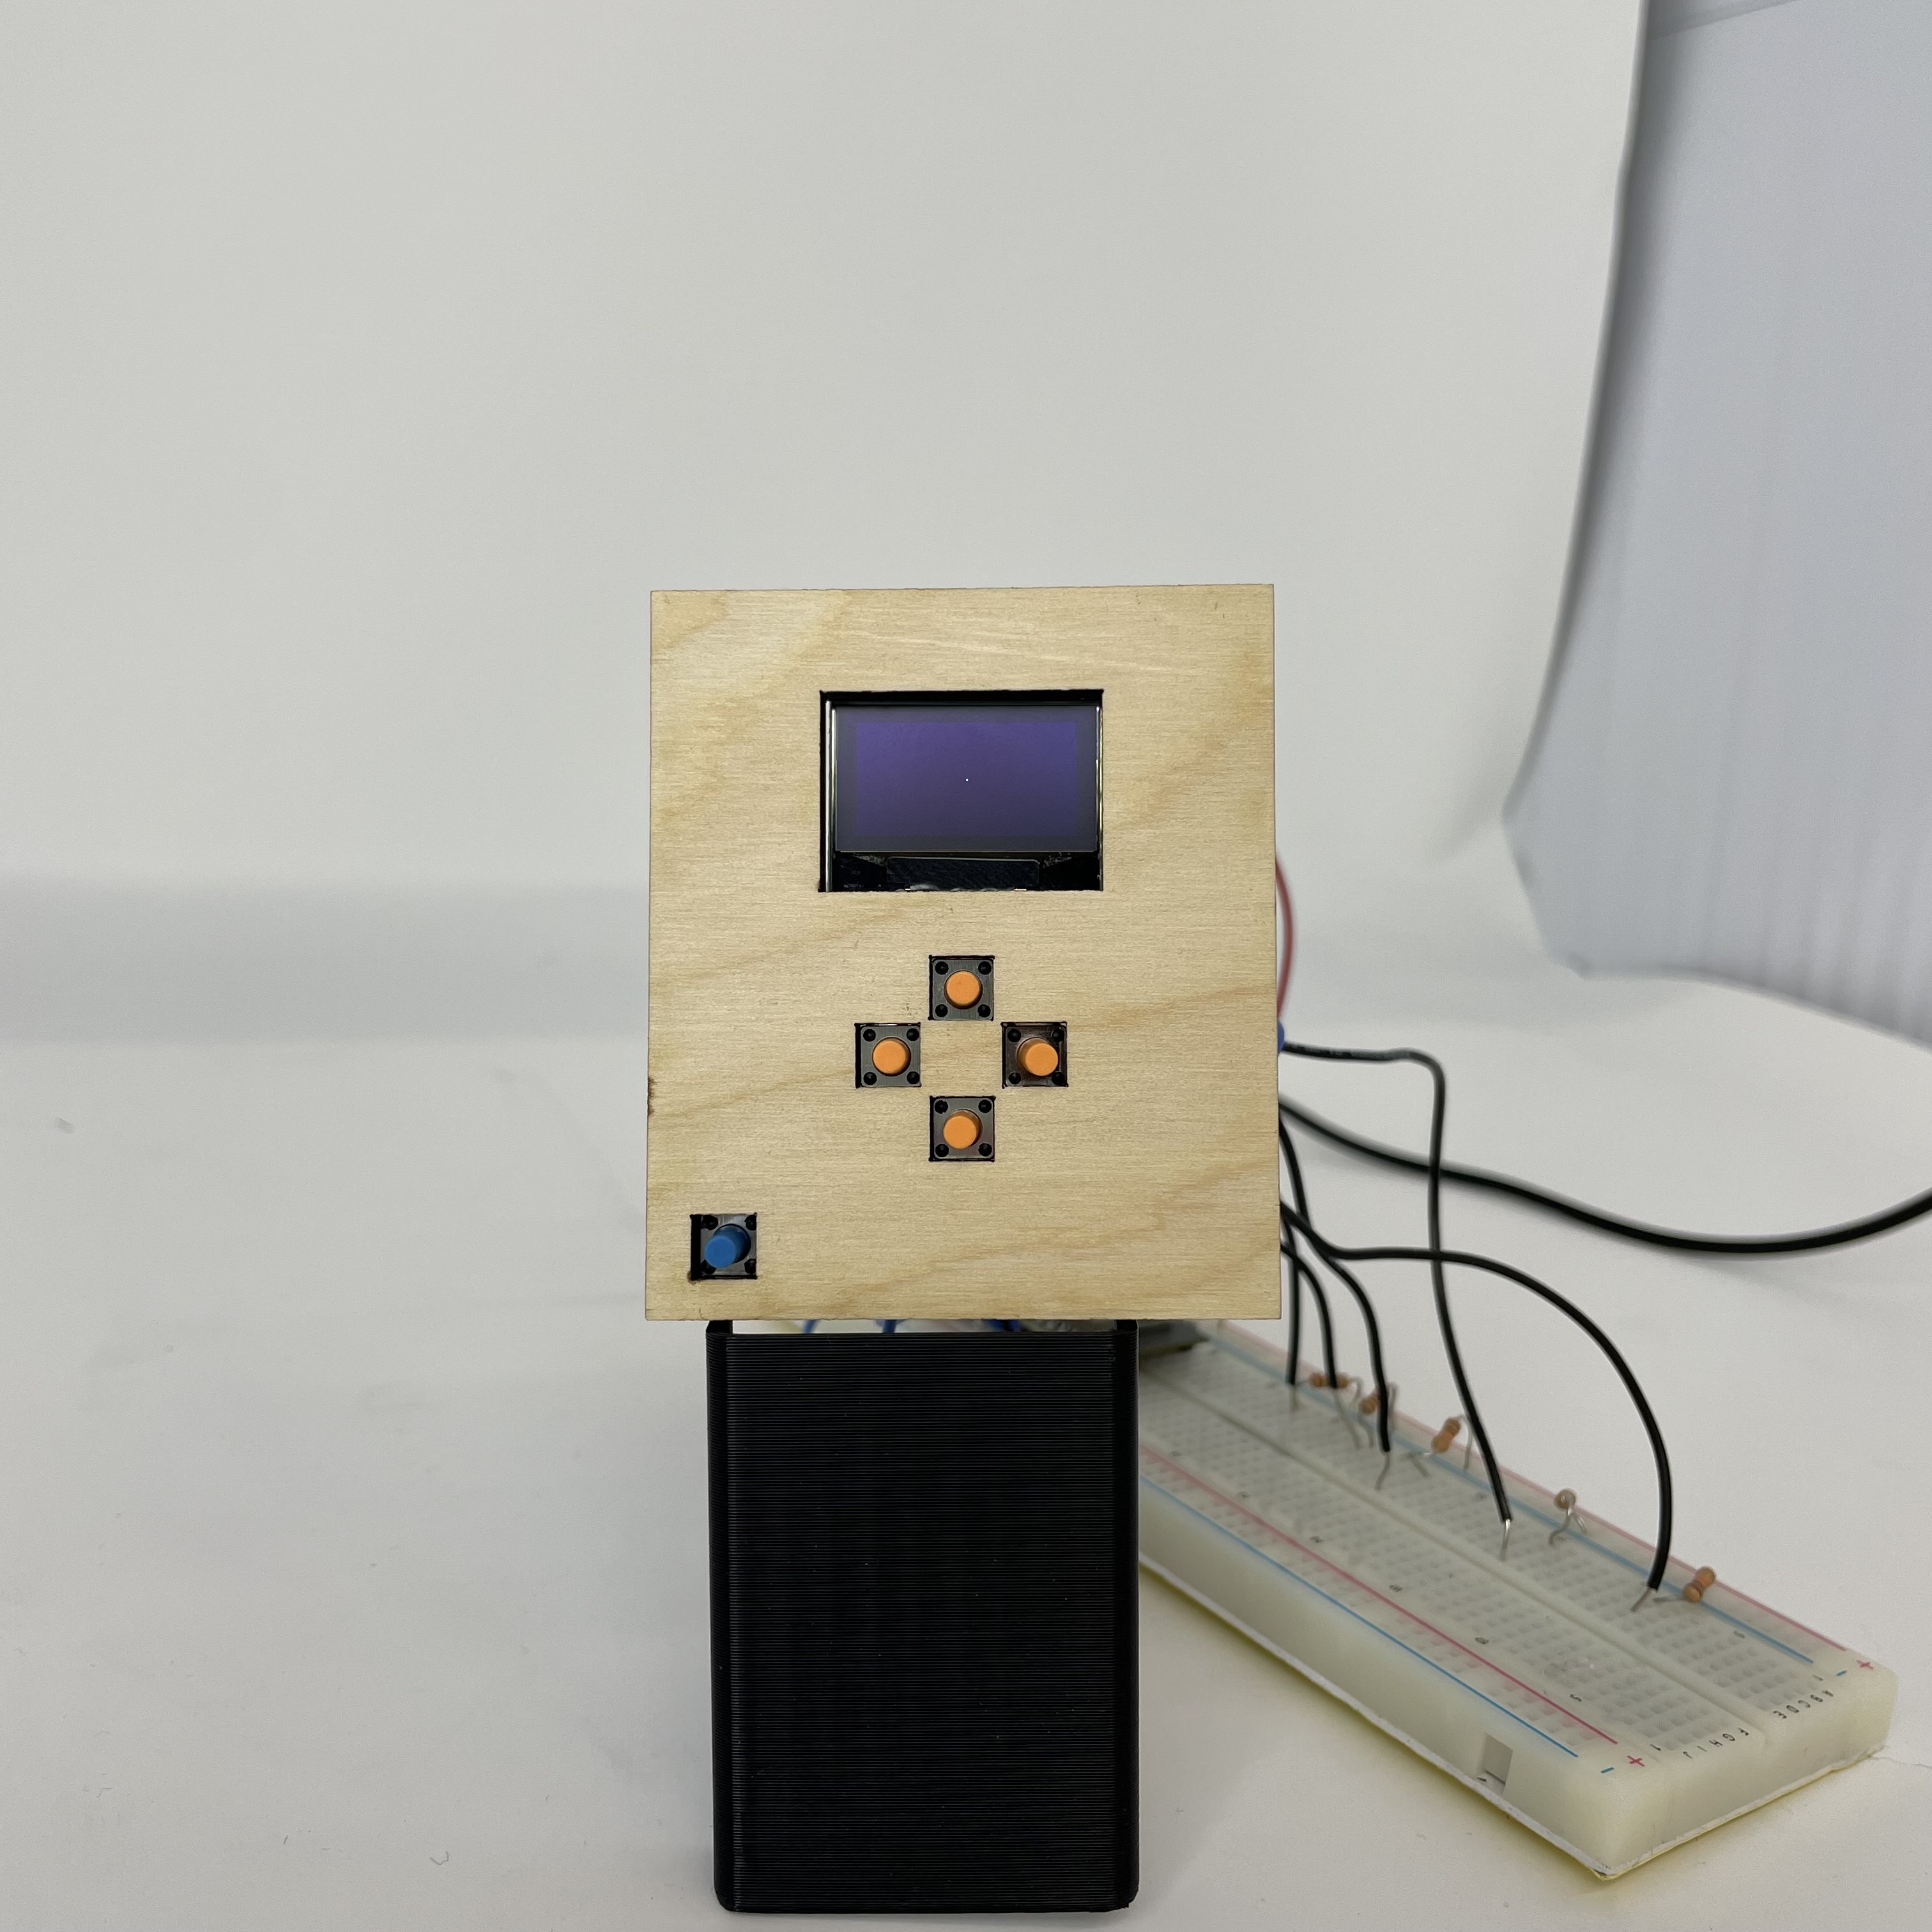
For this assignment, I decided to do something simple and fun: a digital Etch-a-Sketch! I used an OLED screen, 5 buttons, and a laser cut body for the Etch-a-Sketch. Rather than using dials (or potentiometers) for movement, I decided to use buttons to make it easier to control.
The code is also relatively straightforward. You begin by drawing a pixel in the center of the screen, and, upon each click of a button, add or subtract one pixel from the current coordinates. For example, if your starting pixel is (x,y), pressing the right button draws a pixel at (x+1, y). The code for this is below:// Libraries #include <SPI.h> #include <Wire.h> #include <Adafruit_GFX.h> #include <Adafruit_SSD1306.h> // Constants #define SCREEN_WIDTH 128 #define SCREEN_HEIGHT 64 #define I2C_SDA 20 #define I2C_SCL 19 #define OLED_RESET -1 #define SCREEN_ADDRESS 0x3C const int RIGHT_PIN = 41; const int UP_PIN = 42; const int DOWN_PIN = 2; const int LEFT_PIN = 1; const int RESET_PIN = 40; int pos_X = 64; int pos_Y = 32; int UP_STATE = 0; int DOWN_STATE = 0; int RIGHT_STATE = 0; int LEFT_STATE = 0; int RESET_STATE = 0; // Init hardware TwoWire I2C_screen = TwoWire(0); Adafruit_SSD1306 display(SCREEN_WIDTH, SCREEN_HEIGHT, &I2C_screen, OLED_RESET); void setup() { Serial.begin(115200); I2C_screen.begin(I2C_SDA, I2C_SCL, 100000); if (!display.begin(SSD1306_SWITCHCAPVCC, SCREEN_ADDRESS)) { Serial.println(F("SSD1306 allocation failed")); for (;;) ; } pinMode(RIGHT_PIN, INPUT); pinMode(LEFT_PIN, INPUT); pinMode(UP_PIN, INPUT); pinMode(DOWN_PIN, INPUT); pinMode(RESET_PIN, INPUT); display.display(); delay(500); display.clearDisplay(); // Draw pixel at initial position, center of screen display.drawPixel(pos_X, pos_Y, SSD1306_WHITE); display.display(); } void loop() { // read current button states UP_STATE = digitalRead(UP_PIN); DOWN_STATE = digitalRead(DOWN_PIN); RIGHT_STATE = digitalRead(RIGHT_PIN); LEFT_STATE = digitalRead(LEFT_PIN); RESET_STATE = digitalRead(RESET_PIN); // move up one pixel if (UP_STATE == HIGH) { pos_Y -= 1; Serial.println(F("UP")); } // move down one pixel if (DOWN_STATE == HIGH) { pos_Y += 1; Serial.println(F("DOWN")); } // move right one pixel if (RIGHT_STATE == HIGH) { pos_X += 1; Serial.println(F("RIGHT")); } // move left one pixel if (LEFT_STATE == HIGH) { pos_X -= 1; Serial.println(F("LEFT")); } // clear the screen and set the pixel position back to the center if (RESET_STATE == HIGH) { pos_X = 64; pos_Y = 32; Serial.println(F("RESET")); display.clearDisplay(); } // go to left side of screen if overcome right side if (pos_X > 128) { pos_X = 0; } // go to right side of screen if overcome left side if (pos_X < 0) { pos_X = 128; } // go to bottom of screen if overcome top if (pos_Y < 0) { pos_Y = 64; } // go to top of screen if overcome bottom if (pos_Y > 64) { pos_Y = 0; } // draw the new pixel and display display.drawPixel(pos_X, pos_Y, SSD1306_WHITE); display.display(); }
Unfortunately, the oscilloscope did not go as well. When I went to OH, no one (including the TF) knew how to use it, so I (along with many classmates) was unable to get the readings on this. -
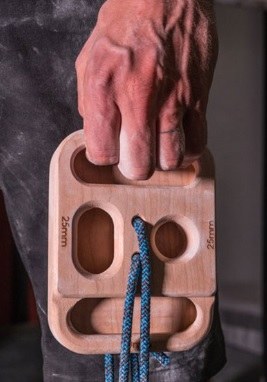
For the milling/CNC week, I want to start making the hangboard body. Because a full hangboard is very long, I instead am opting to make a one-handed hangboard, pictured below. These guys are smaller, less costly, and definitely easier to mill, mold, cast, or whatever else you want to do with it.
Photos
-
Below are some photos of the final product along with a short demo. In the demo, I actually accidentally went out of bounds of the screen, but you get the idea. I corrected for this in my code by having the drawing loop around once it overcomes the boundaries of the screen.
-
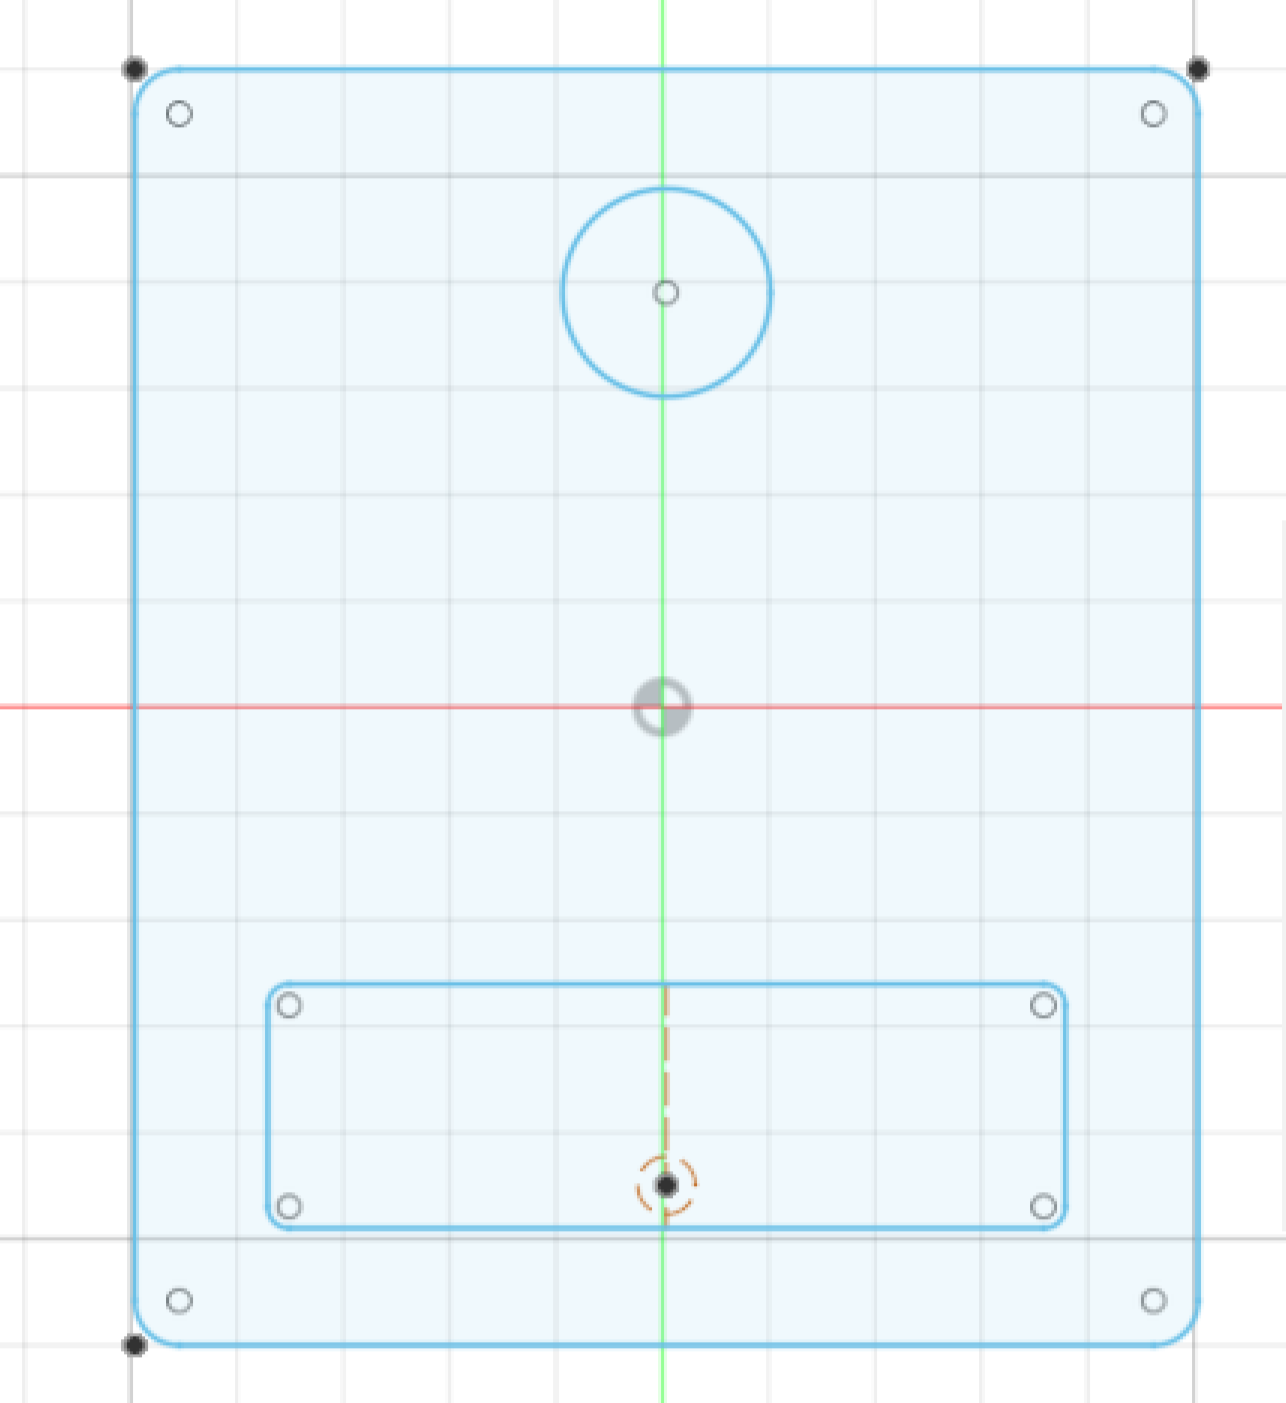
So below is a quick photo of the 2D model for the hangboard I had, and then a photo of what I was going for. I am considering adding a second pocket at the top for pinching strength, but I would have to talk to Nathan first and see how the sensors and stuff would work for that.
-
Files
-
Click the links below to download.