Week 4
microcontroller programming
Assignment Prompt
Program an Arduino board to do something. The examples in the Arduino Projects Book provide good starting points. You may also wish to use this assignment to build on the previous assignment.
Introduction
Since the last assignment (kinetic sculptures) didn't quite lend itself to my final project, I decided to work on something that would benefit me in the long run this week: a digital scale.
Soldering
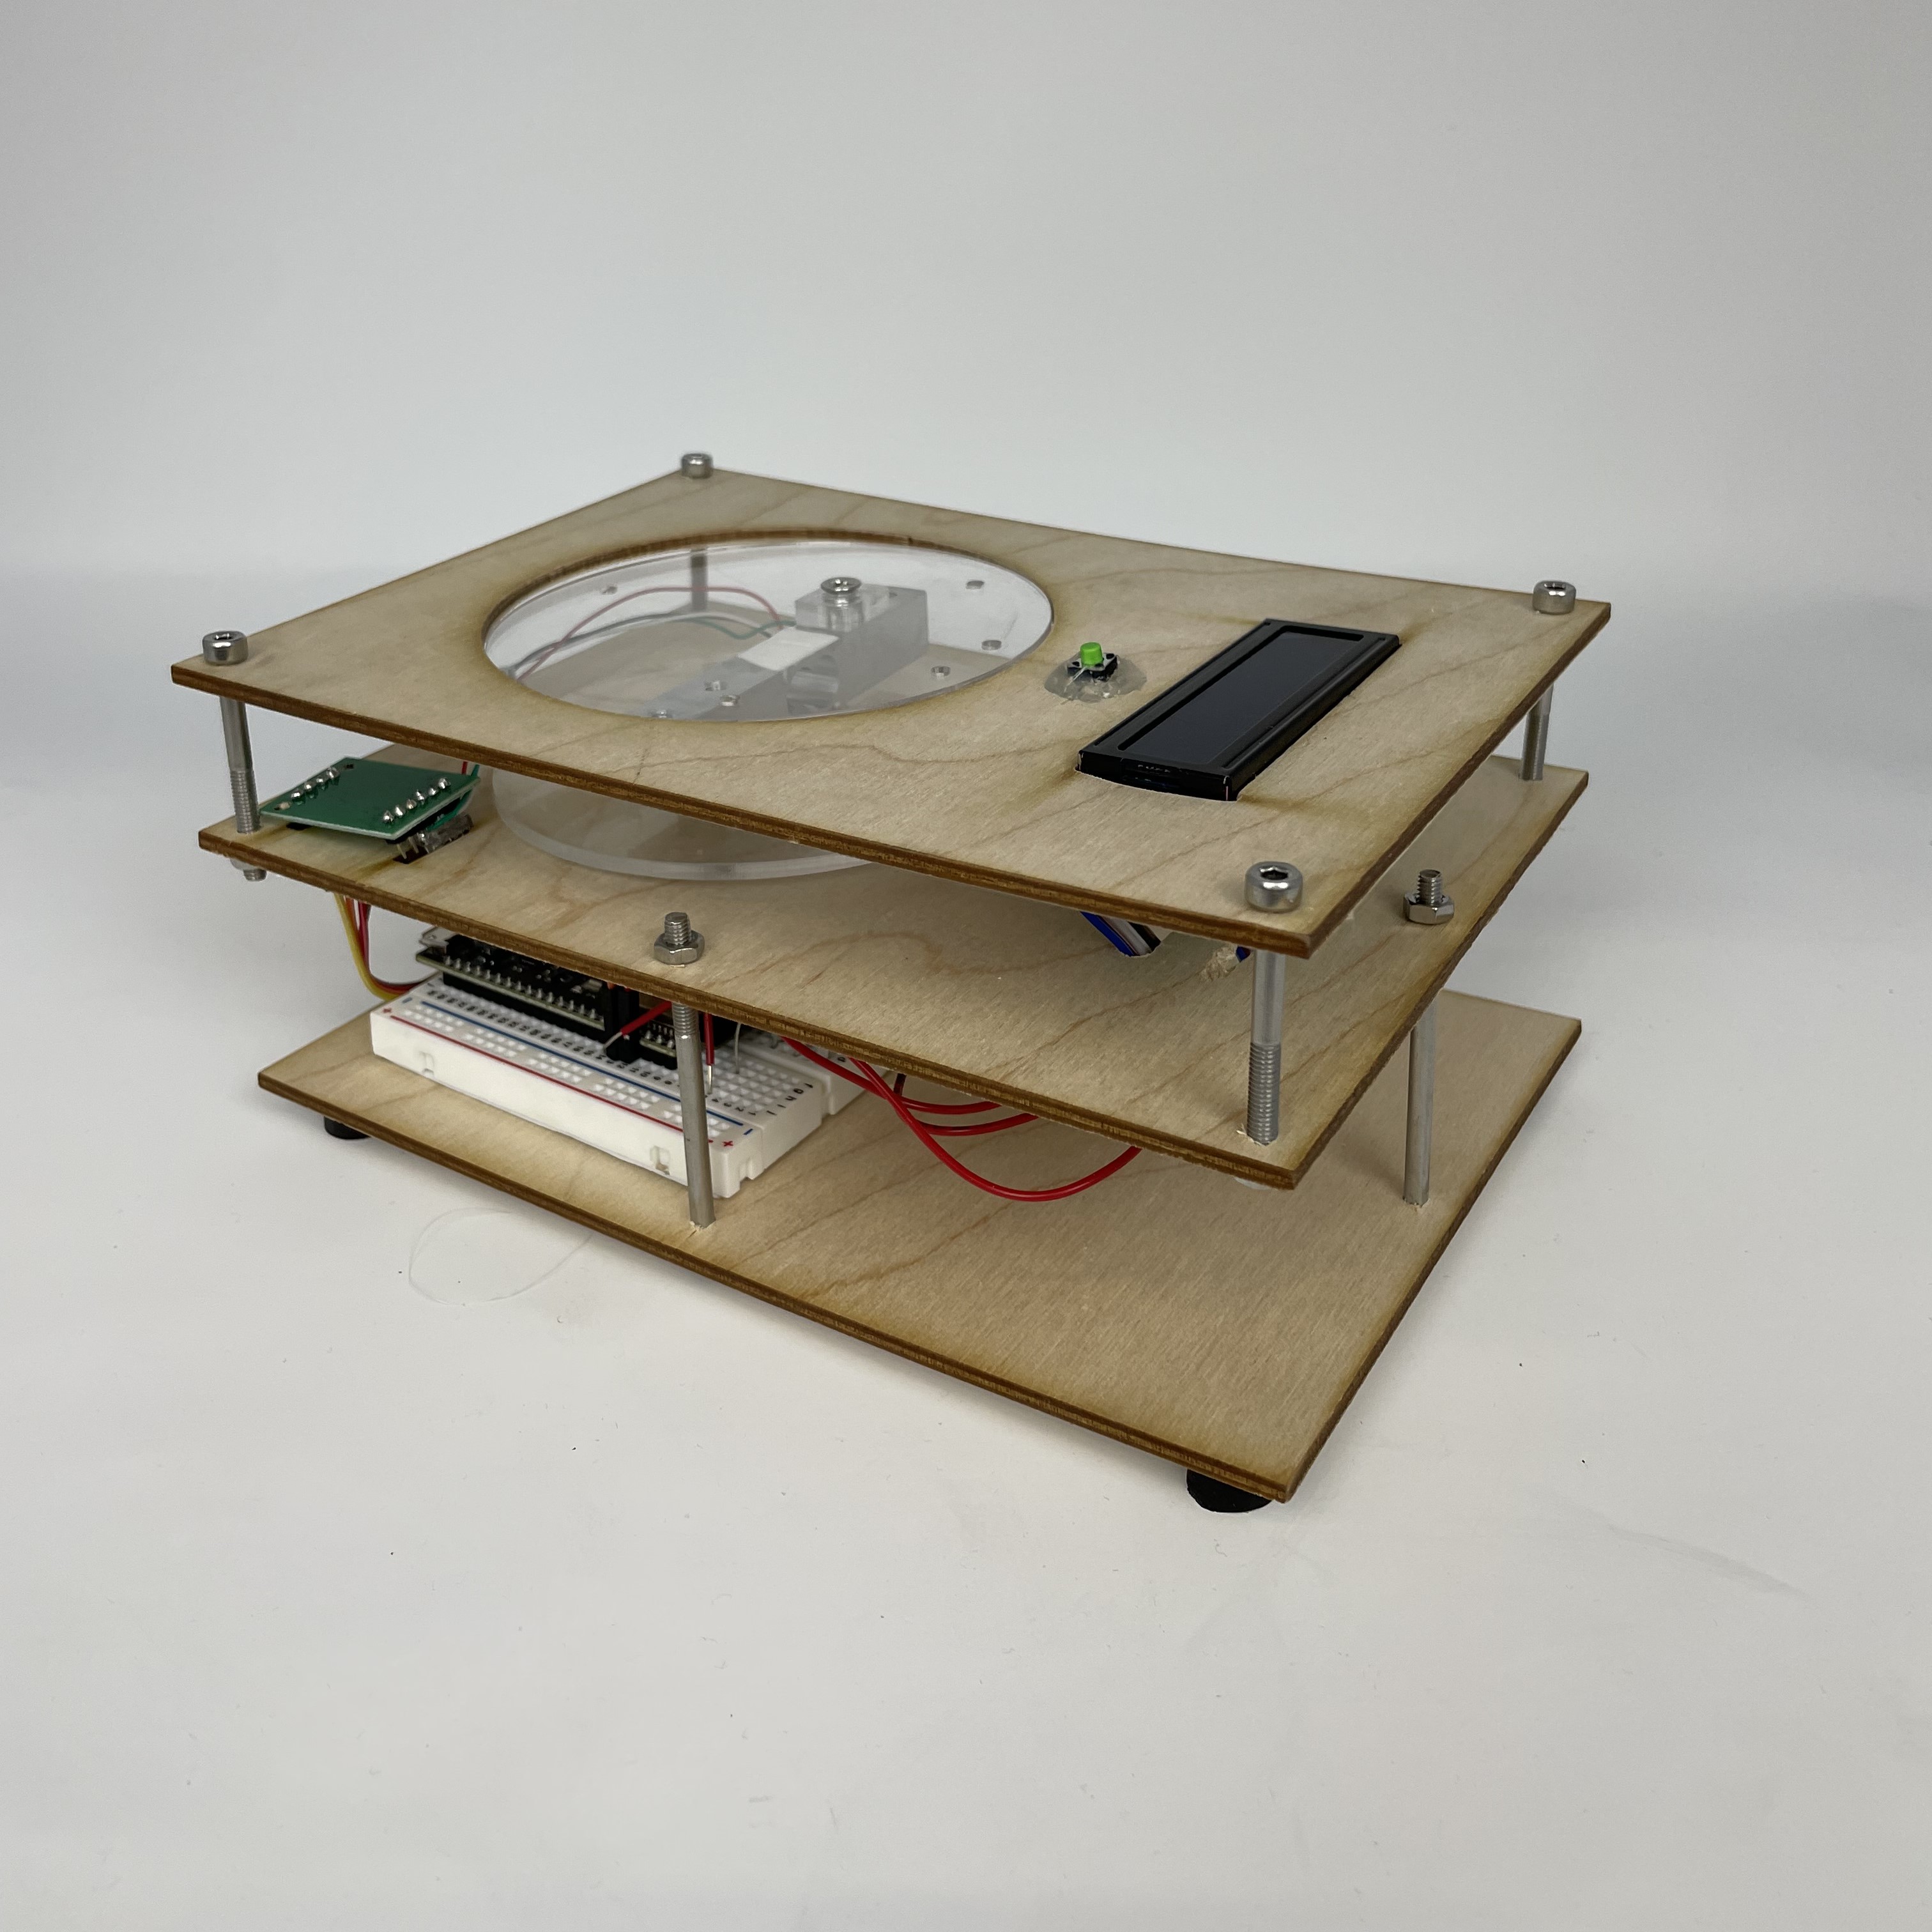
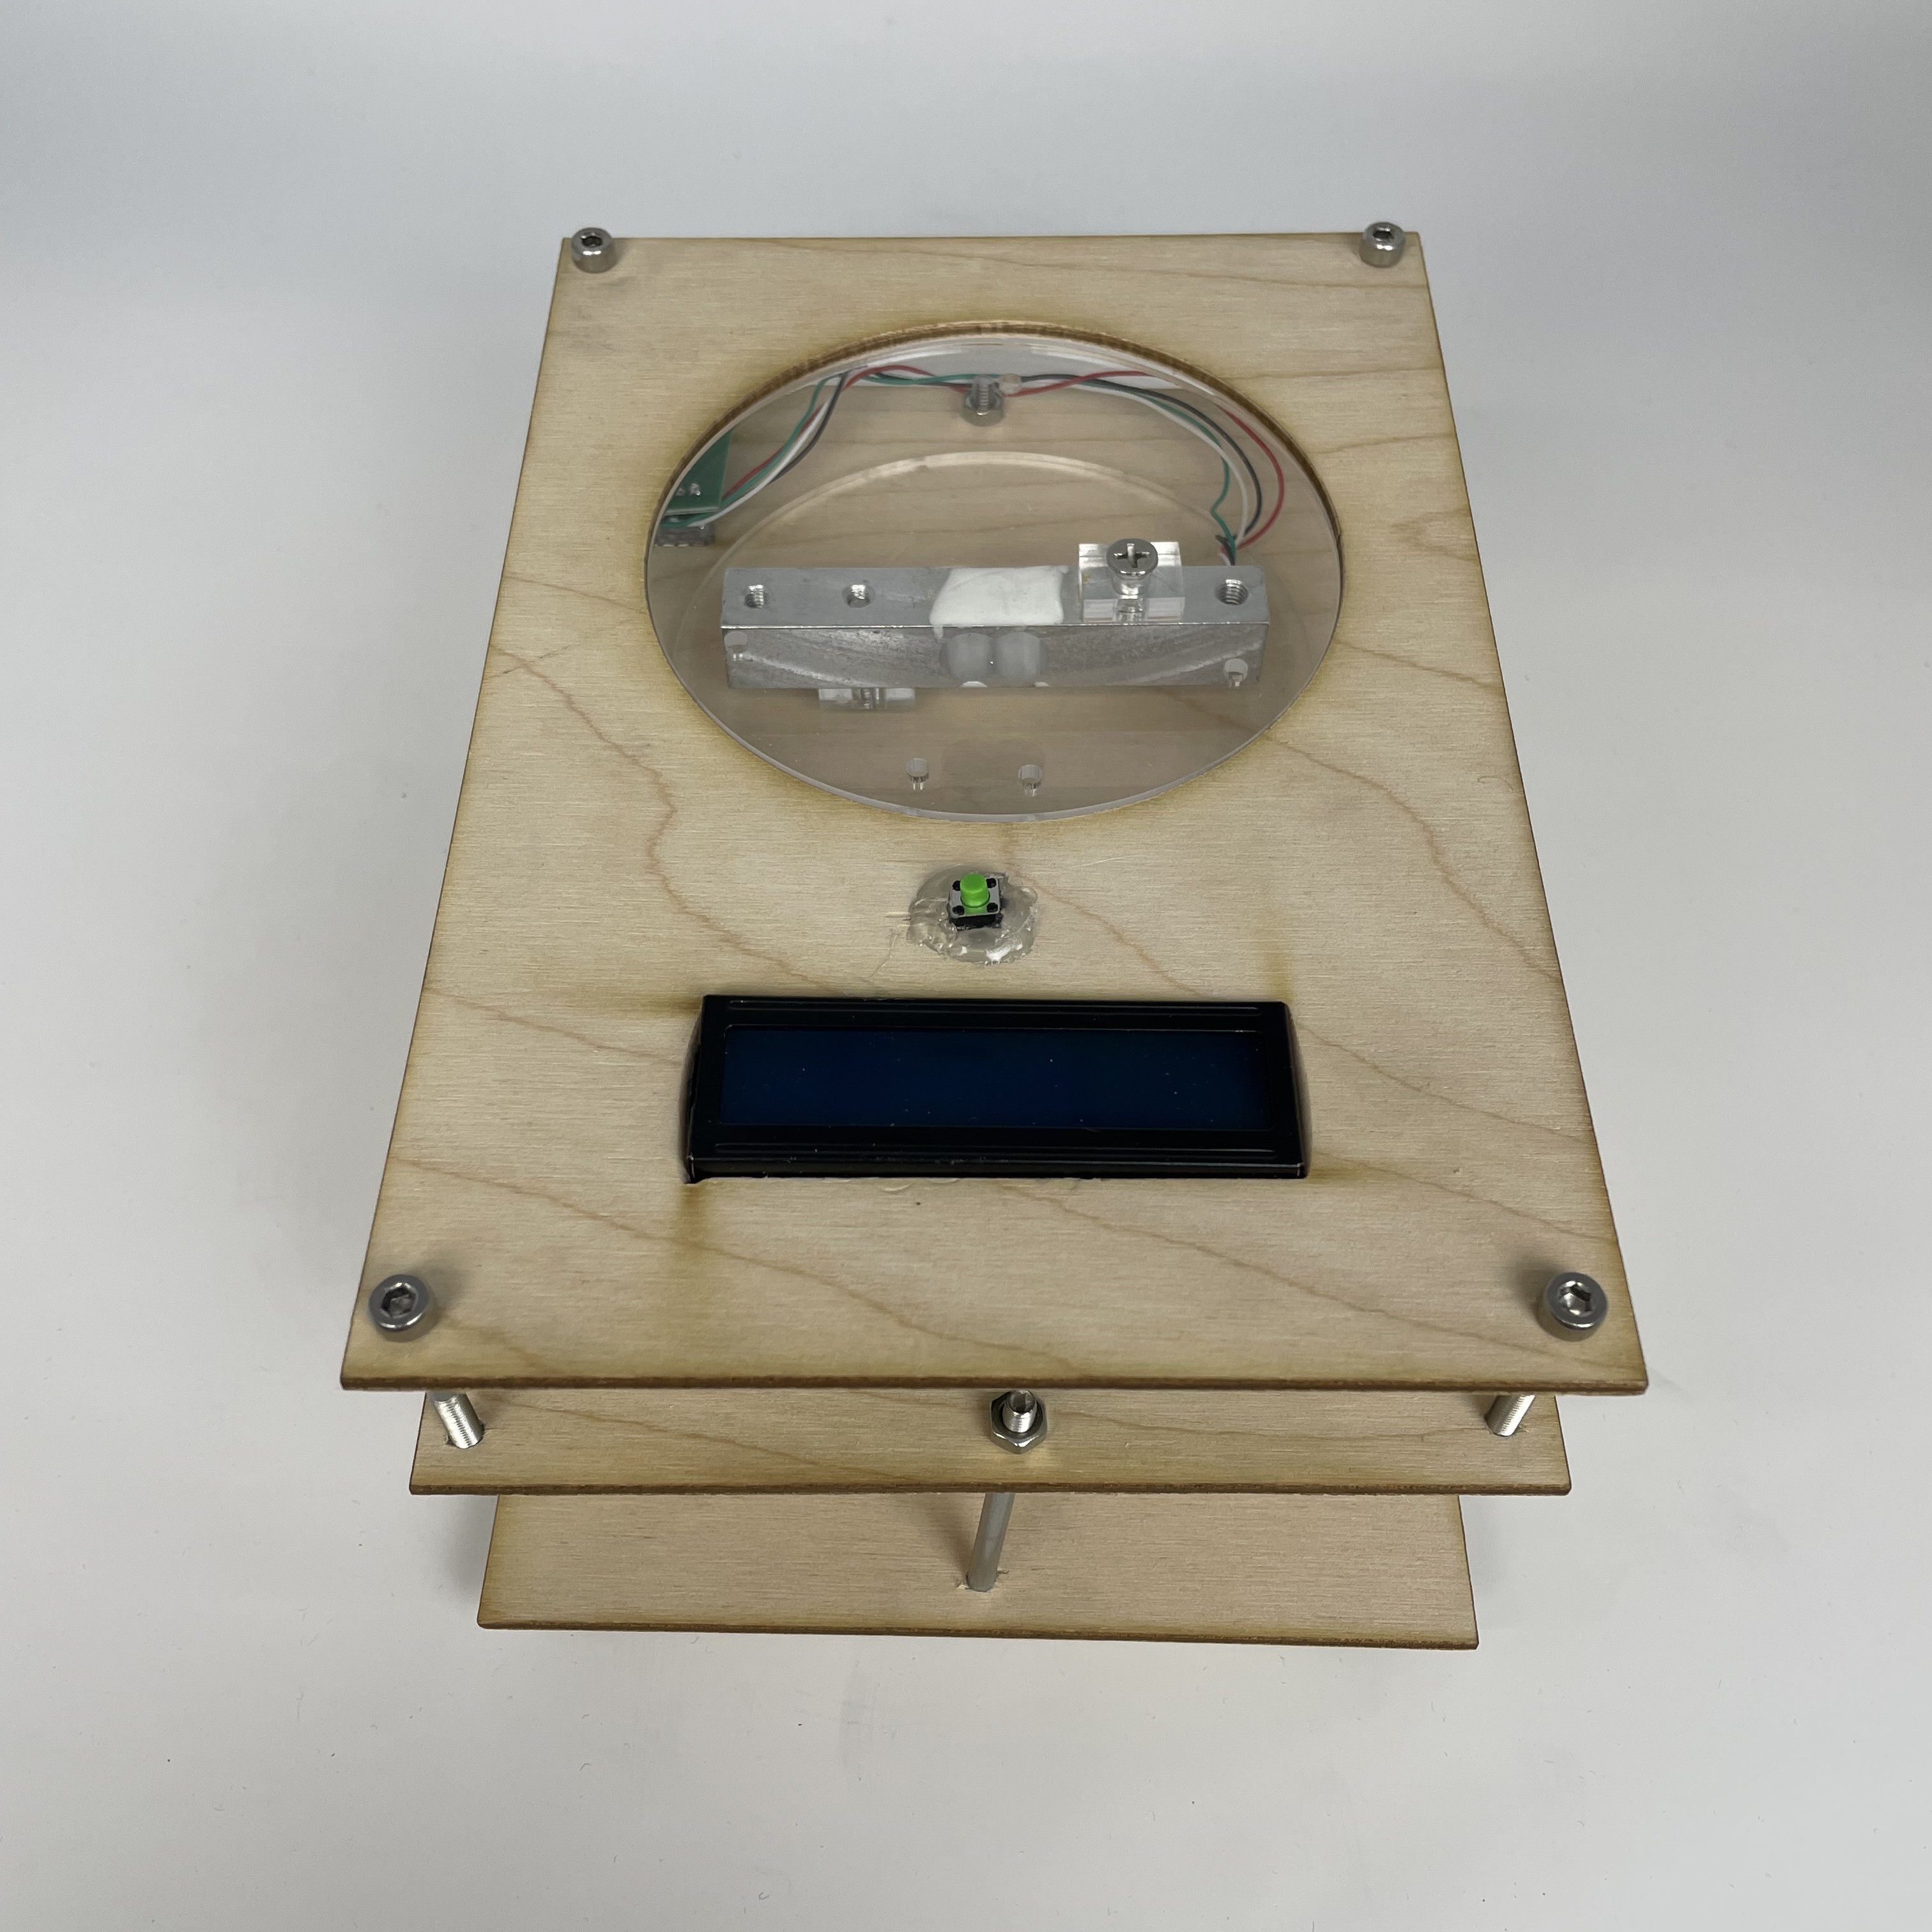
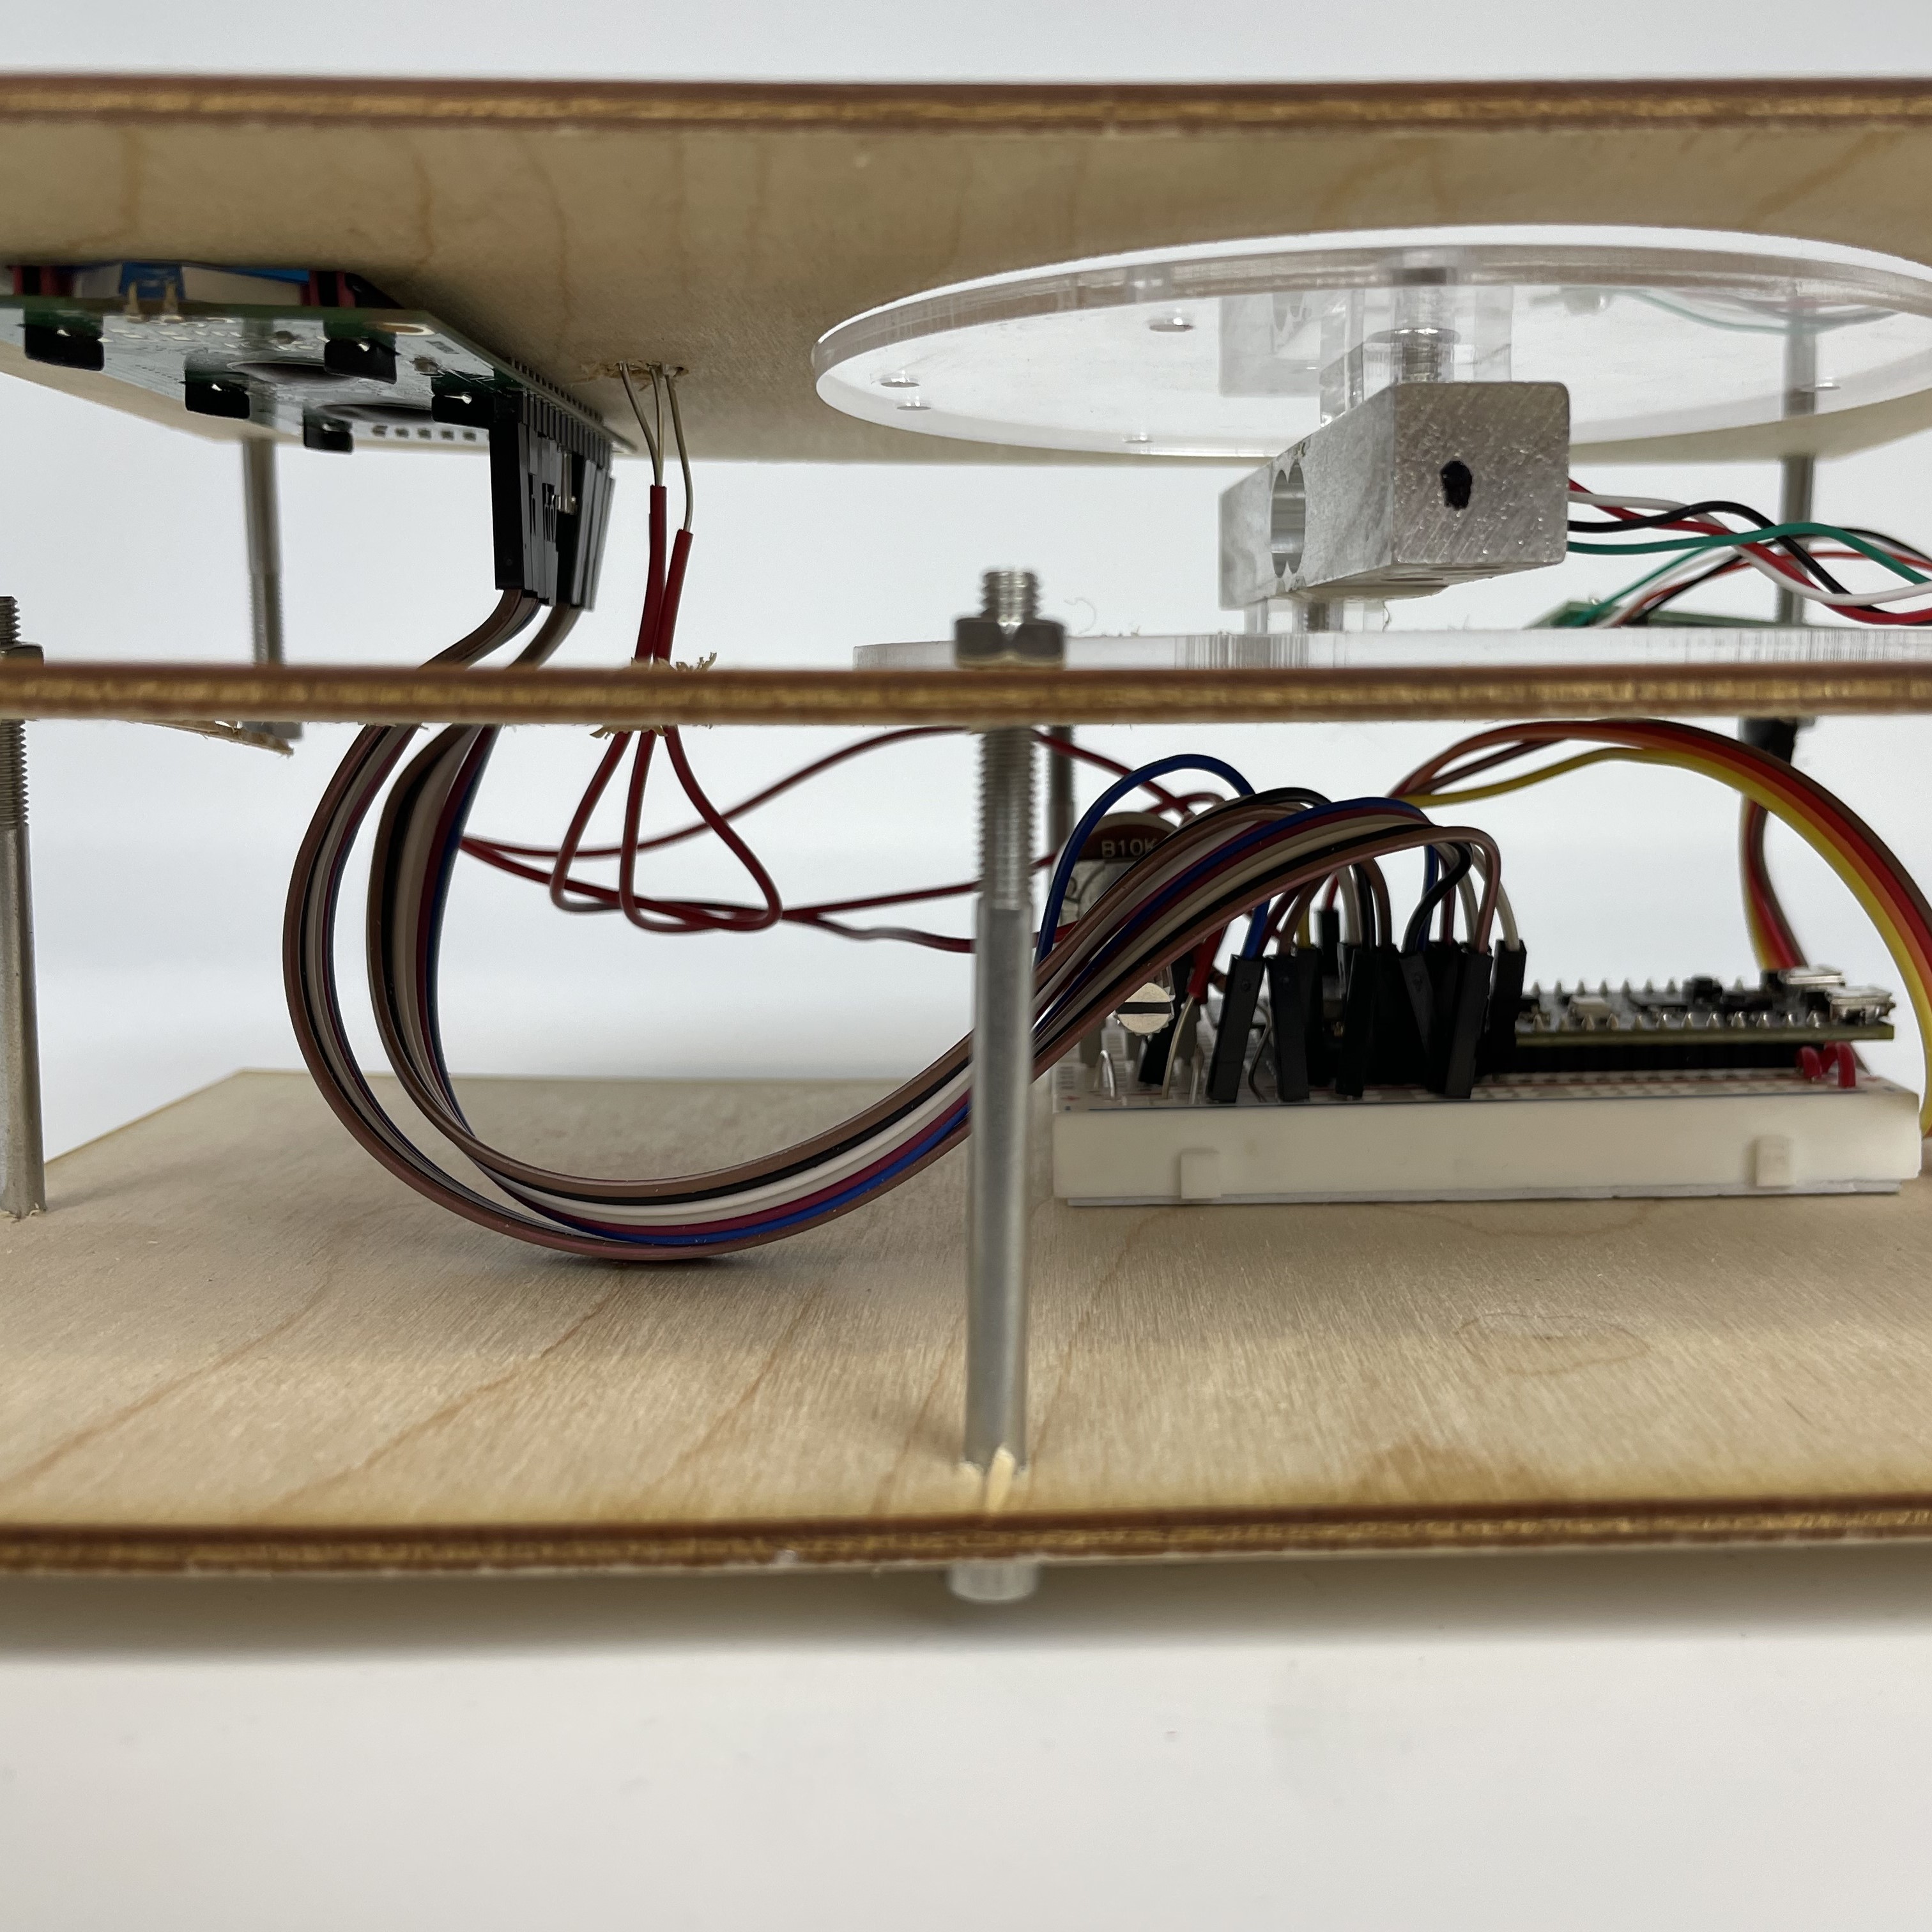
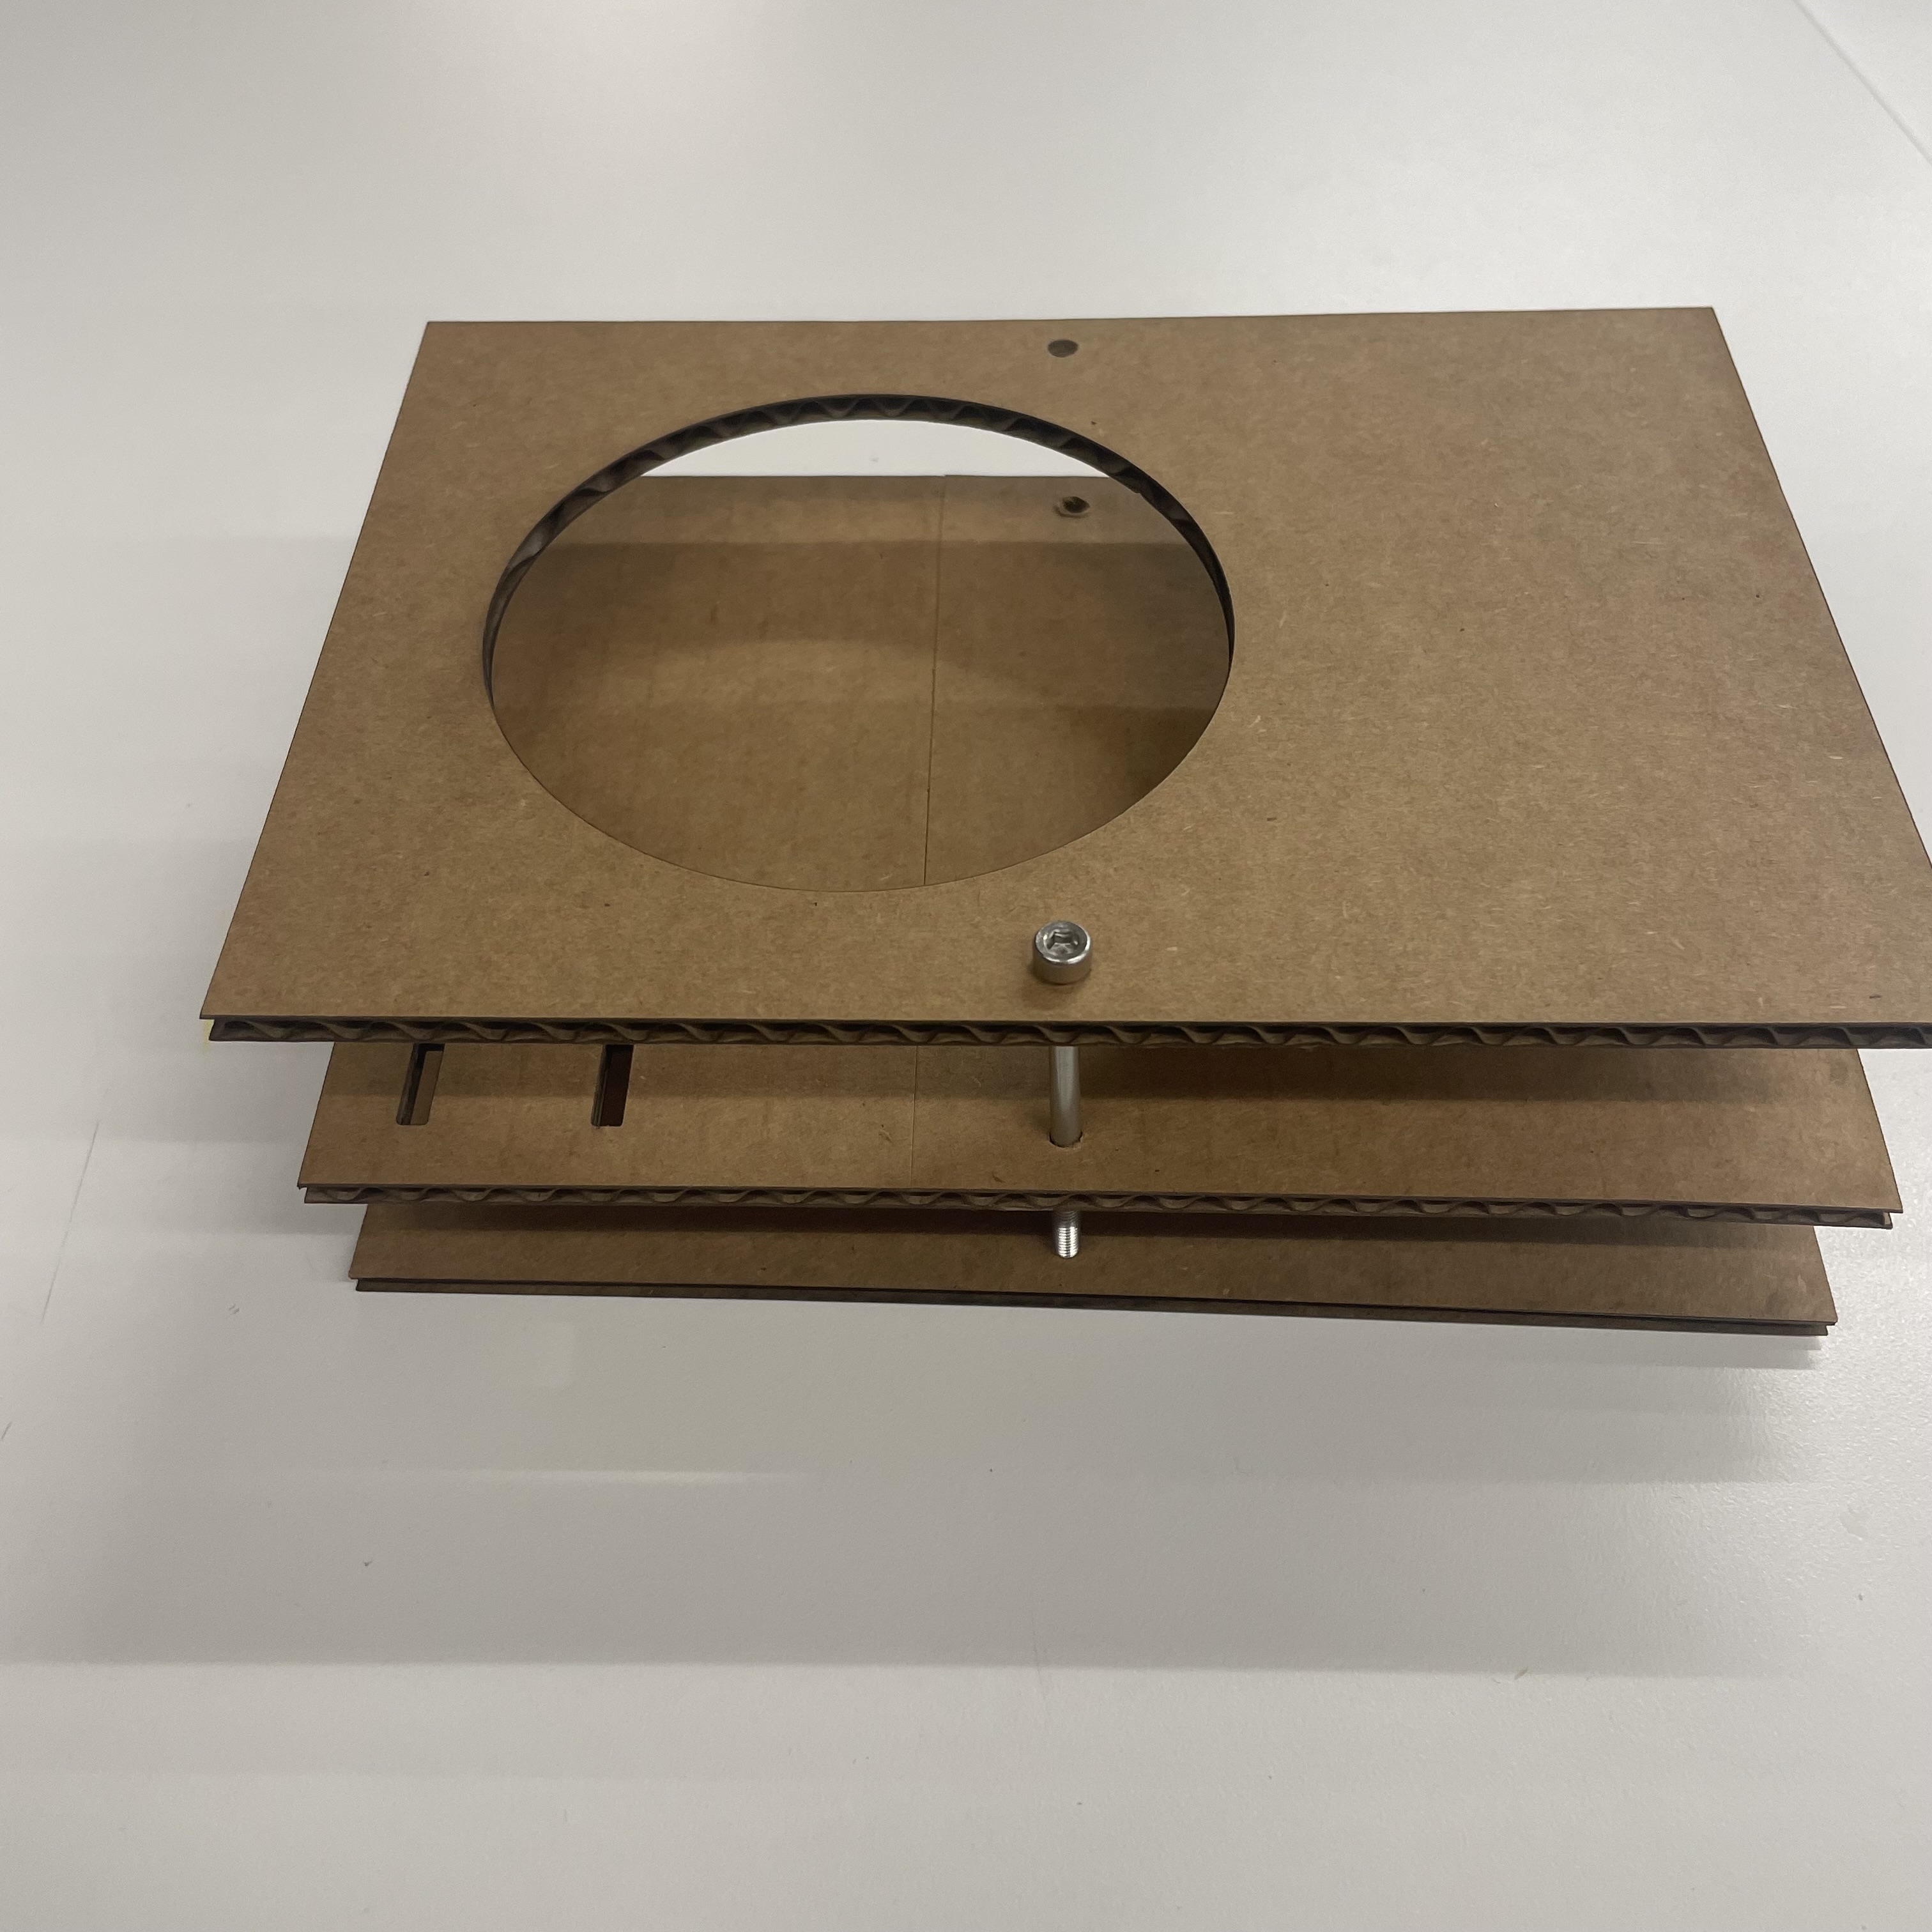
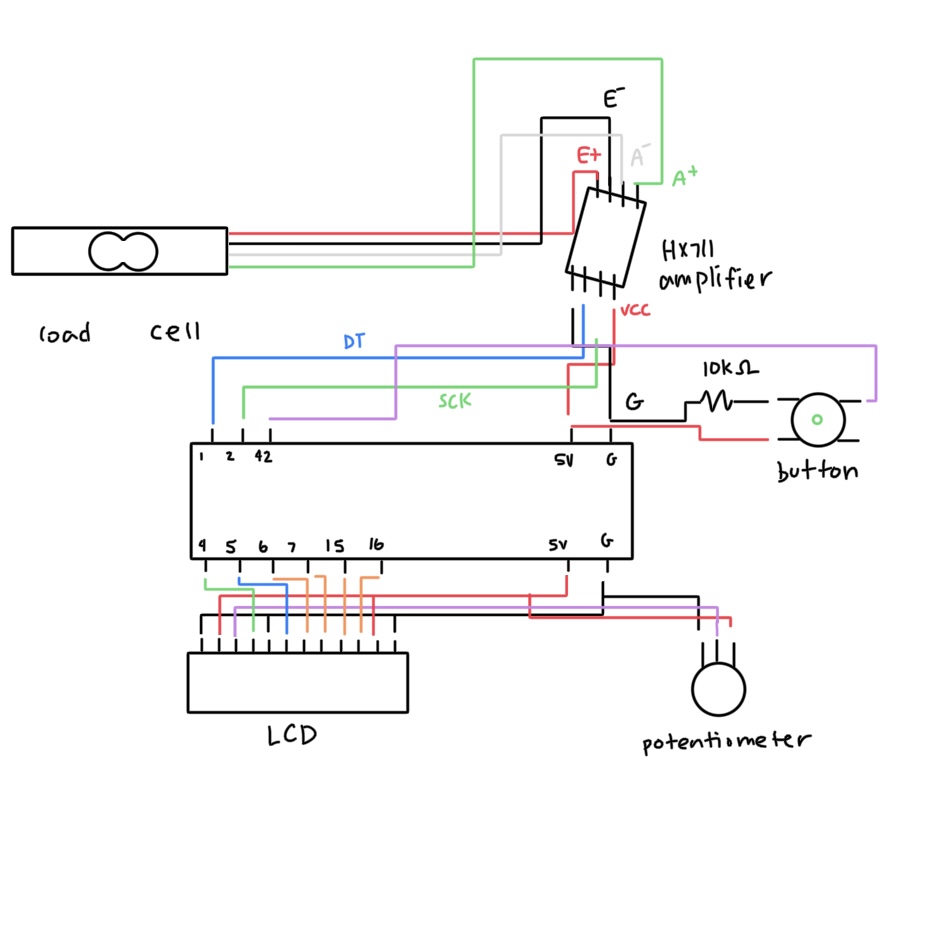
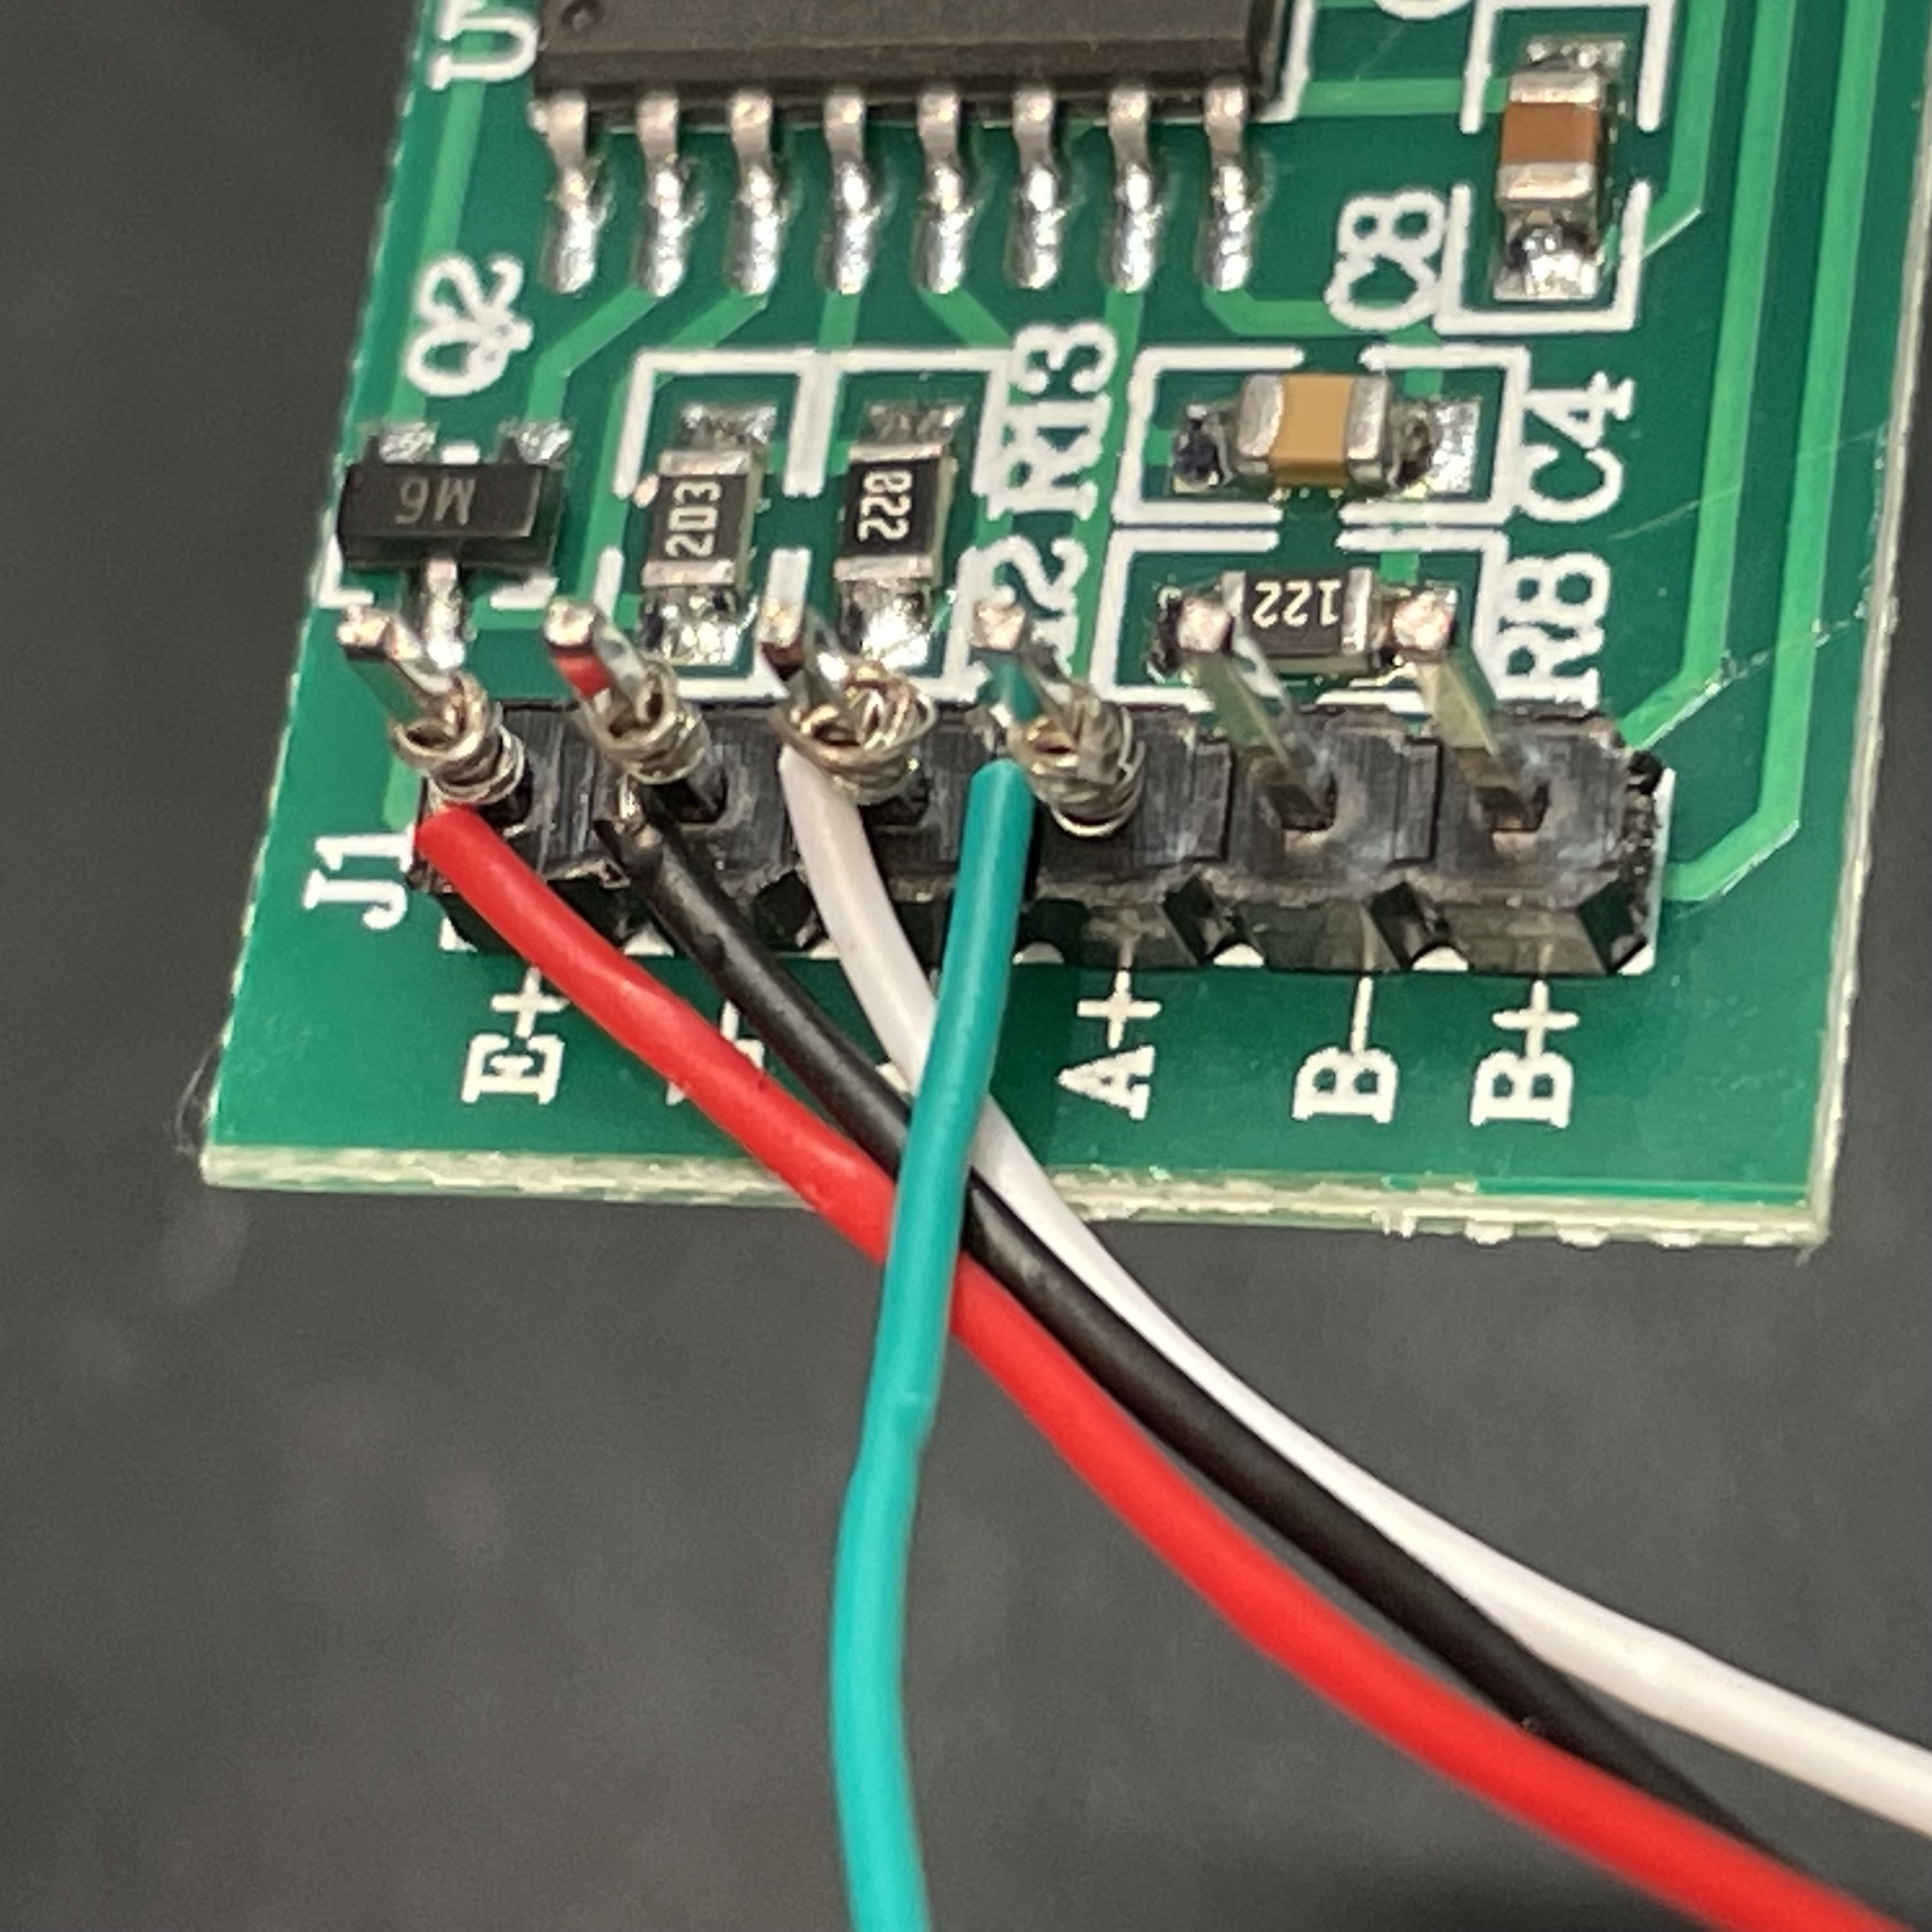
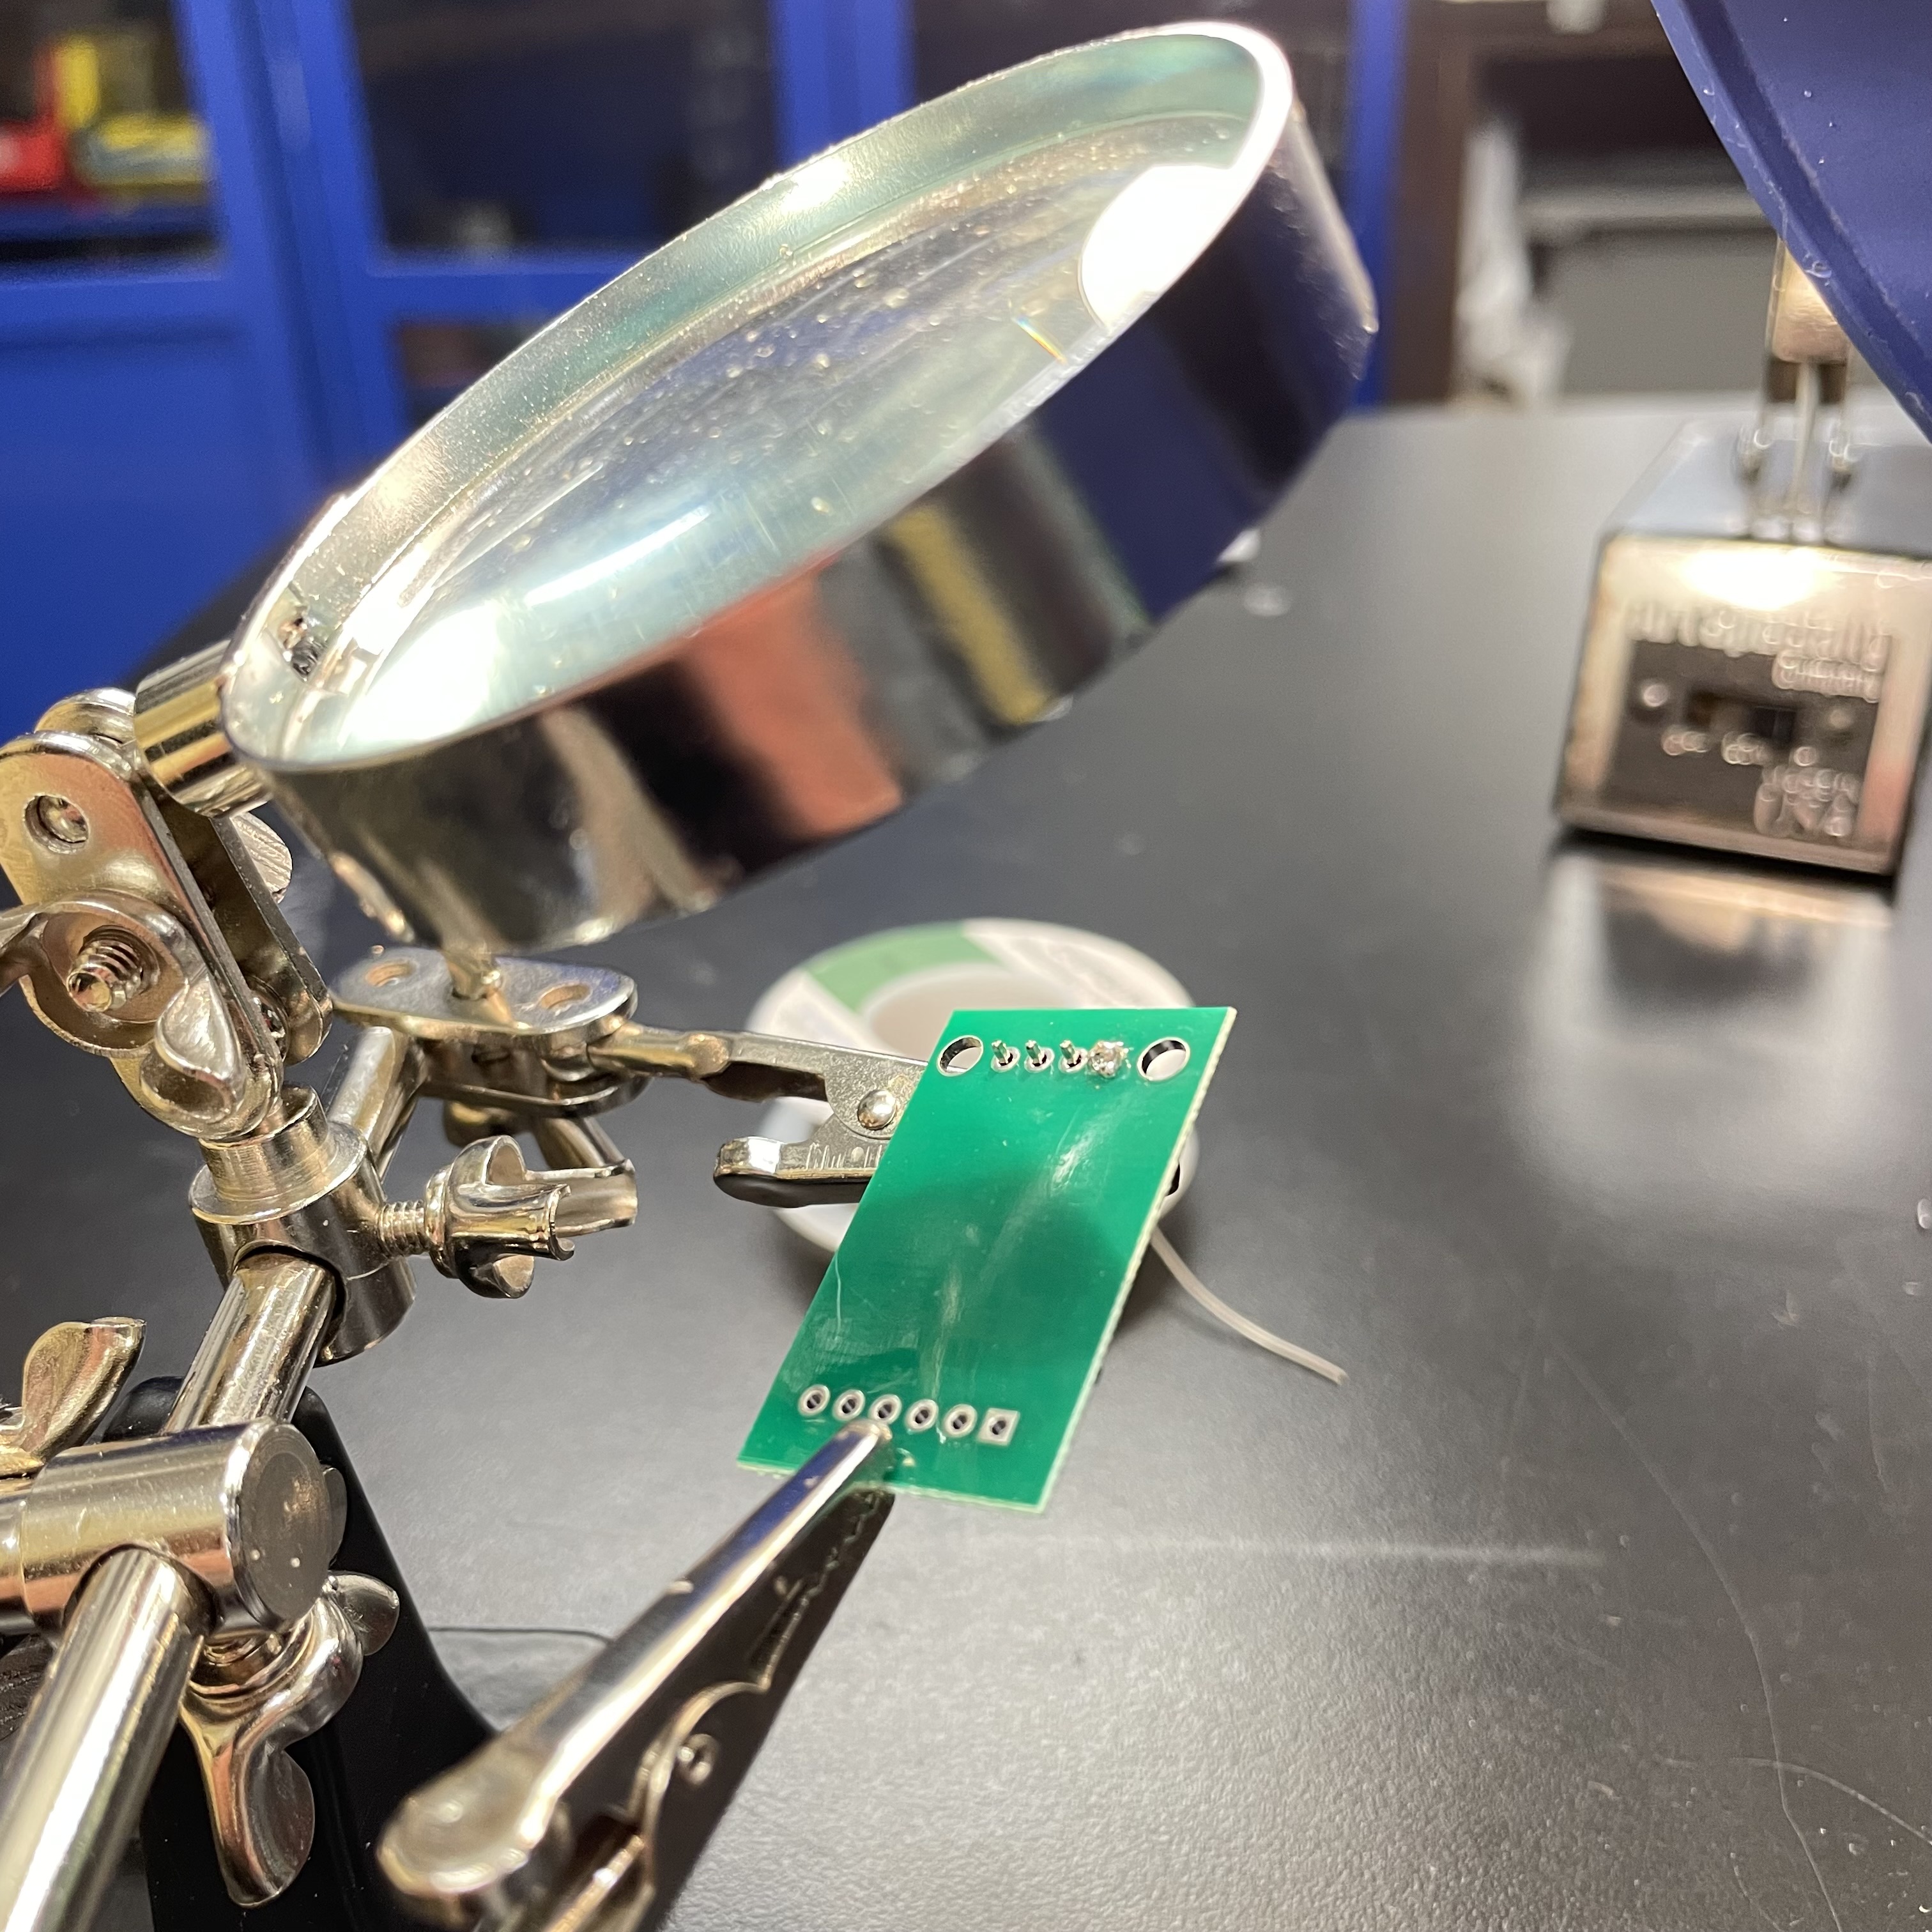
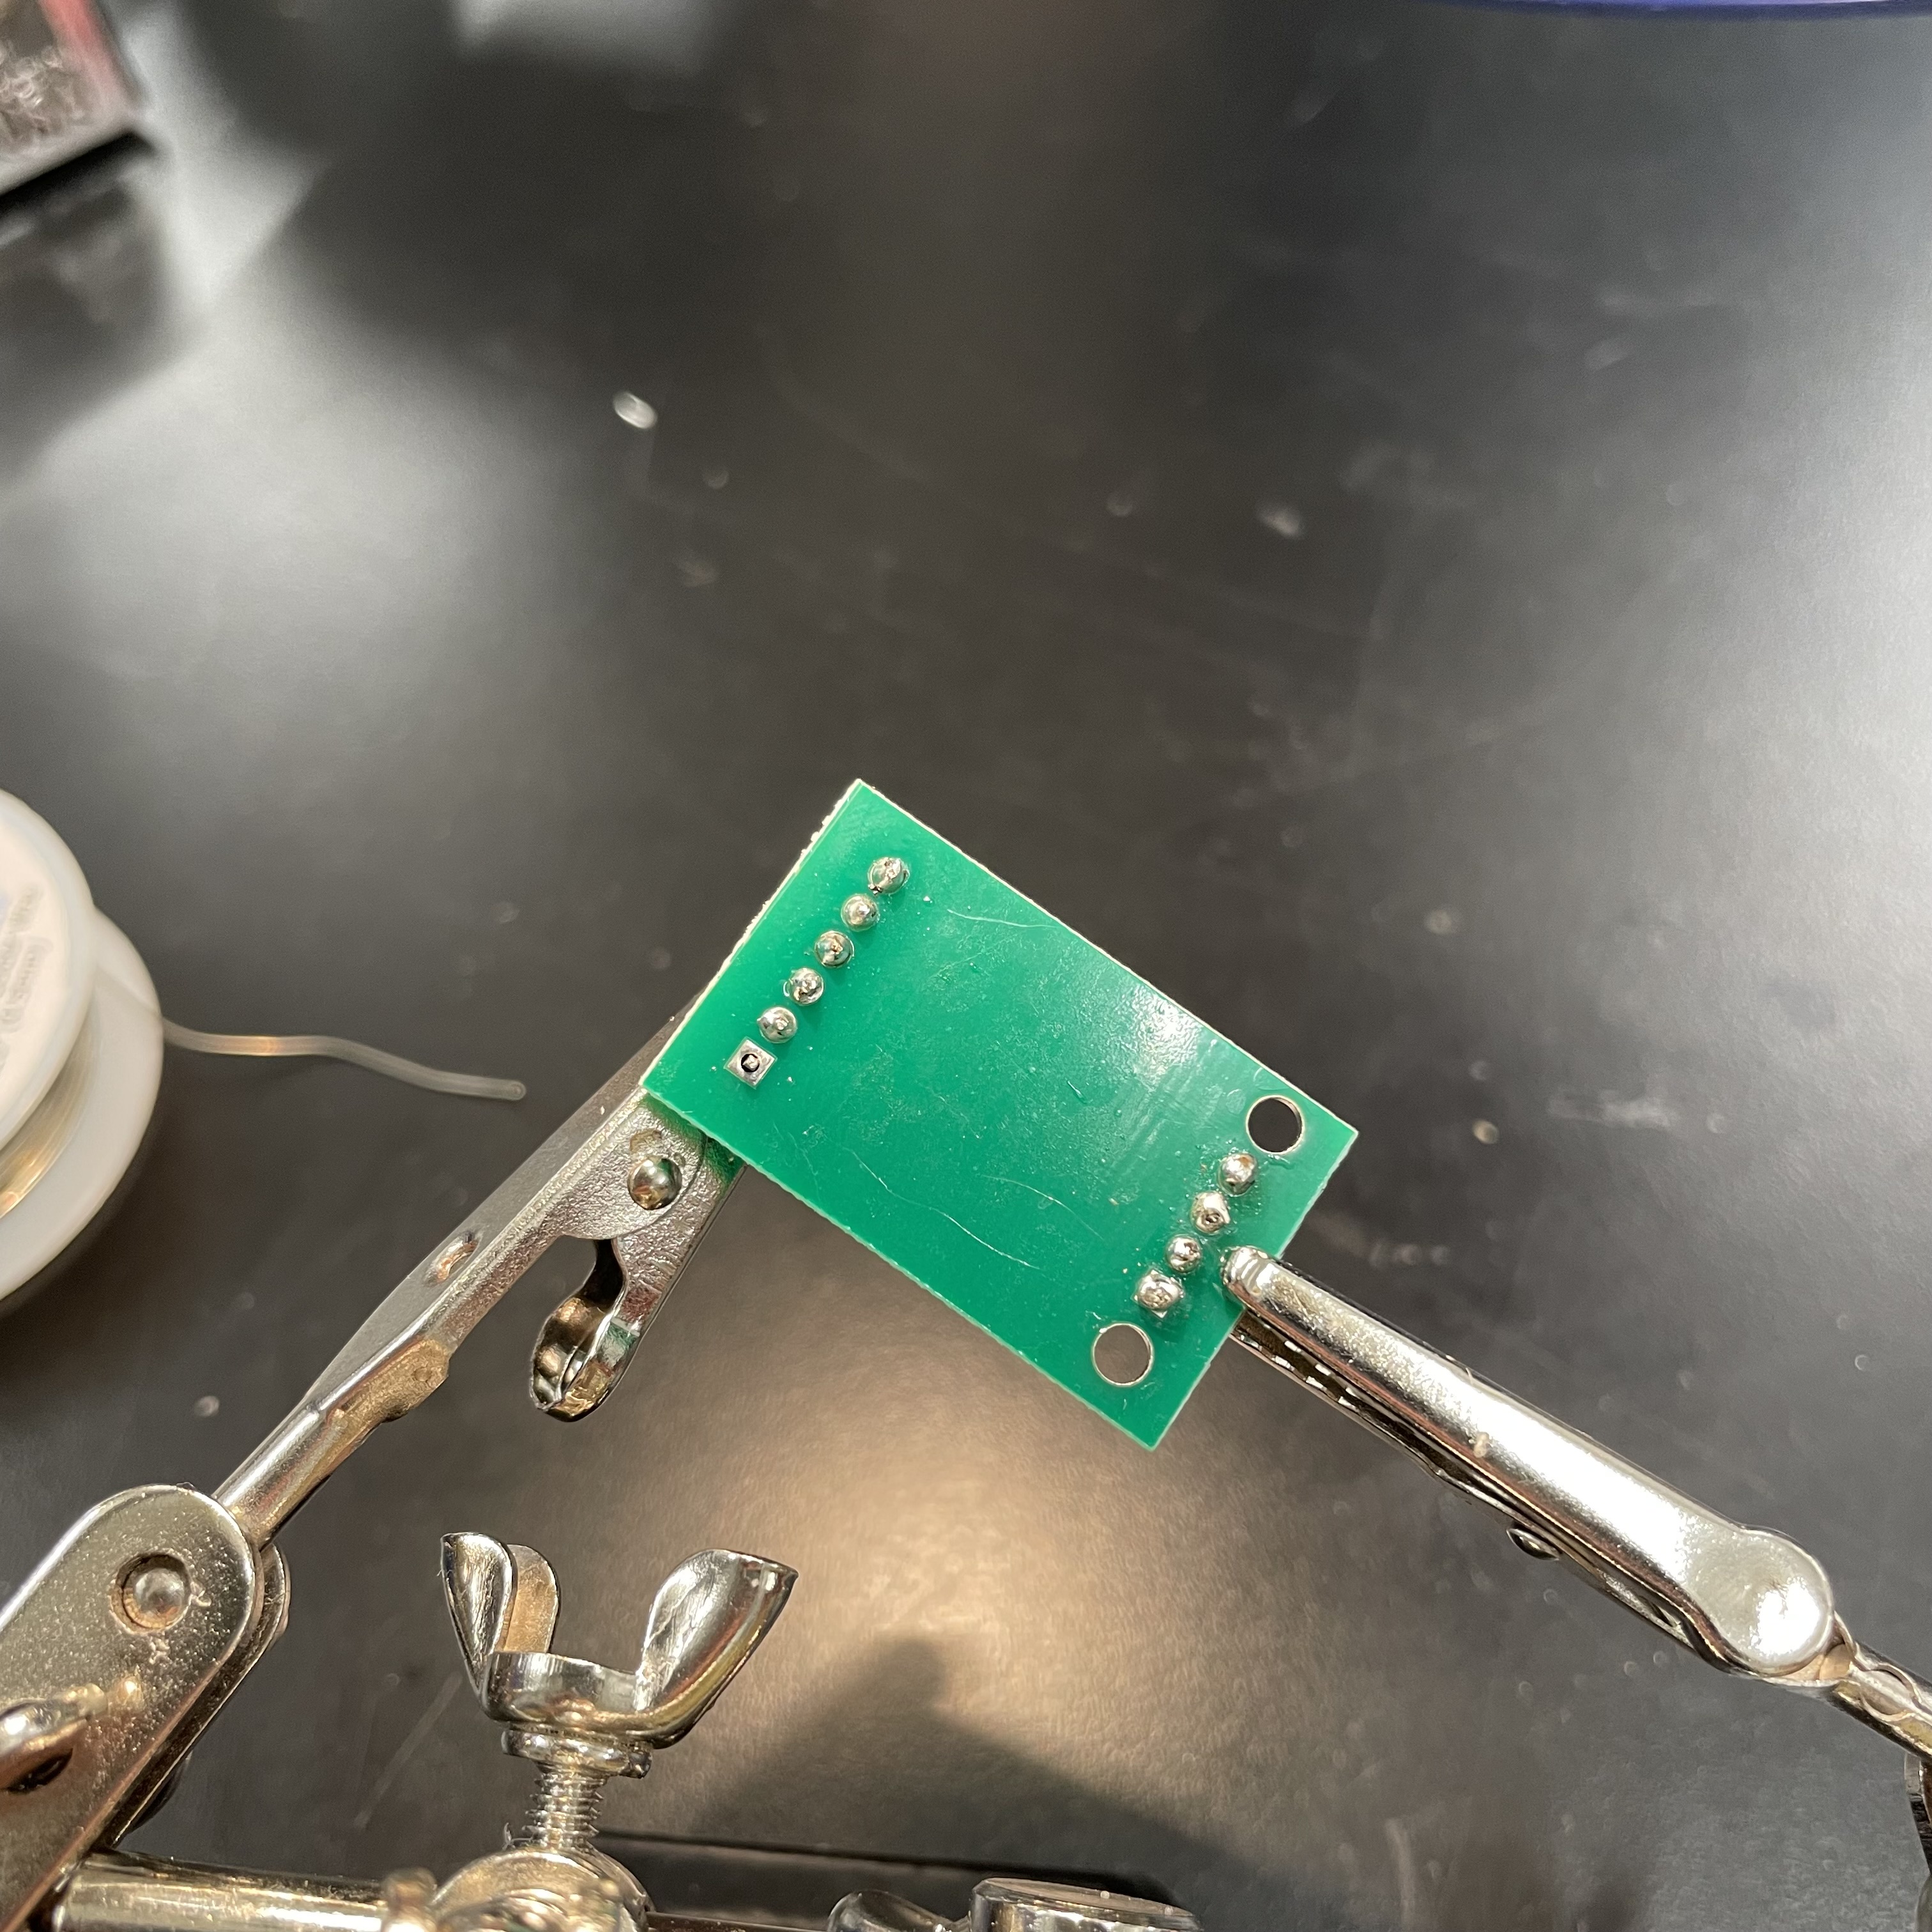
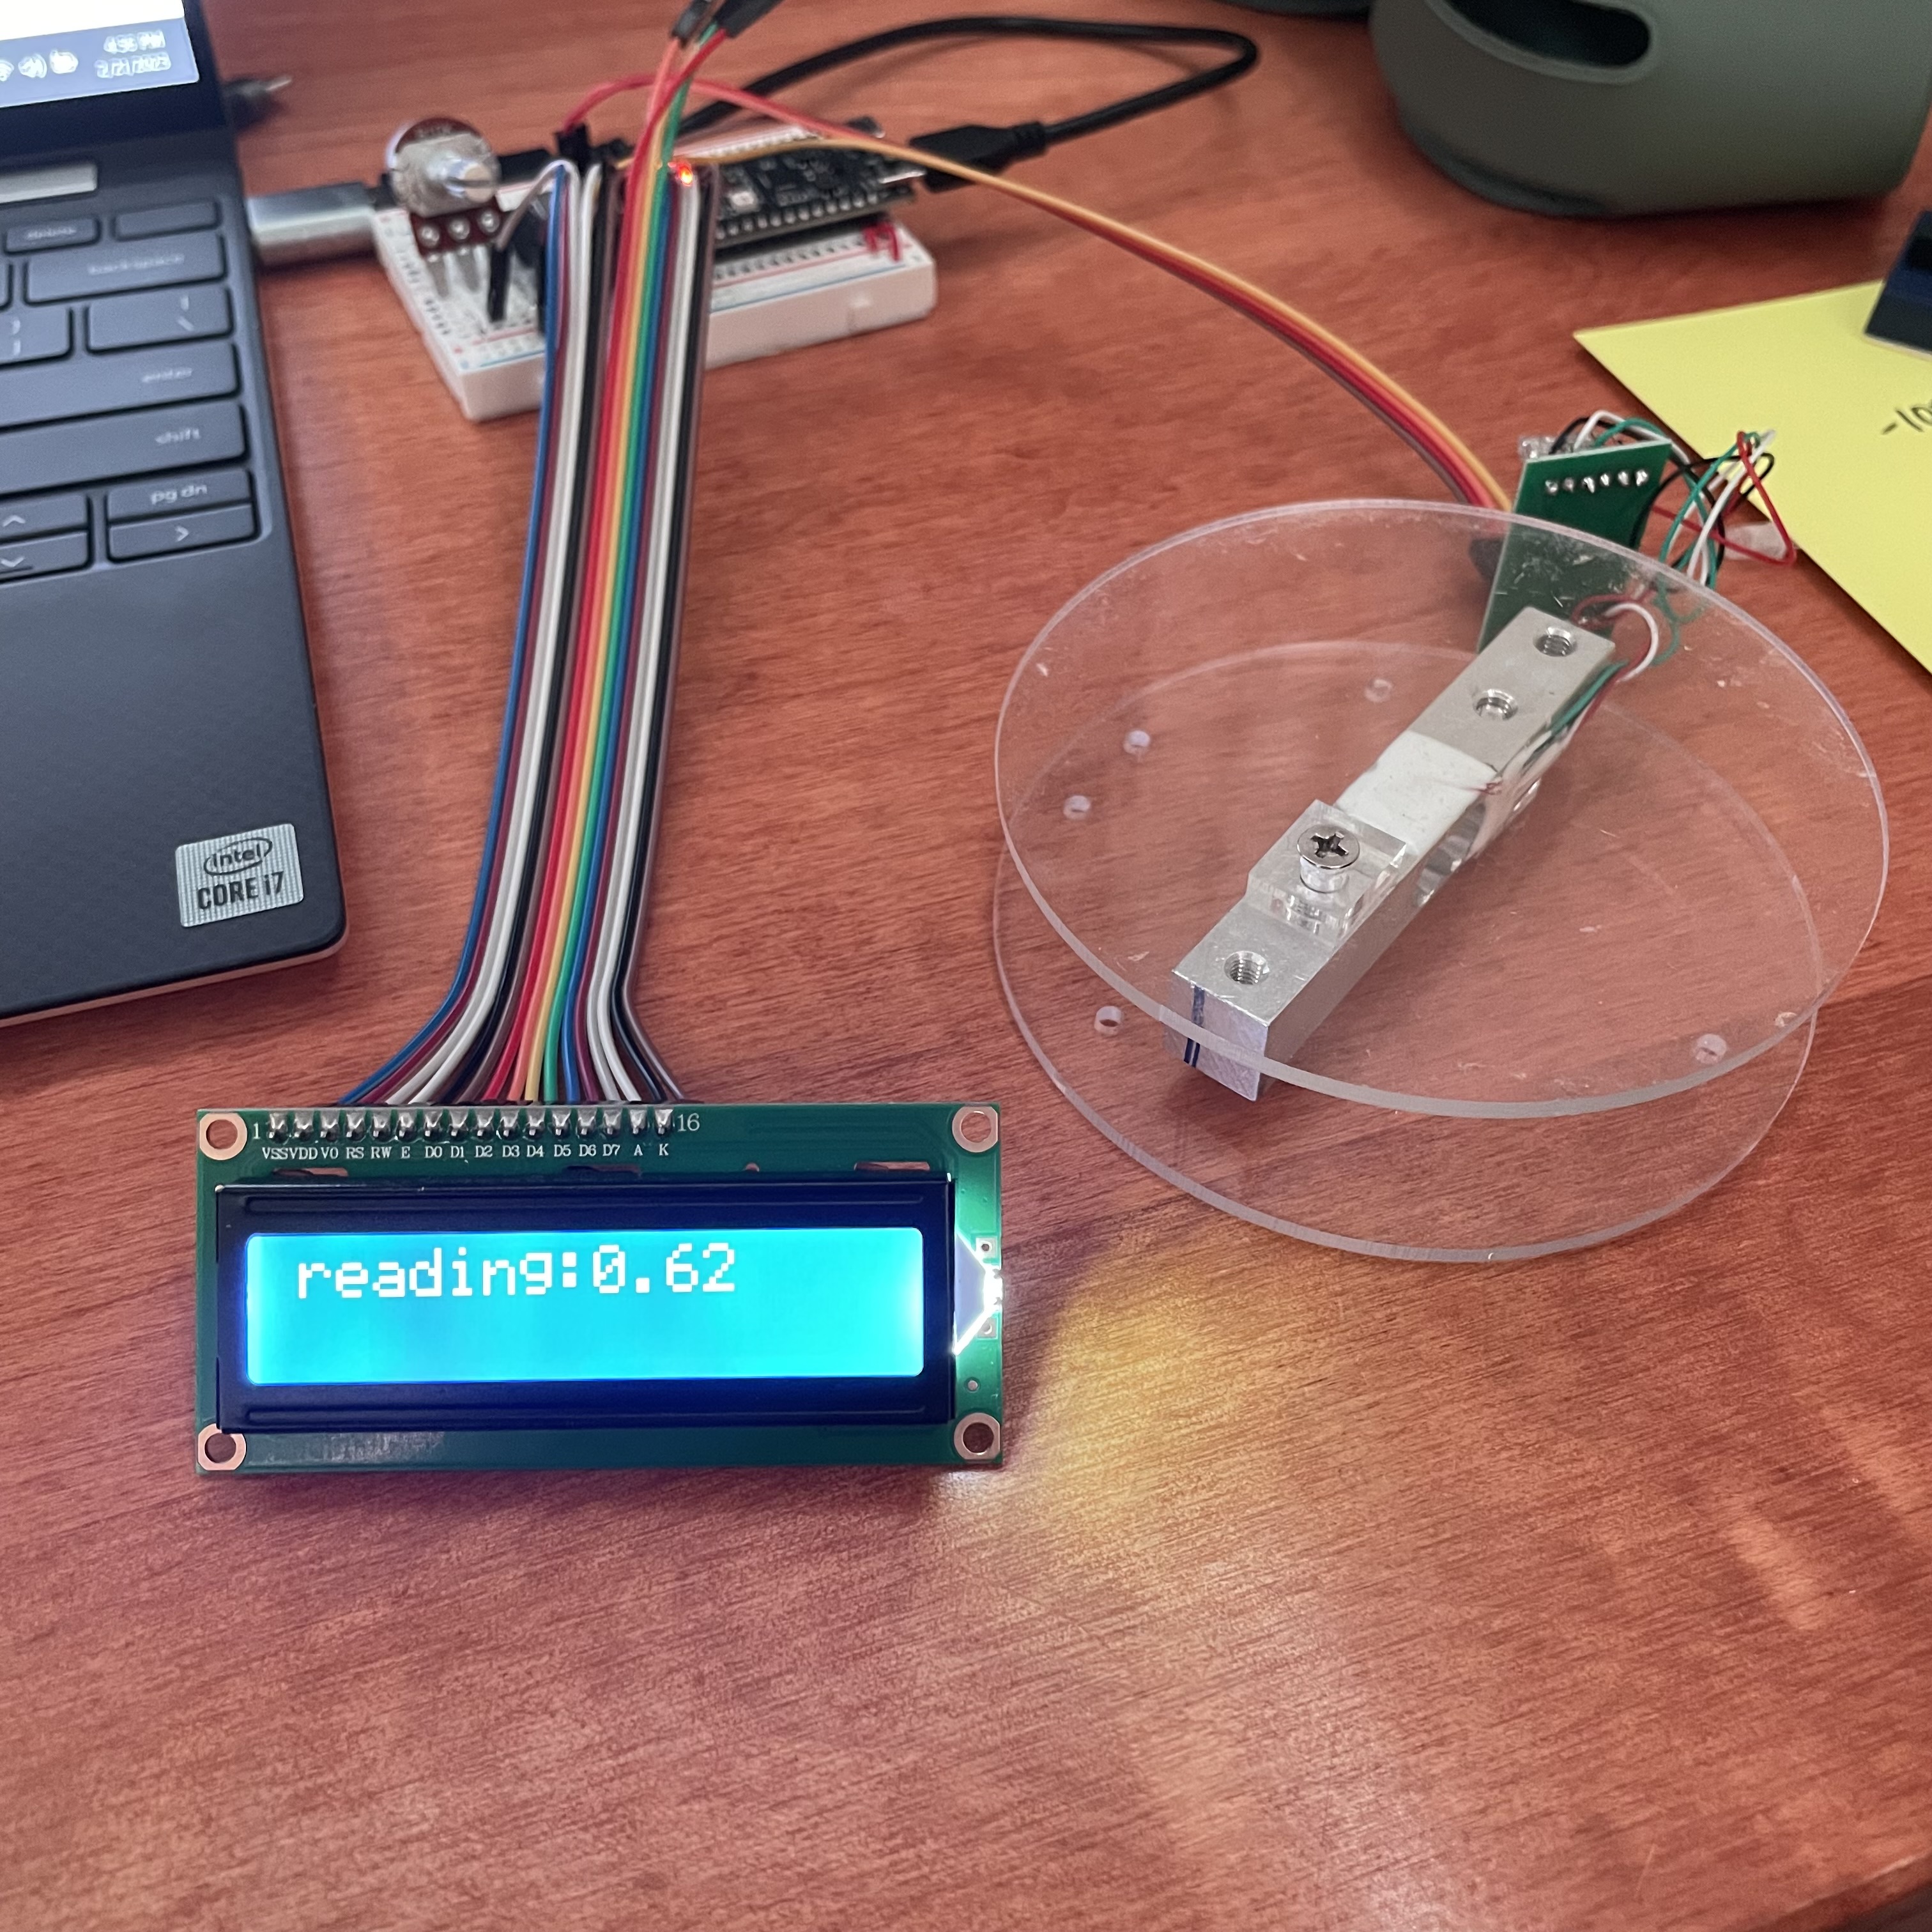
The scale only has a few components: a load cell, an amplifier, a petentiometer, a button, and an LCD screen. The body of the scale is built out of the load cell, two acrylic plates, and two acrylic spacers. The output runs through the amplifier before displaying on a digital screen. To tare and ready the scale, the user has to hit one small button. Before getting to the programming component, though, I had to solder pins and the load cell to the amplifier, as seen below. Honestly, I did a pretty good job with the soldering, pretty proud of that. Soldering that is NOT shown: the button, because I am significantly less proud of that.
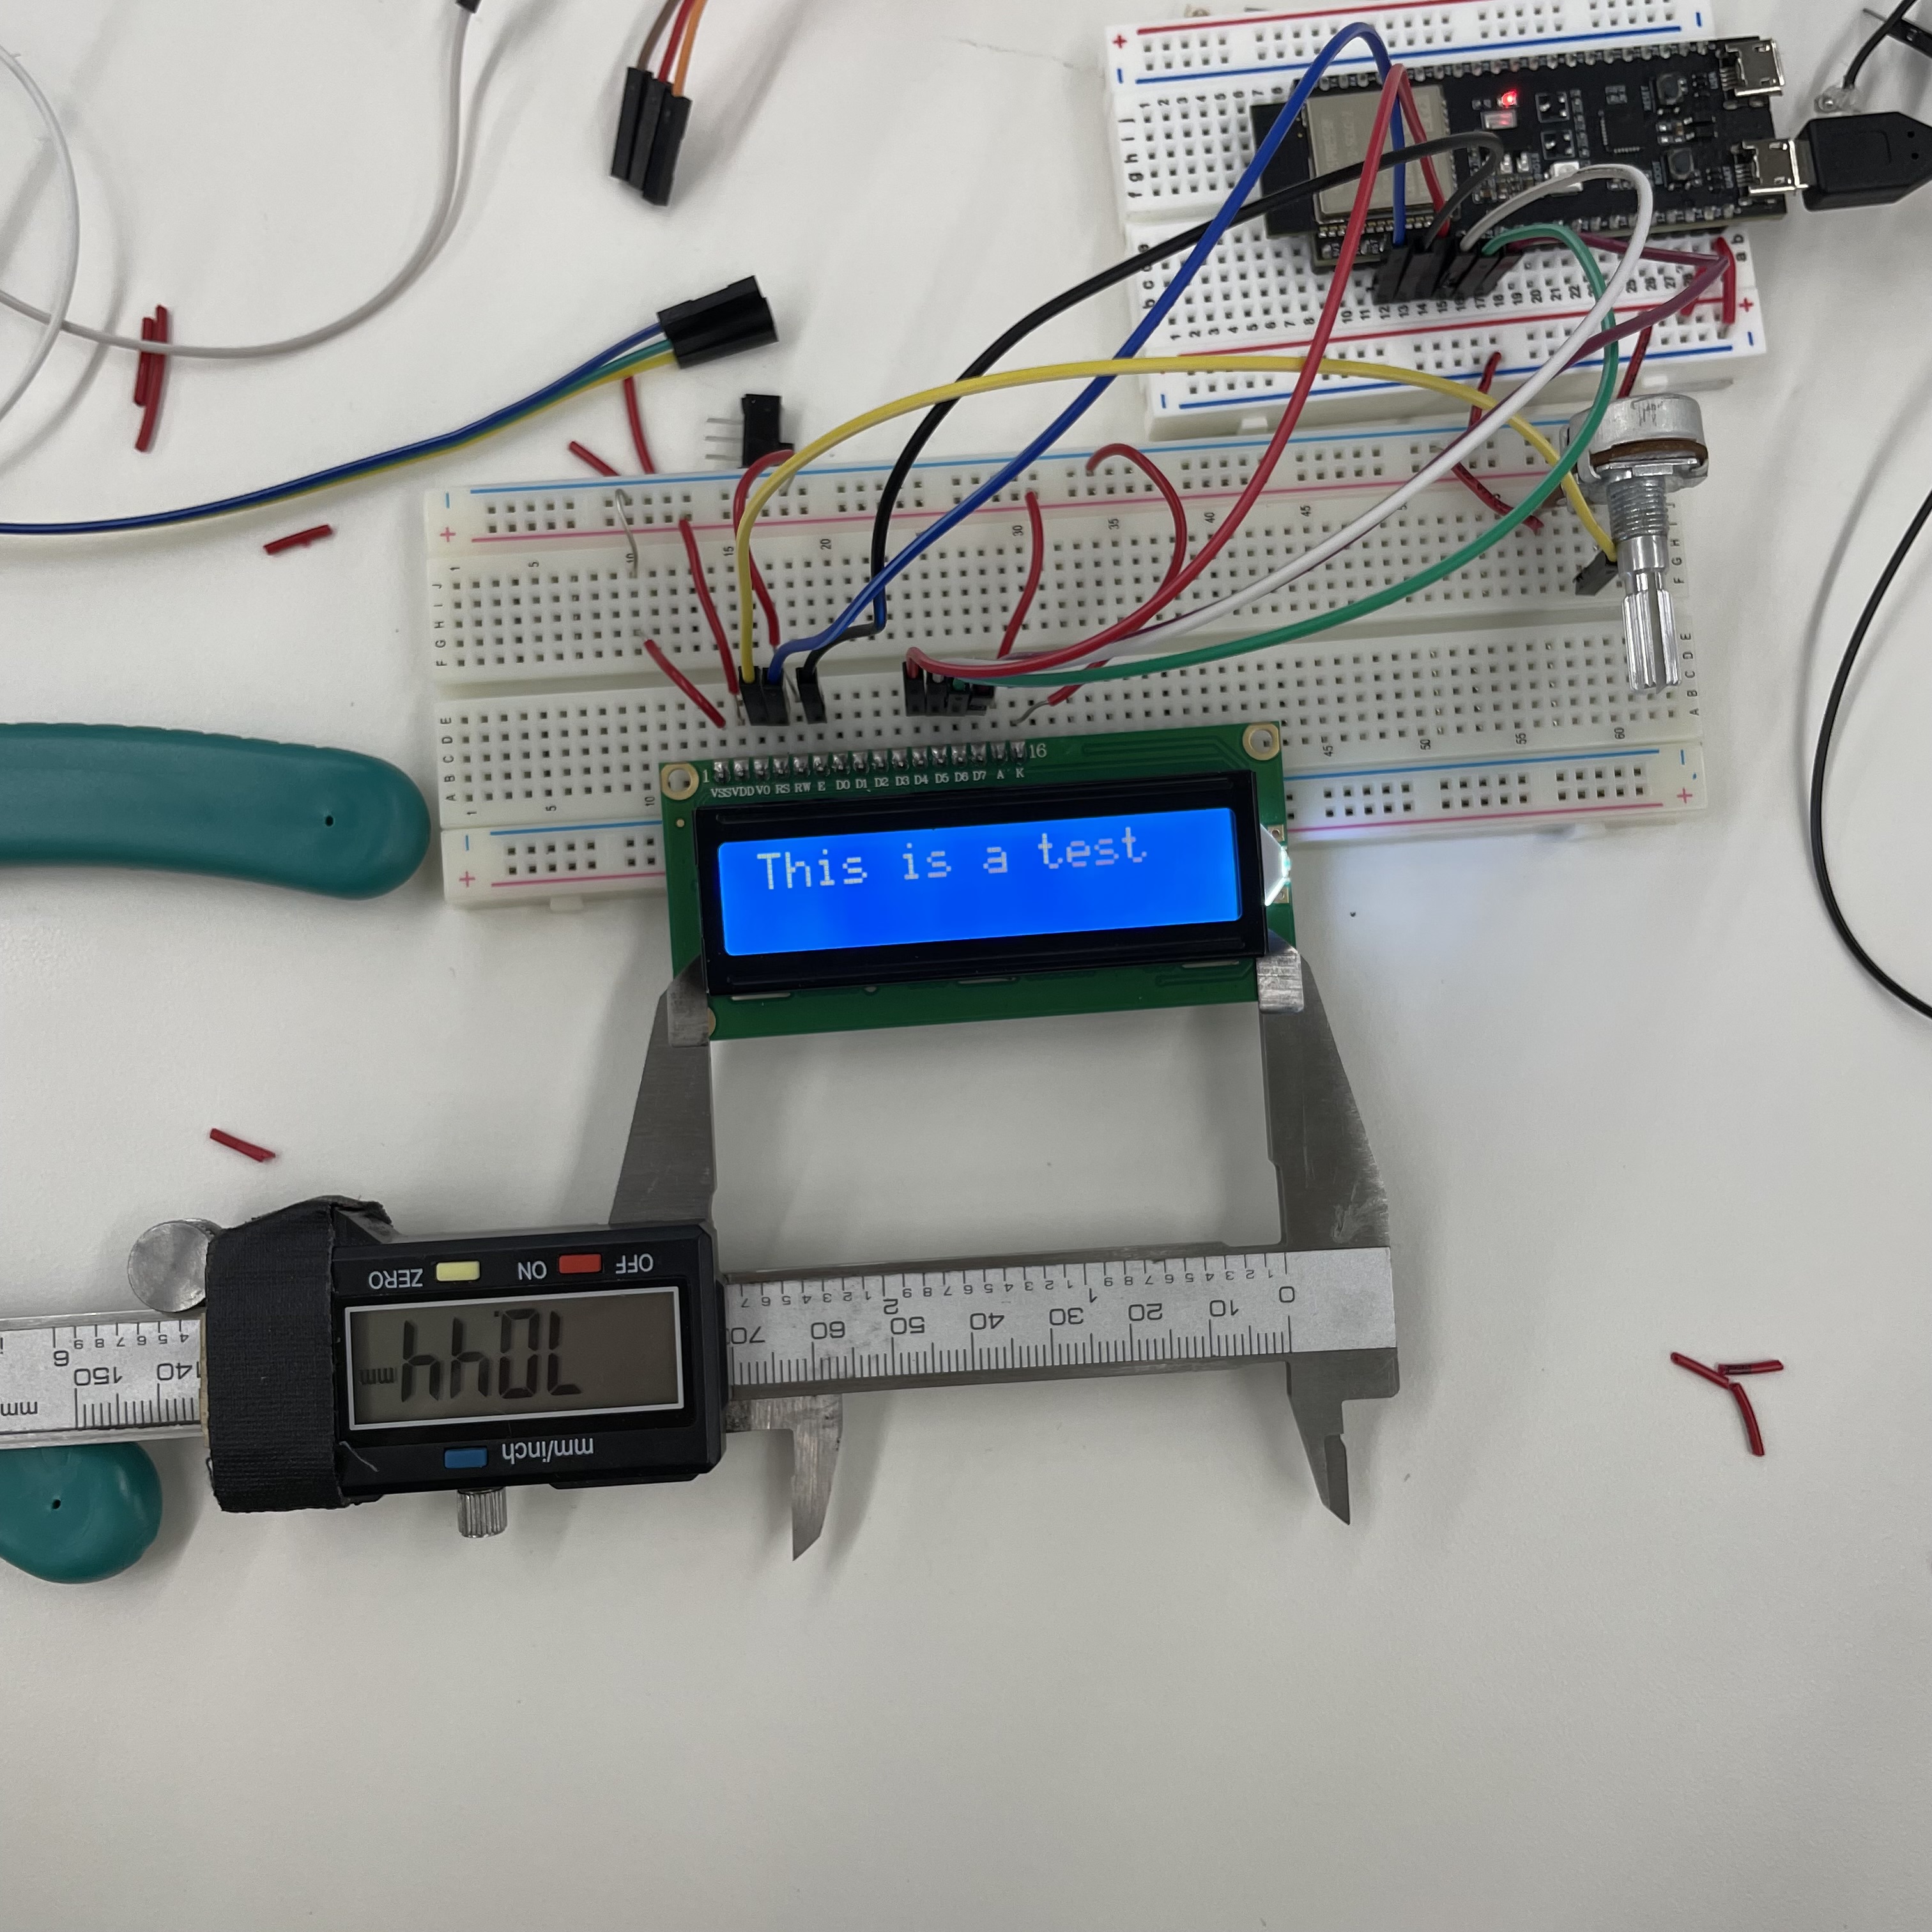
Using the LCD
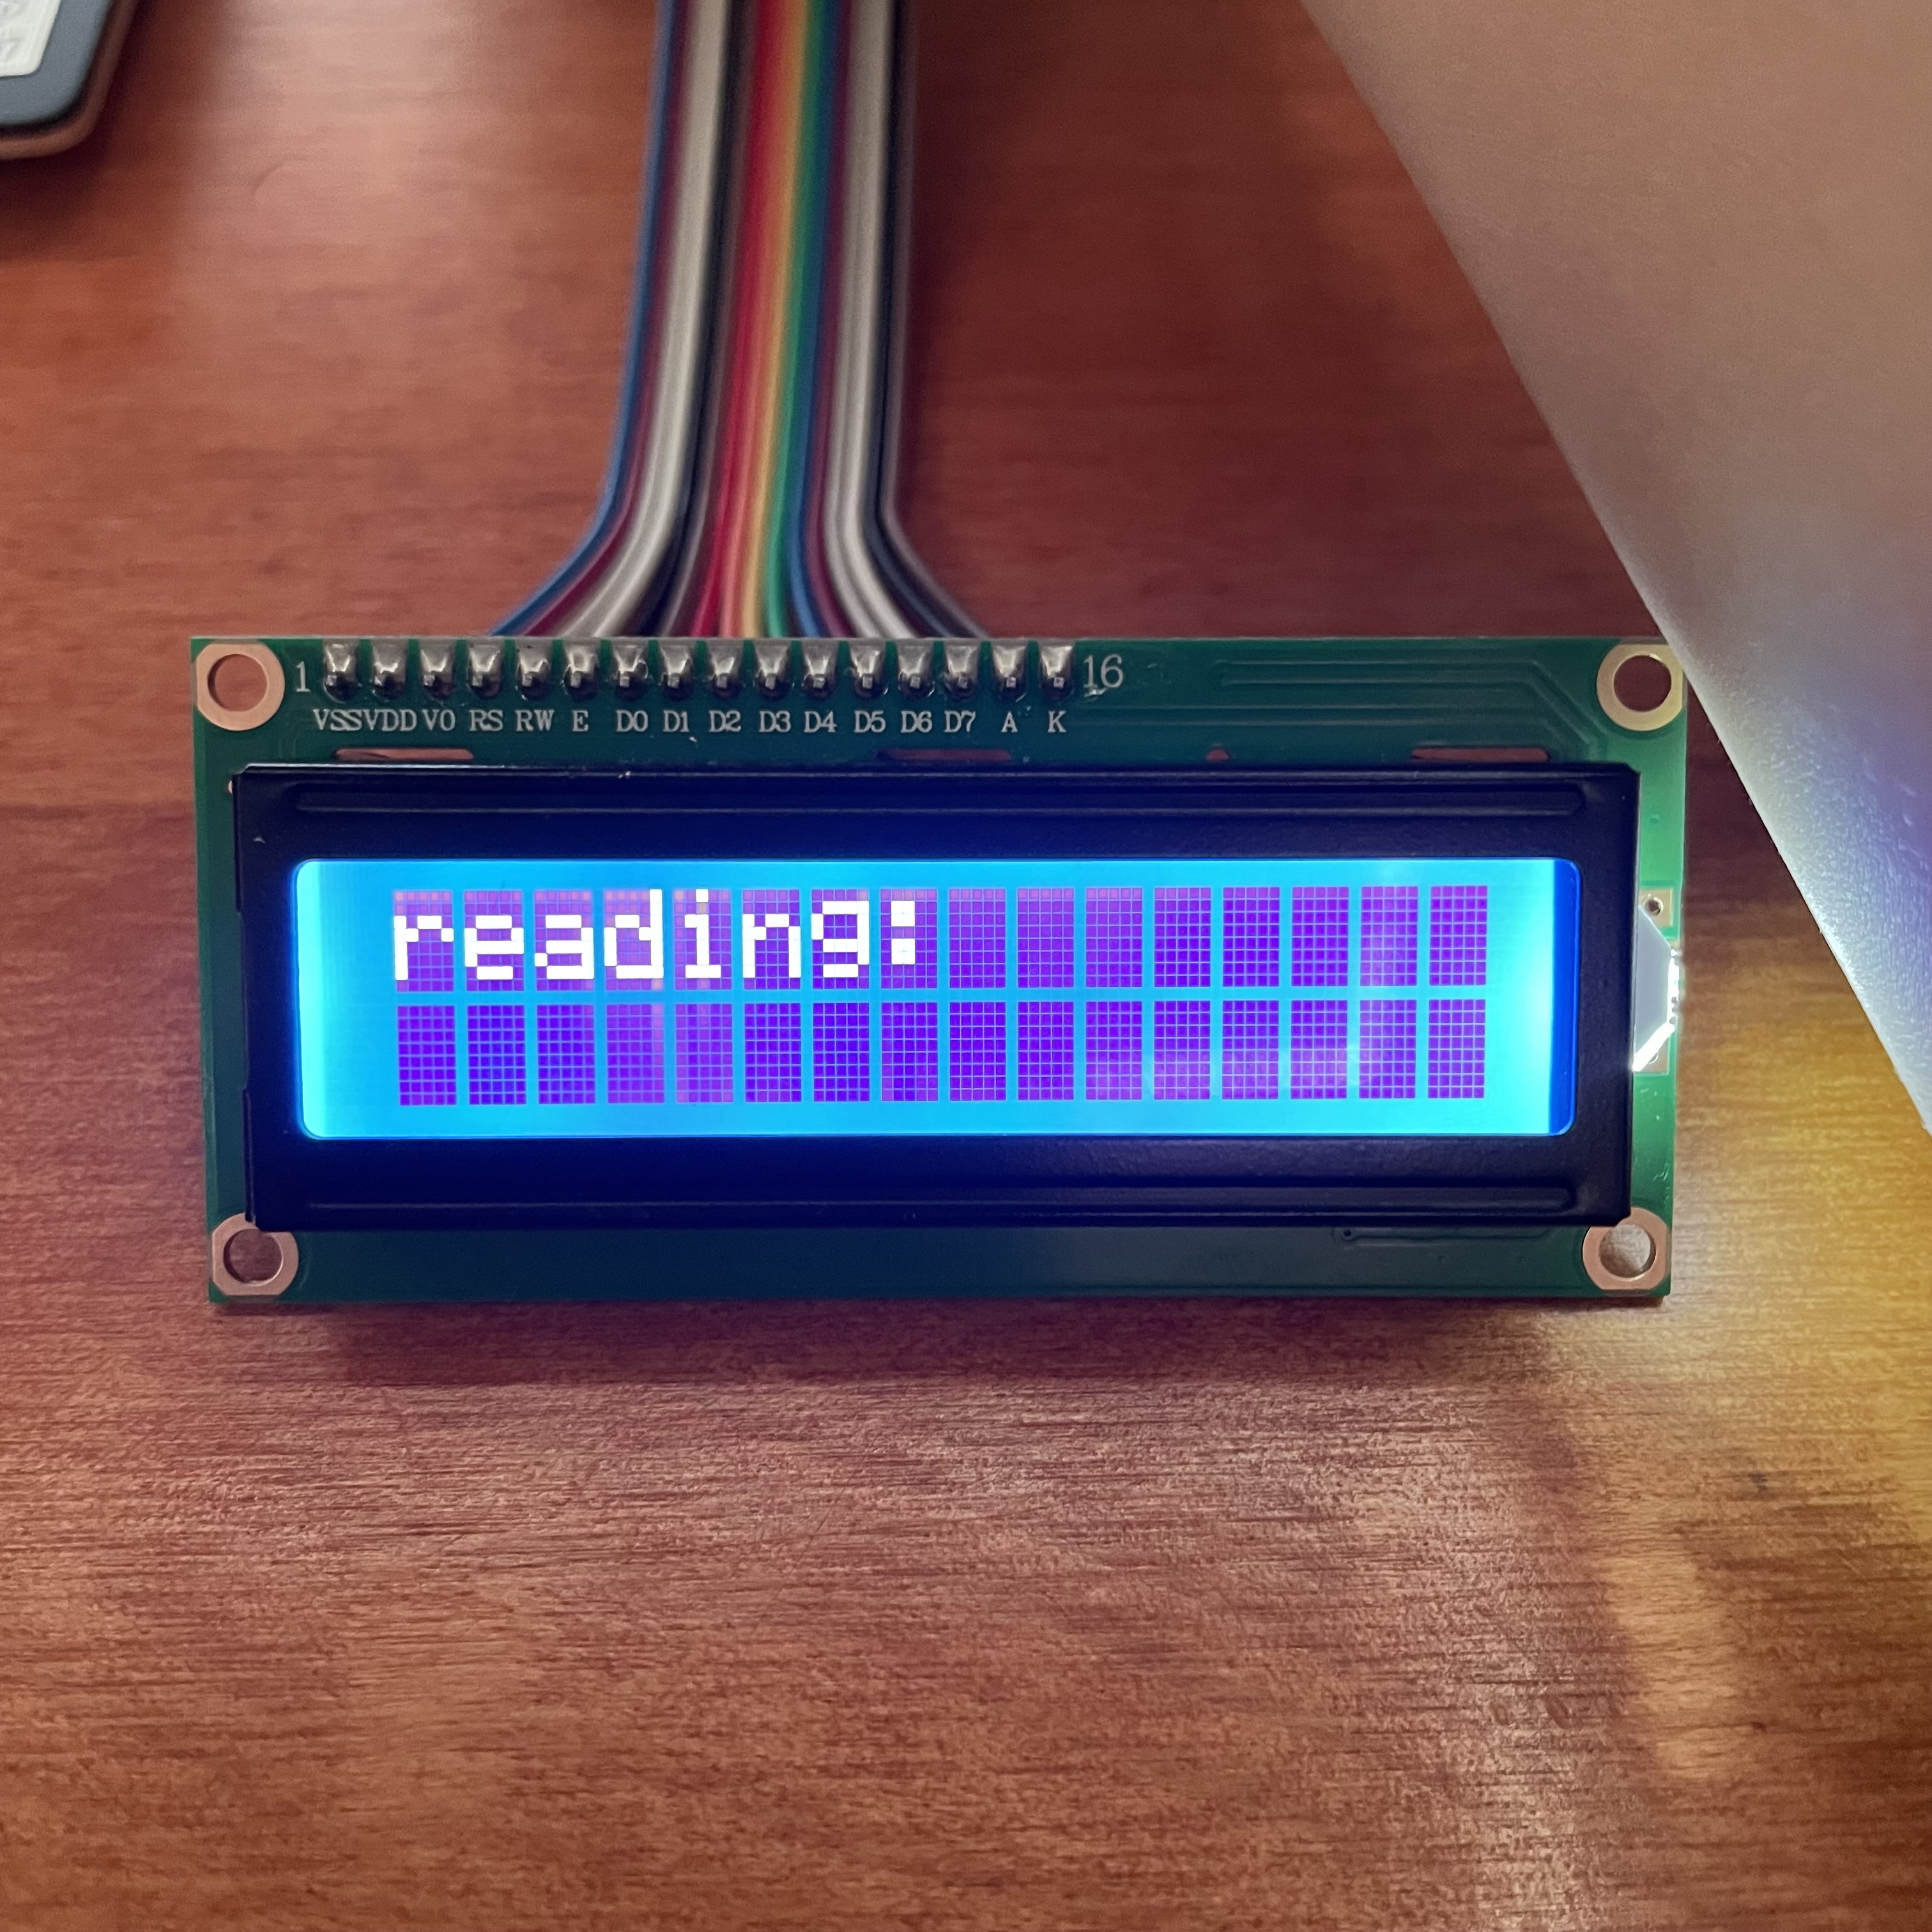
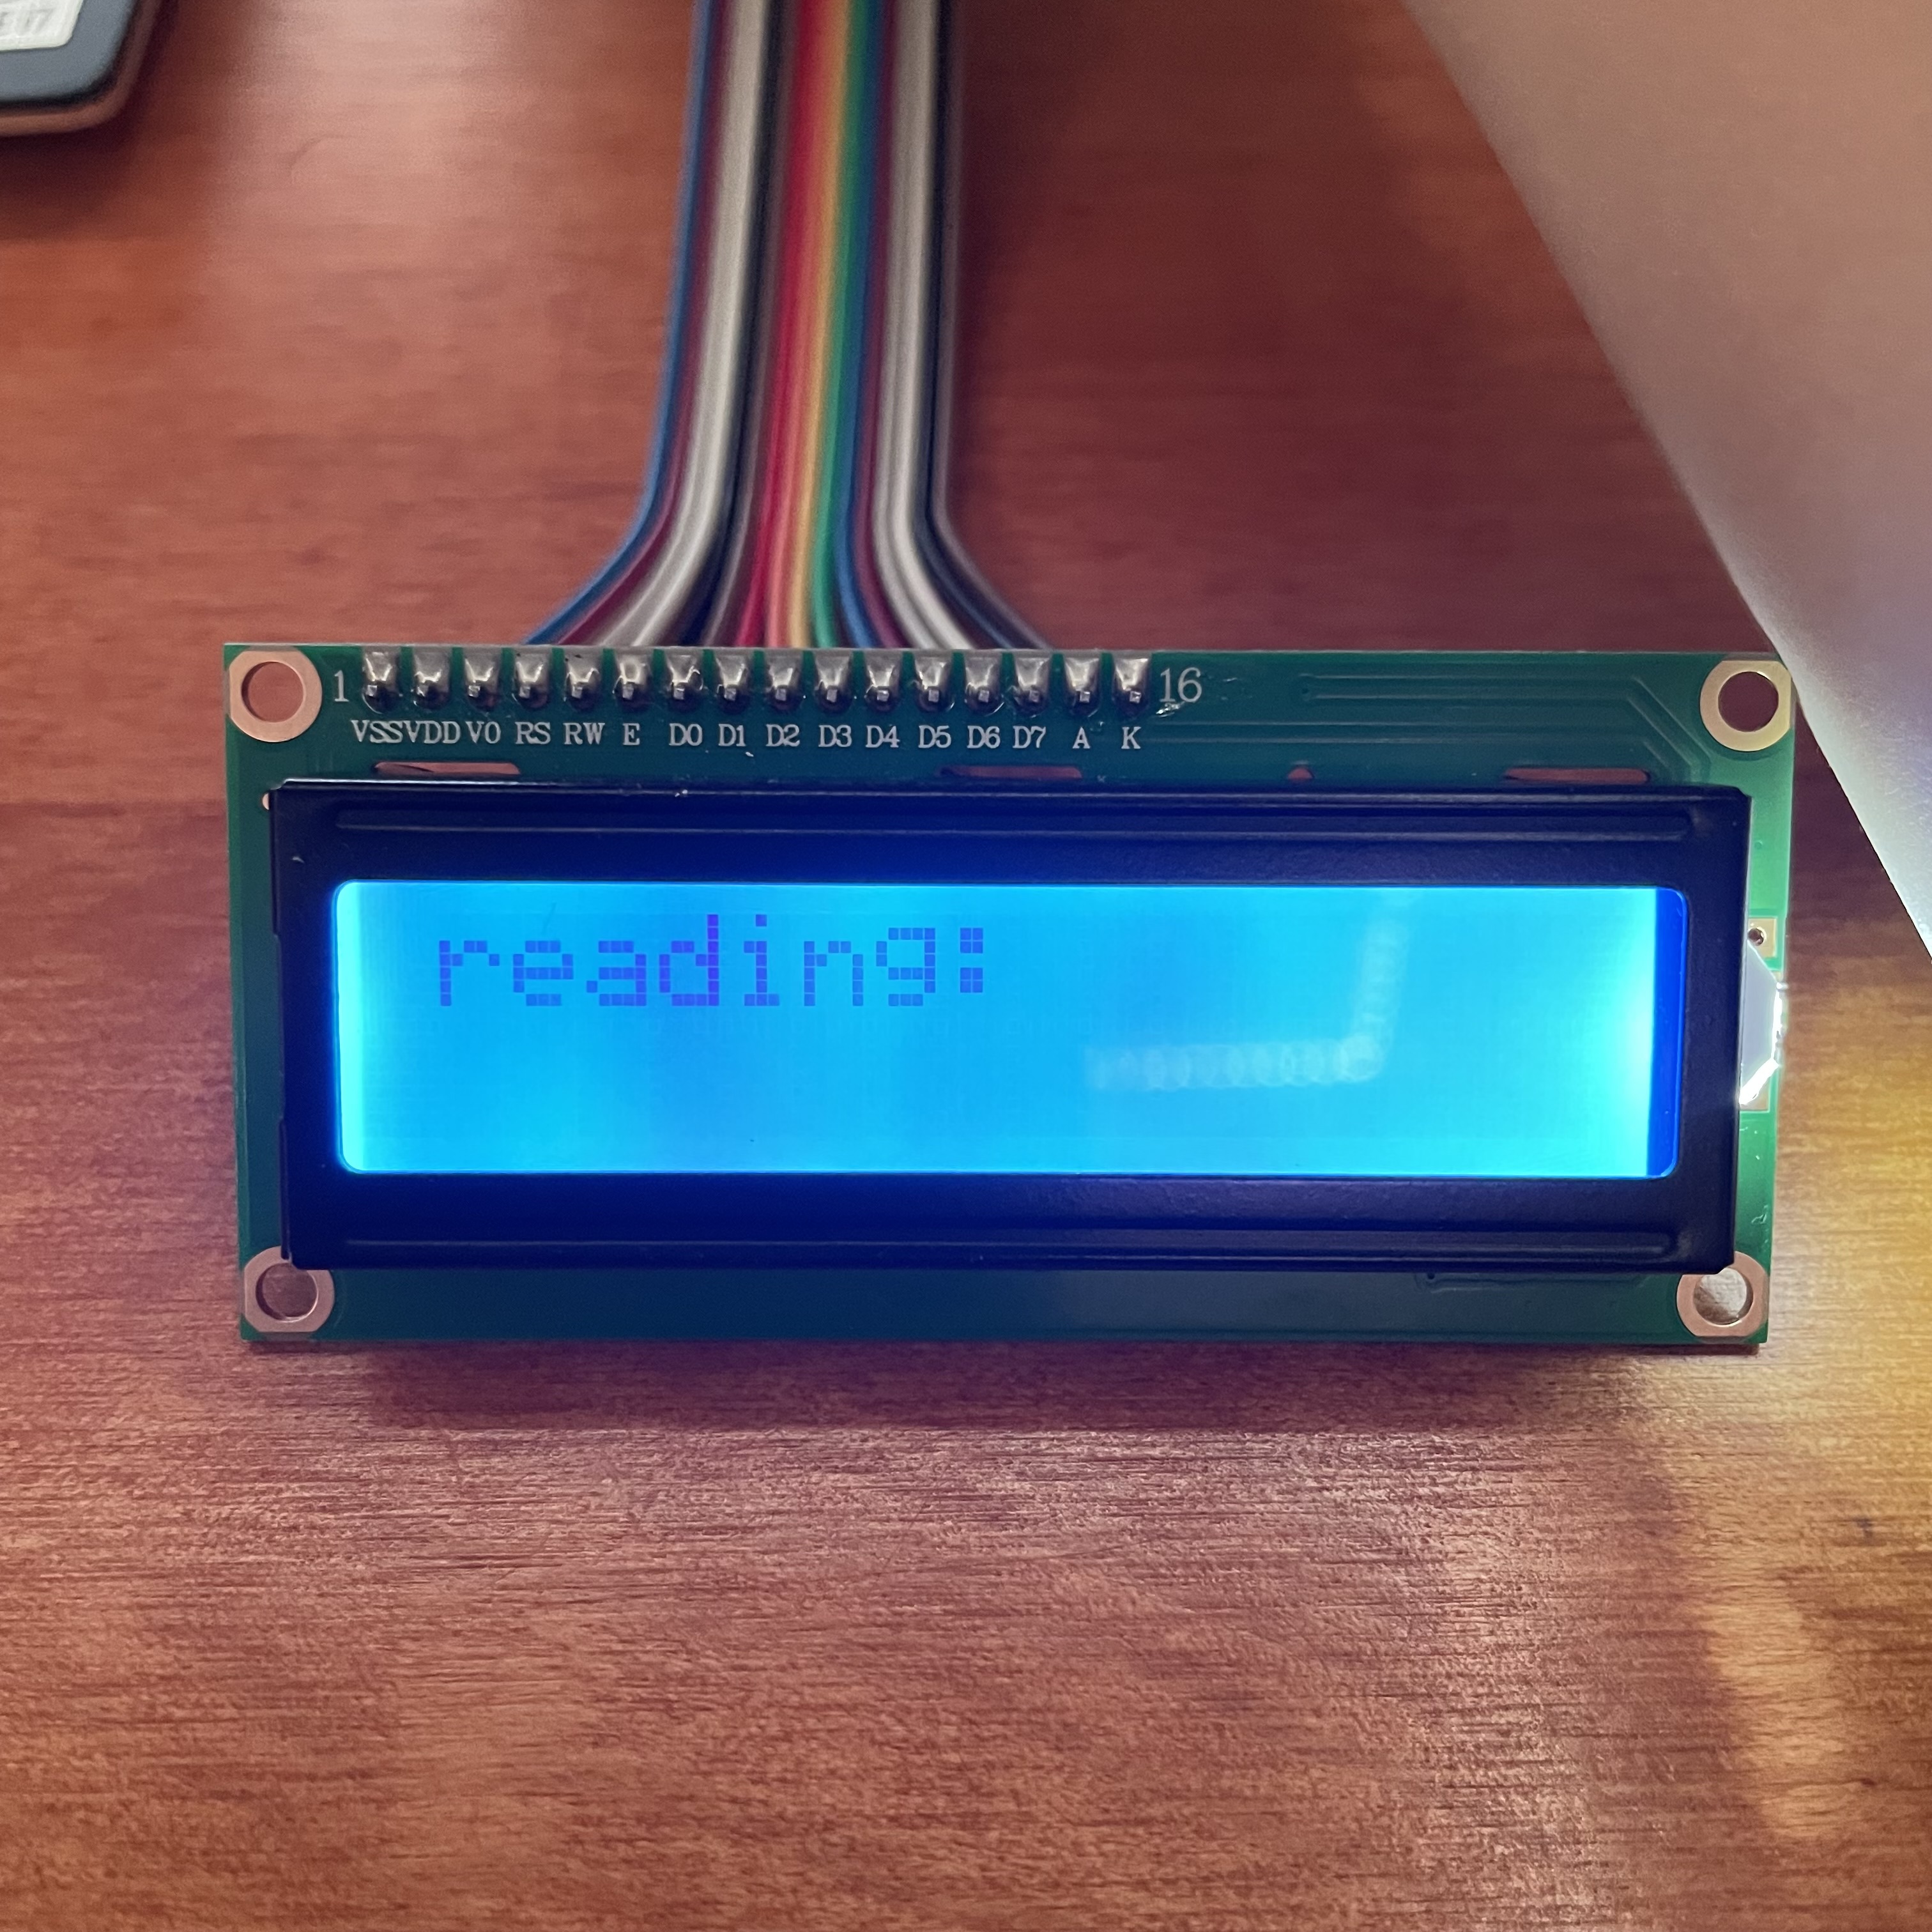
Before using the LCD for output, I had to figure out how to, well, use it. A few online tutorials later, and we have the following! The LCD has 16 pins, though we only need 12. We hook the LCD up to the potentiometer, which is set to be a variable resistor, to adjust the contrast of the LCD. Too high or low a voltage, and the text will not be visible.
#include <LiquidCrystal.h>
LiquidCrystal lcd(4, 5, 6, 7, 15, 16);

// start lcd
void setup() {
    lcd.begin(16, 2);
}

// display and clear text
void loop() {
    lcd.print("This is a test");
    delay(3000);
    lcd.clear();
}
Using the Load Cell
Before the load cell can be used as a scale, we need to calibrate it. We calibrate by
zeroing the scale, placing an object of known weight on it, and then dividing the measured
weight by its known weight. This gives us a calibration factor that we will multiply all
future measurements by to ensure accuracy.
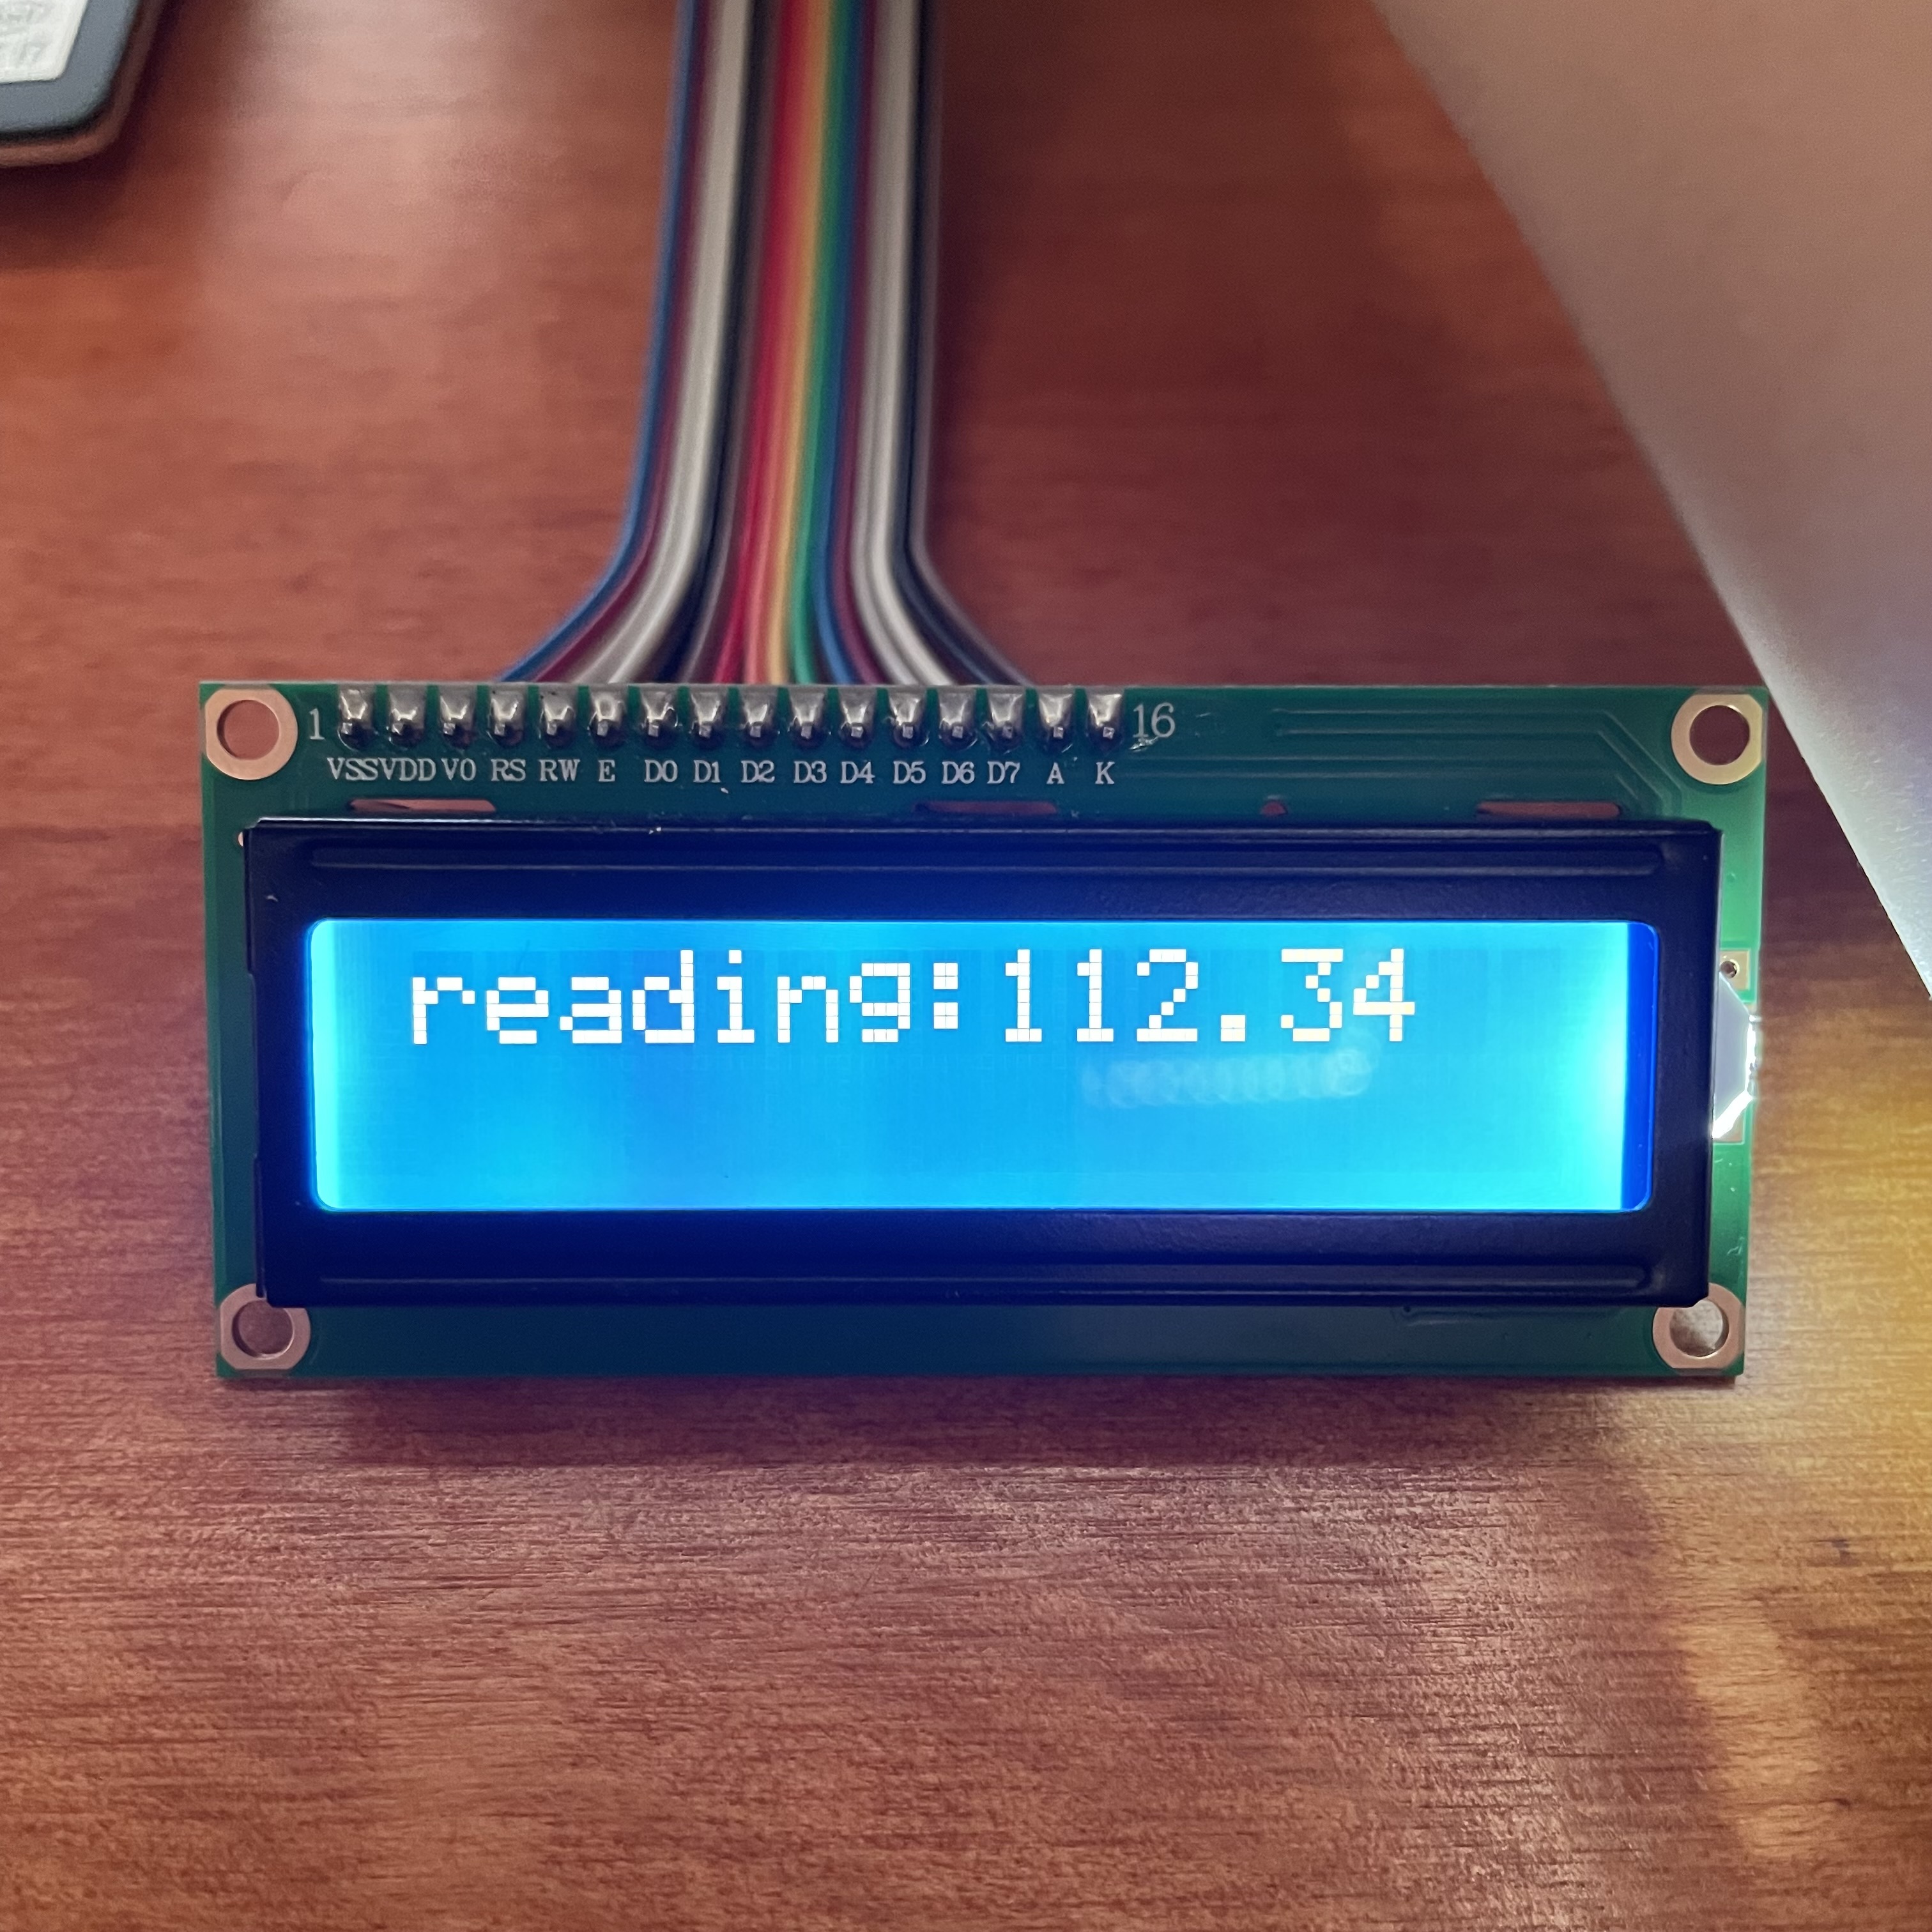
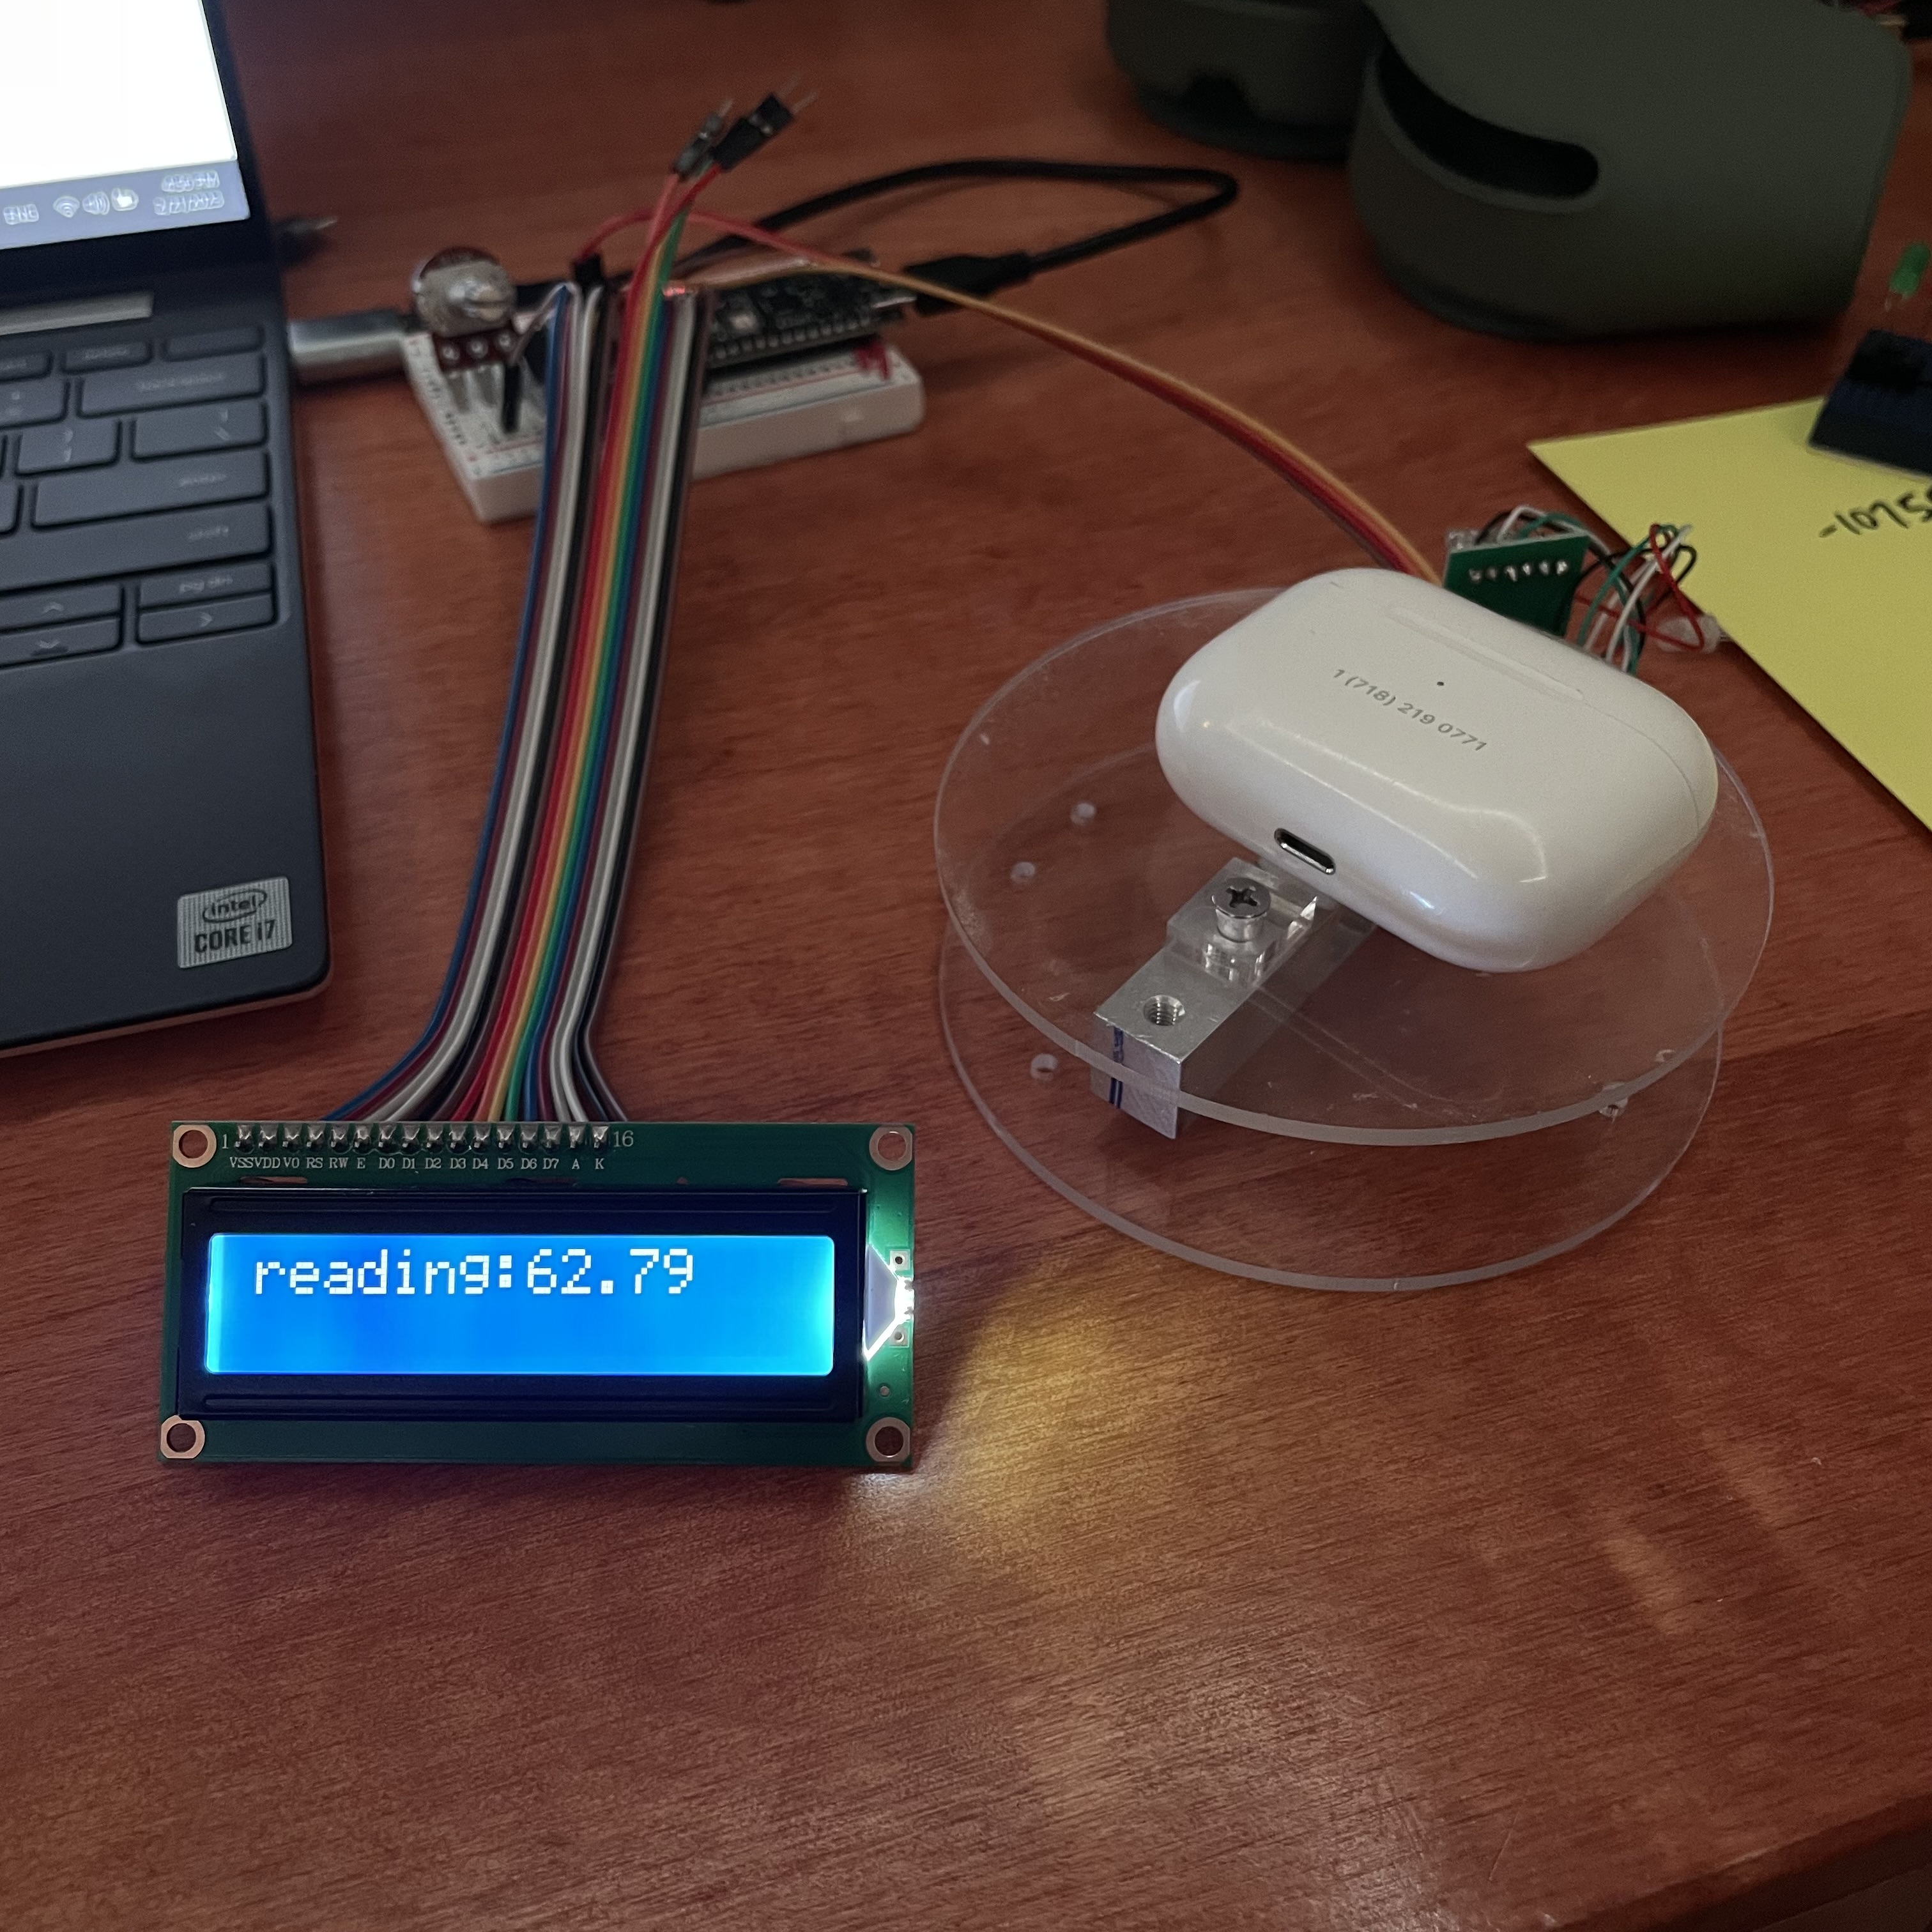
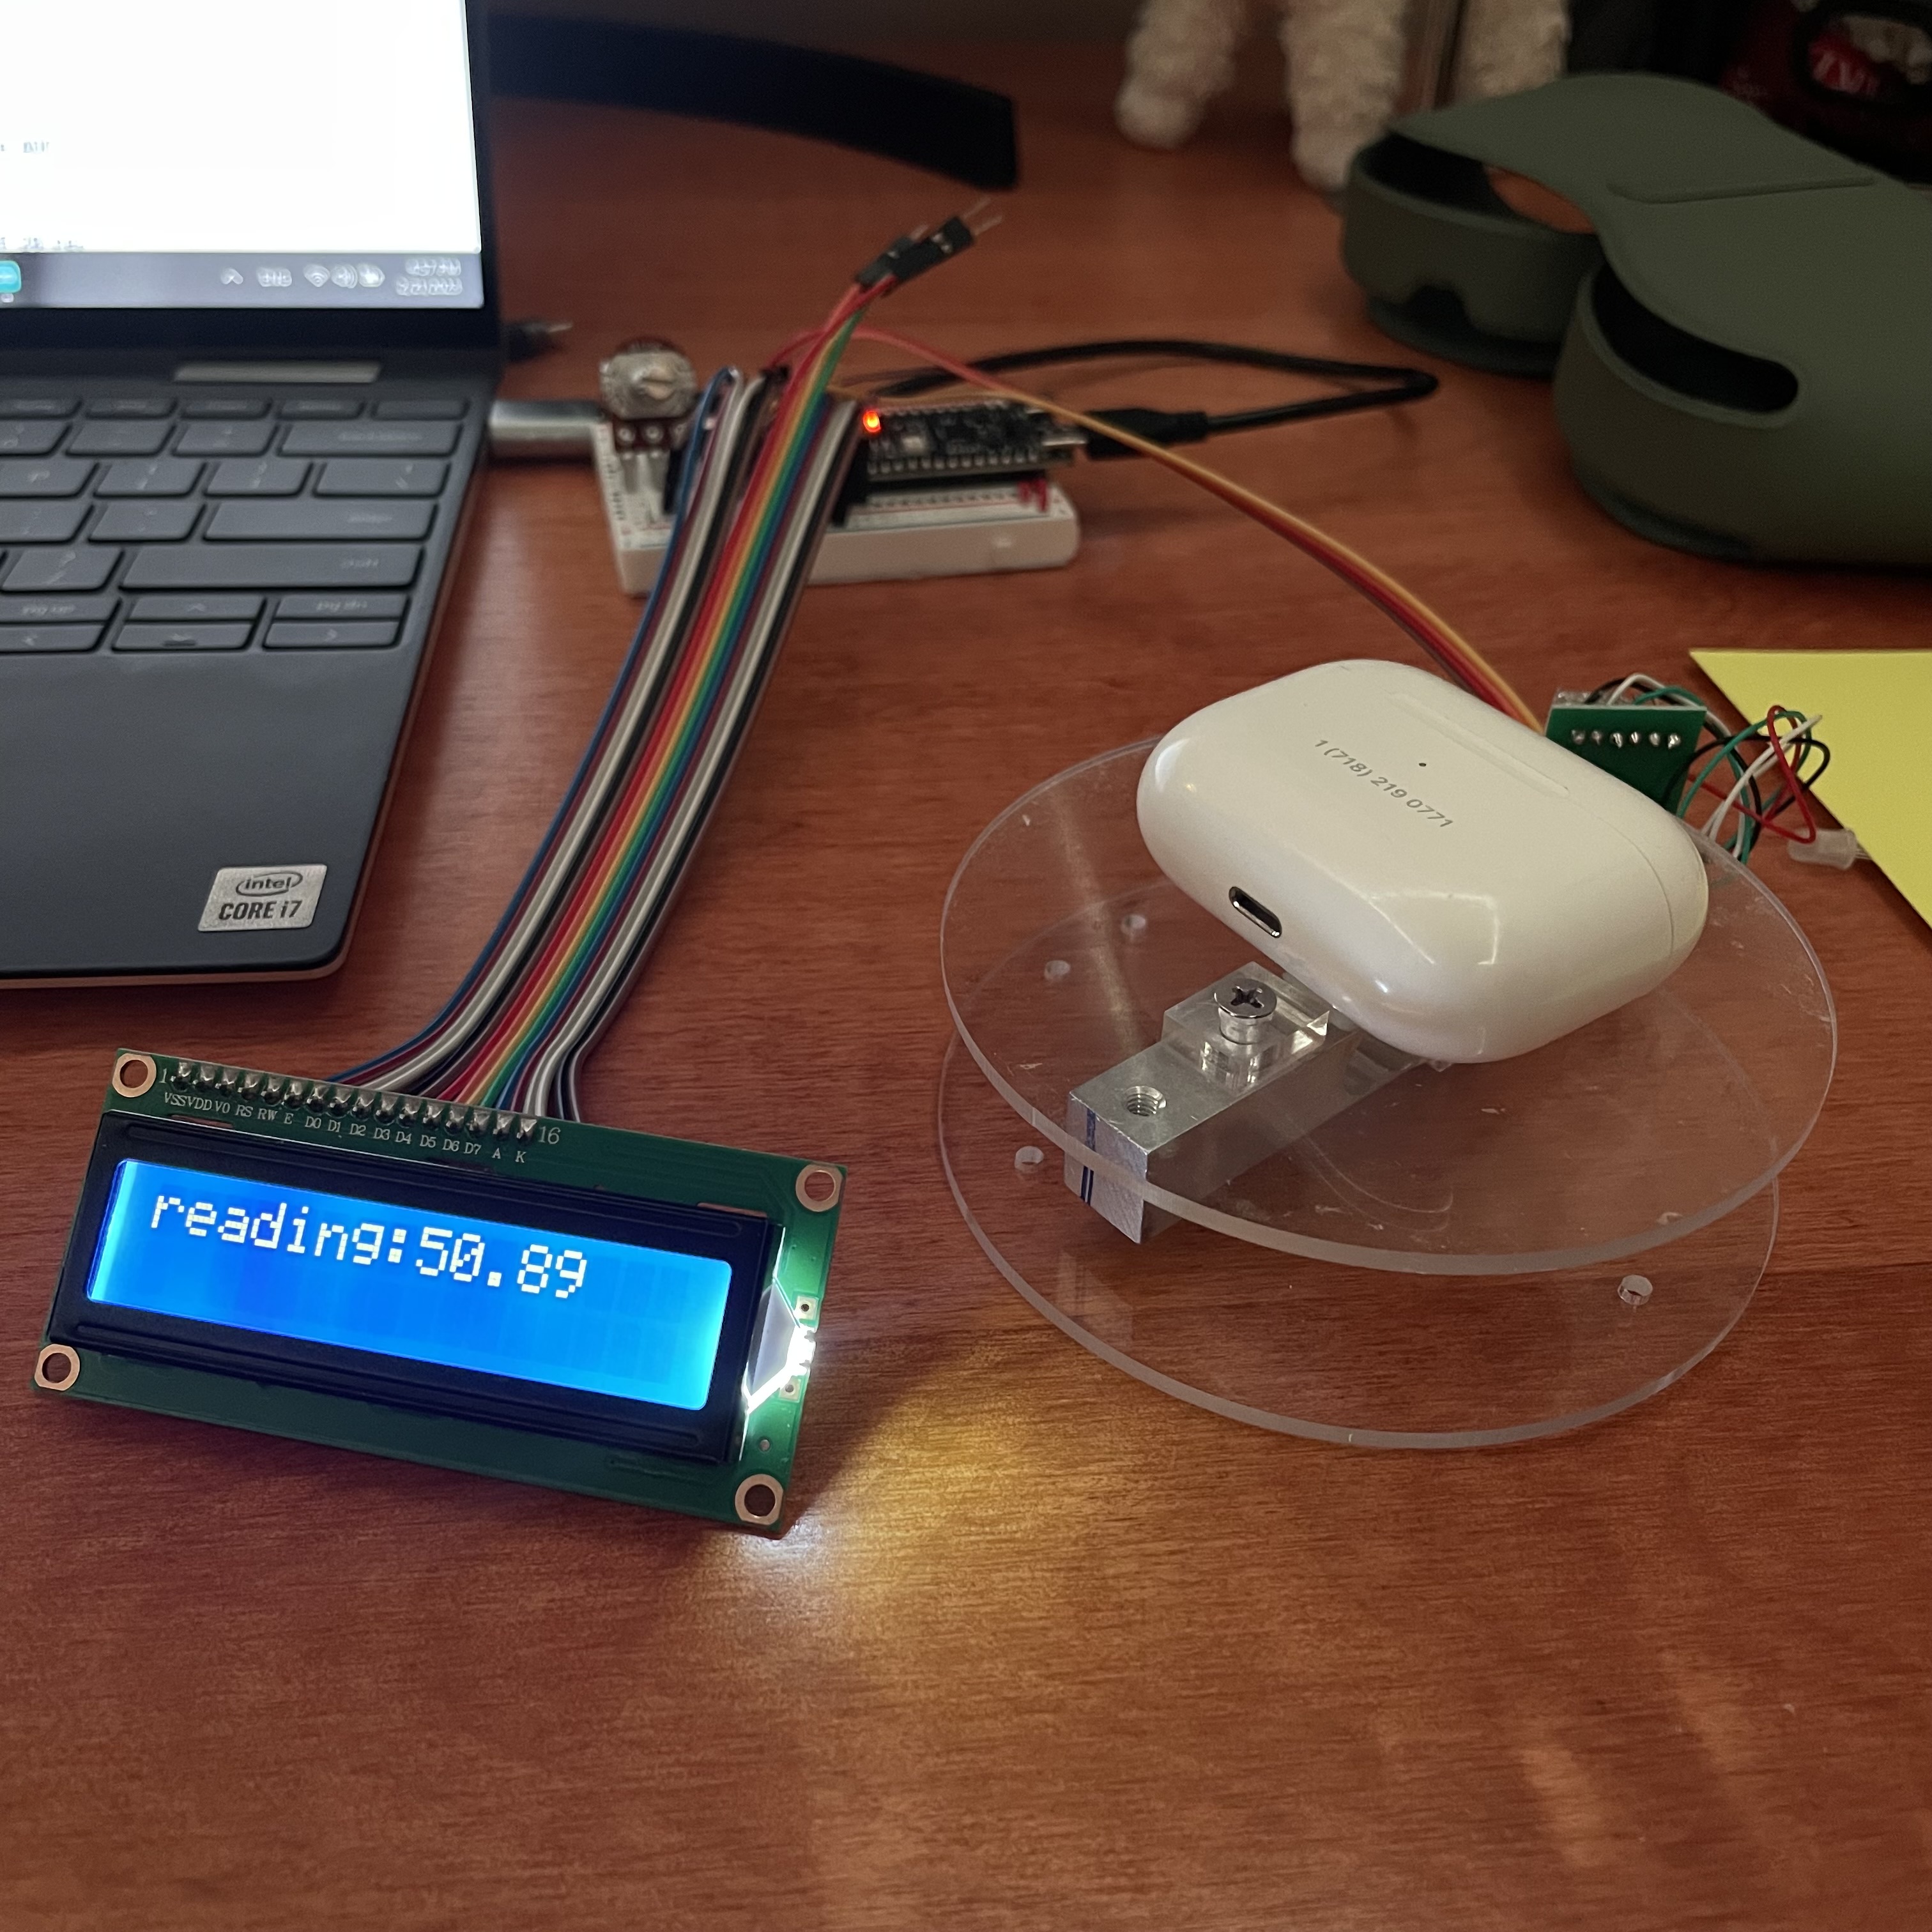
I chose to use my airpods case as my object of known weight. On another scale, I measured it
to be 50.8 grams. The calibration factor, for which the code is provided below, is roughly
212.5. After assembling the full scale and adding the wooden frame, the calibration factor
became 238. After measuring a few other objects, I can confirm that the weight it returns is
accurate-ish, within about a gram of error. One small source of frustration is the fact that
the load cell has huge fluctuations from measurement to measurement. Even when not weighing
anything, it returns values roughly between -1.0g and 1.0g. This leads to issues with
calibration, as one cannot get a "perfect" calibration factor due to the fluctuations. To
reduce this error, I have the scale return the average of 50 readings instead of a single,
which has helped a bit, though it increases the amount of time it takes to get the reading.
Below, I measured my Apple Pencil (real weight:
20.7g), my airpod case (real weight: 50.8g), and my airpod case with airpods included (real
weight: 61.4g).
#include <Arduino.h>
#include "soc/rtc.h"
#include "HX711.h"
#include "esp32-hal-cpu.h"
#include <LiquidCrystal.h>

// HX711 circuit wiring
const int LOADCELL_DOUT_PIN = 1;
const int LOADCELL_SCK_PIN = 2;

LiquidCrystal lcd(4, 5, 6, 7, 15, 16);
HX711 scale;

void setup() {
    Serial.begin(57600);
    scale.begin(LOADCELL_DOUT_PIN, LOADCELL_SCK_PIN);
    lcd.begin(16, 2);
    lcd.print("Ok!");

}

void loop() {

    if (scale.is_ready()) {
        // get scale ready and set calibration factor, 212.5
        scale.set_scale(212.5);
        lcd.clear();
        lcd.print("Ready");
            delay(5000);

        // tare the scale
        scale.tare();
        lcd.clear();
        lcd.print("Tared, place.");
            delay(5000);
        lcd.clear();

        // take 50 readings and return the average result
        lcd.print("reading:");
        lcd.print(scale.get_units(50));
            delay(5000);
        scale.power_down();
    }
    lcd.clear();
    scale.power_up();

}
Final Product
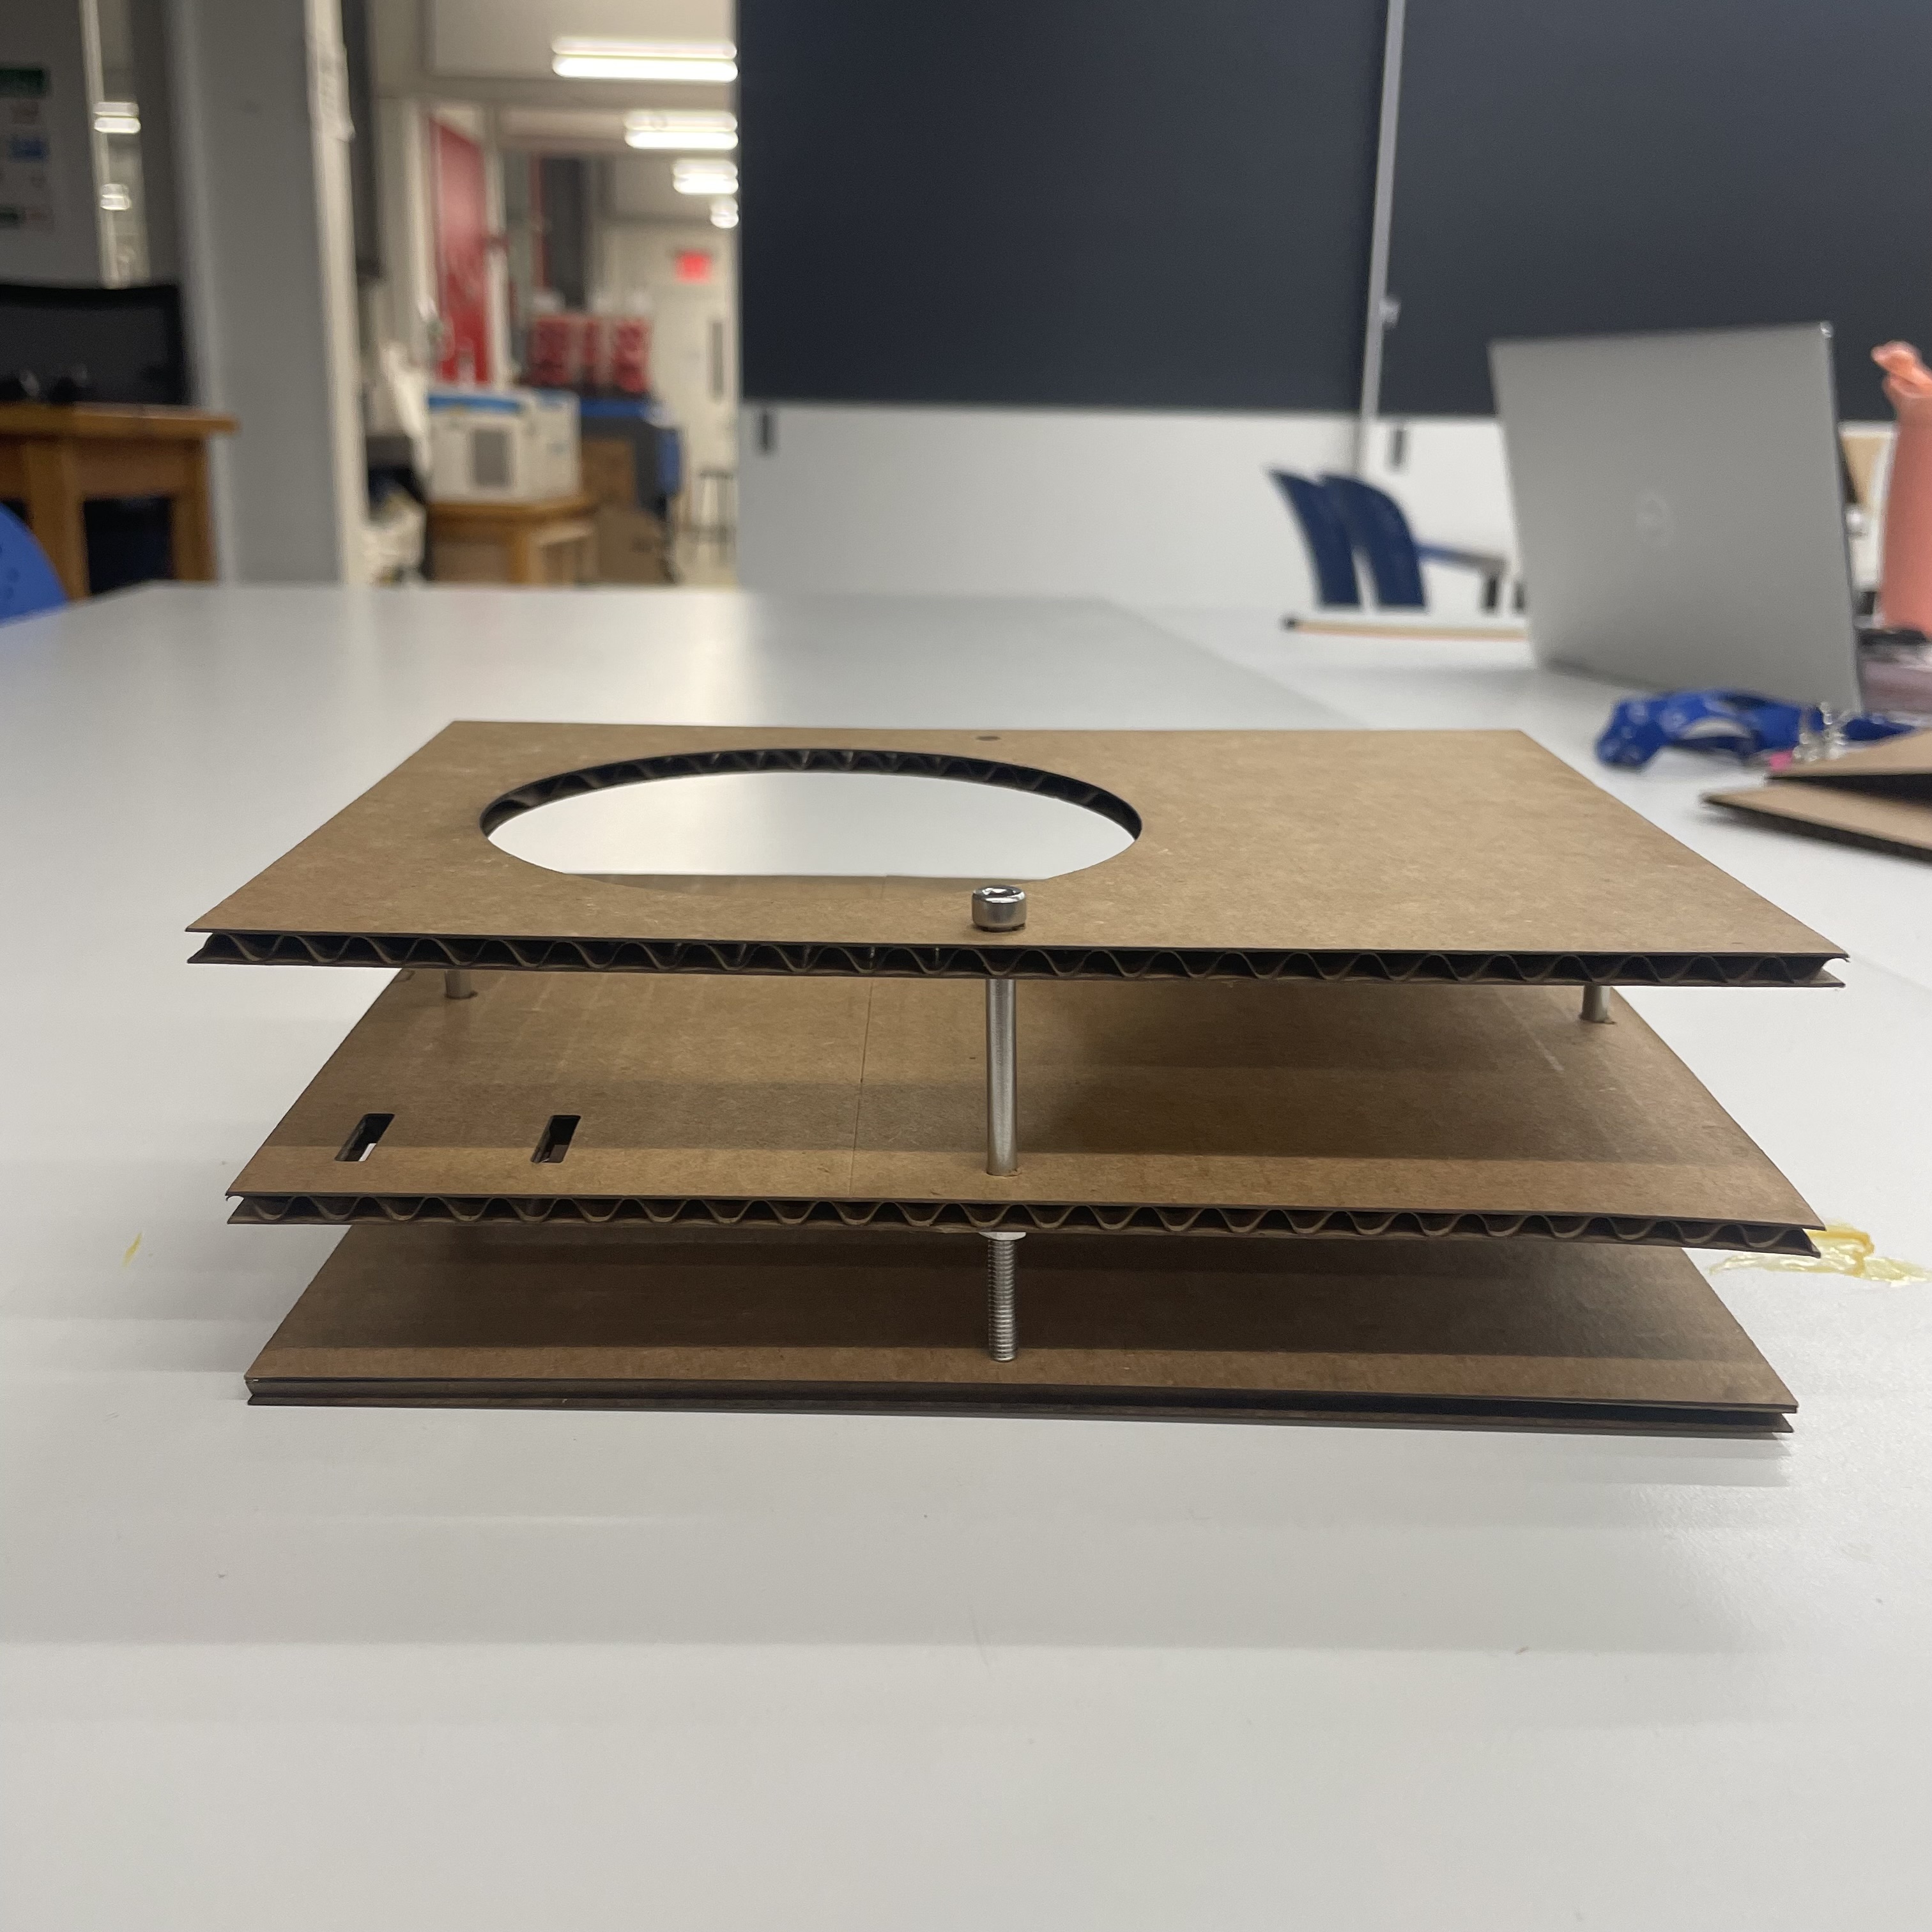
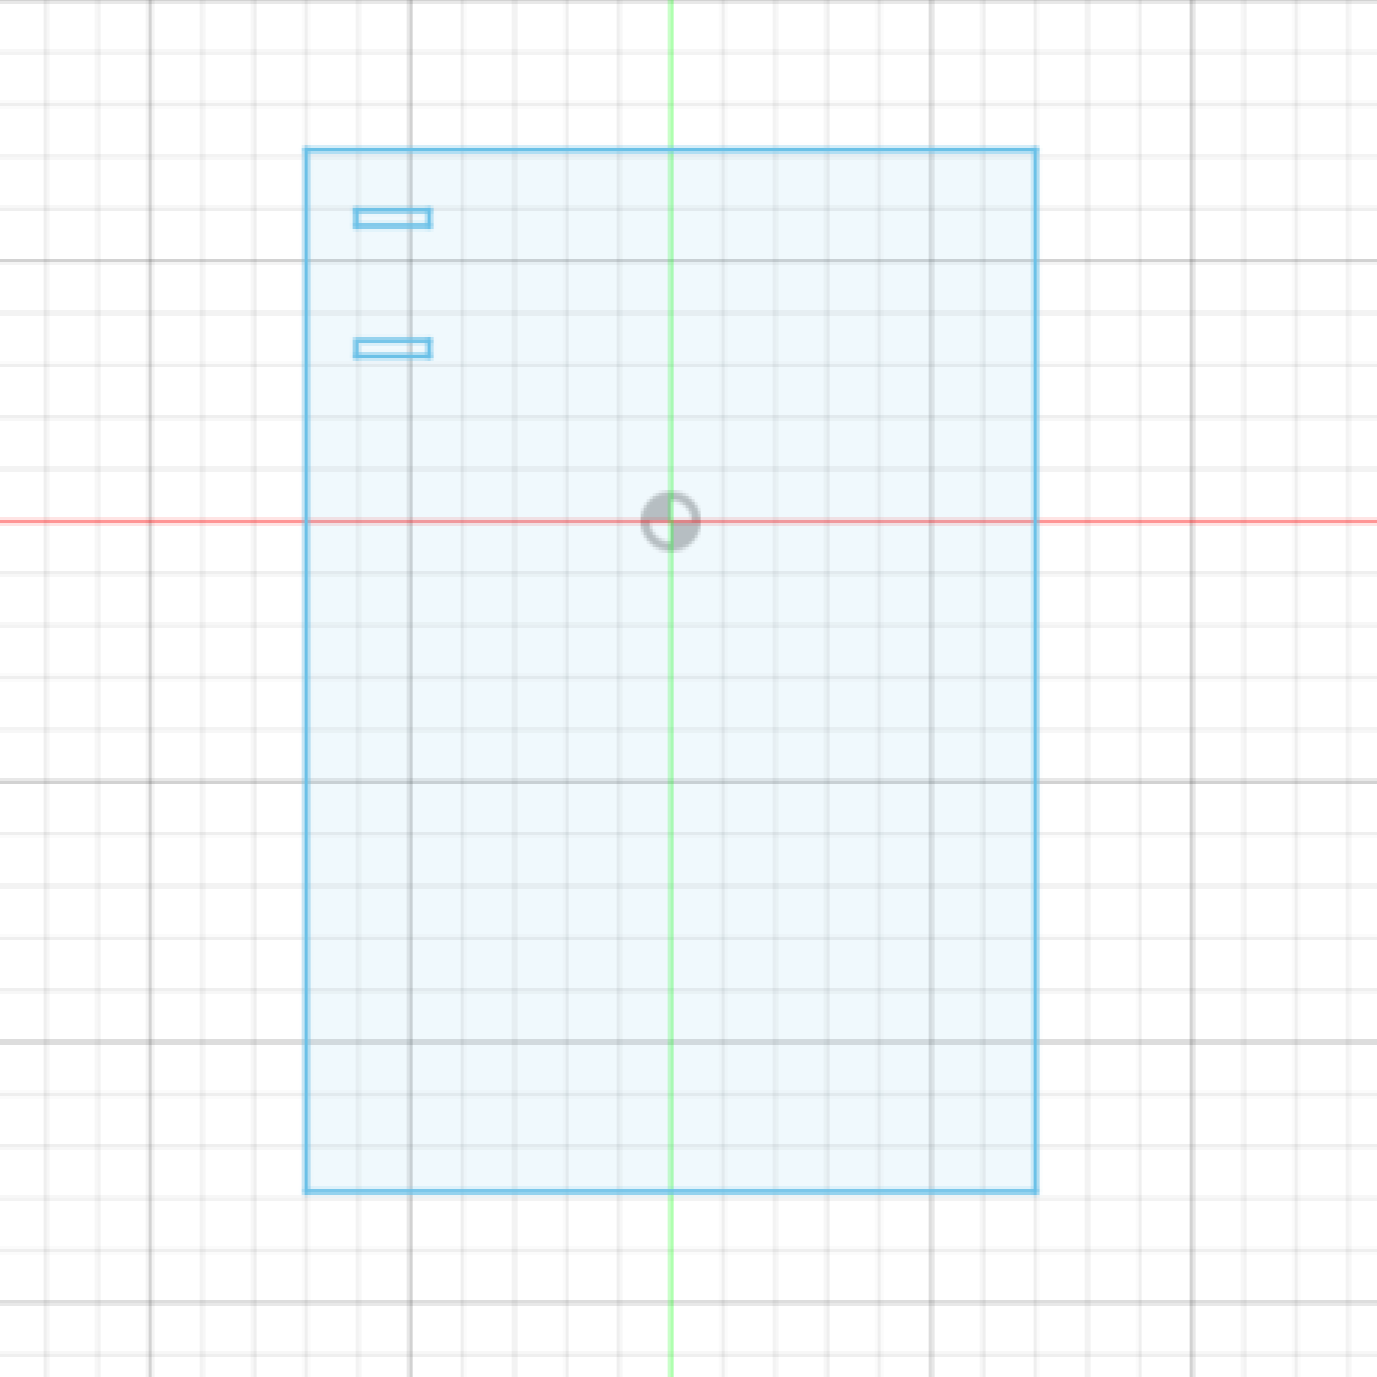
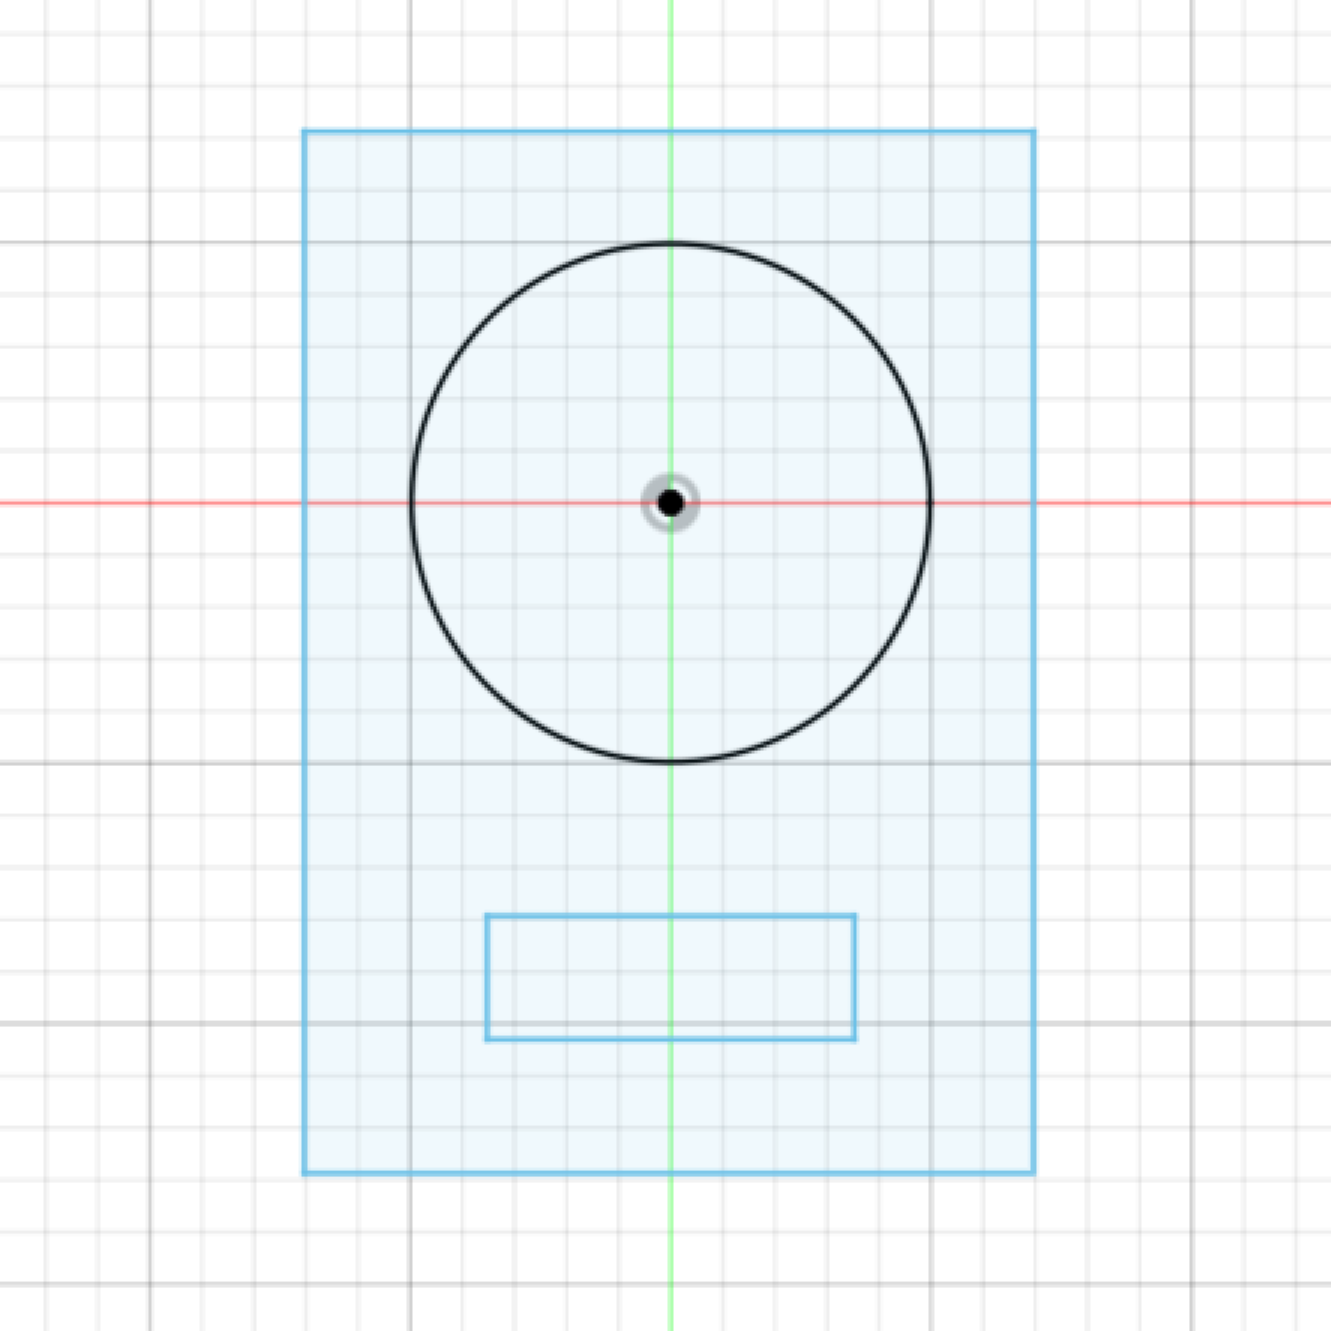
When we put all of the above together (and throw in a button to start the measurement process), we get the below! This was a lot of fun to make, and I feel I learned a lot in the process. Included below are photos of the scale and the cardboard prototype, a video of the scale in action, the schematic of the circuit, and the design for the three wooden plates that make up the body.
#include <Arduino.h>
#include "soc/rtc.h"
#include "HX711.h"
#include "esp32-hal-cpu.h"
#include <LiquidCrystal.h>

// Set pins for HX711 and button
const int LOADCELL_DOUT_PIN = 1;
const int LOADCELL_SCK_PIN = 2;
const int BUTTON = 42;

// Initialize input states
int button_state = 0;

// Instantiate LCD and HX711
LiquidCrystal lcd(4, 5, 6, 7, 15, 16);
HX711 scale;

void setup() {
    Serial.begin(57600);
    scale.begin(LOADCELL_DOUT_PIN, LOADCELL_SCK_PIN);
    lcd.begin(16, 2);
    lcd.print("Ok!");
    pinMode(BUTTON, INPUT);
}

void loop() {

    button_state = digitalRead(BUTTON);
    lcd.setCursor(0,0);
    lcd.print("Press button to");
    lcd.setCursor(0, 1);
    lcd.print("use scale.");

    if (button_state == HIGH) {
    scale.power_up();

        if (scale.is_ready()) {
            // get scale ready and set calibration factor, 212.5
            scale.set_scale(238);
            lcd.clear();

            // tare the scale
            scale.tare();
            lcd.setCursor(0,0);
            lcd.print("Scale tared,");
            lcd.setCursor(0,1);
            lcd.print("place item.");
            delay(5000);
            lcd.clear();

            // take 50 readings and return the average result
            lcd.setCursor(0,0);
            lcd.print("Reading, please");
            lcd.setCursor(0, 1);
            lcd.print("wait...");
            long weight = scale.get_units(50);
            lcd.clear();
            lcd.setCursor(0,0);
            lcd.print("Weight:");
            lcd.setCursor(0, 1);
            lcd.print(weight);
            lcd.print("g");
            delay(2000);
            scale.power_down();
        }
    }
}